CR-MM-1-0-00
PS-28 Cruiser
PS-28N Cruiser
CHAPTER 10 – POWERPLANT
Date of issue: 2012-05-28
Revision No.: 3
10 - 27
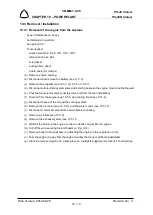
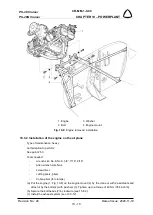
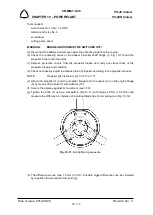
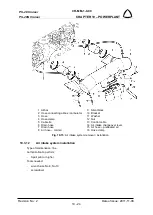
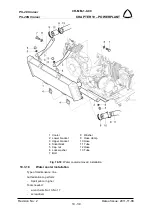
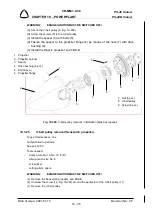
(a) Install the exhaust tubes (2; 3; 4; 5, Fig. 10-16) to the engine necks.
Mind a proper arrangement, each tube is designed for specific necks.
Screw the nuts (7) on the bolts of the engine exhaust necks, do not tighten the nuts.
(b) To all muffler ball joints apply heat resistant lubricant (e.g. Loctite Antiseize).
(c) Install the muffler (1) to the exhaust tubes (2; 3; 4; 5) and secure the tubes by means of the
springs (6); secure springs with the lockwire (see 15.8.2).
(d) Gradually tighten all nuts (7) of the flanges on the engine necks – tightening torque 12–20
Nm (9–14
ft.lb
)
NOTE:
Ensure the sufficient space between the exhaust pipes and the other installed
parts.
(e) Put on muffler (1) heat exchanger (8) and secure it by means of springs (9).
(f) Install air hoses on the heat exchanger (see 10.3.12).
(g) Install engine cowlings.
10.3.15
Oil cooler removal
Type of maintenance: line
Authorization to perform:
Sport pilot or higher
Tools needed:
-
wrench size No.19, No.30
WARNING:
ENGINE IGNITION MUST BE SWITCHED OFF!
(a) Remove the upper and lower engine cowling.
(b) Drain oil from the oil system (see 10.5.1).
NOTE:
It is also possible to pump oil from the cooler to the oil tank. You can do it by
manual running the engine by means of the propeller, whereas from the oil
tank you will remove the hose leading to the oil cooler.
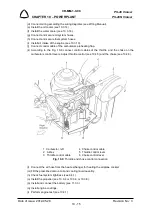
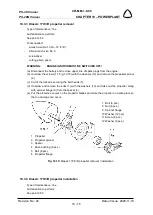
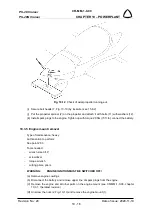
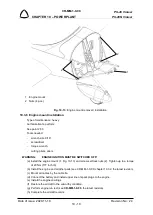
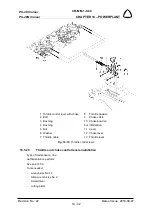
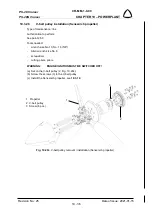
(c) Remove lockwire securing banjo bolts (6, Fig. 10-17).
(d) Loose hose clamps (9), and disconnect hoses (8) from the banjo fittings (5).
(e) Remove banjo bolts (6), banjo fittings (5), and sealing rings (7) from the oil cooler necks.
(f) Unscrew nuts (4), remove the upper pairs of washers (2; 3), and cooler (1).

