CR-MM-1-0-00
PS-28 Cruiser
PS-28N Cruiser
CHAPTER 4 – WING
Date of issue: 2018-09-27
Revision No.: 22
4 - 7
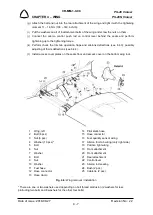
(g) Attach the bolt and nut into the rear attachment of the wing and tight it with the tightening
moment 11 – 16 Nm (100 – 140 inch.lb).
(i) Put the washers on all of 6 attachment bolts of the wing and screw the nuts on them.
(j) Connect the aileron control push rod on control lever behind the seats and perform
tightening up to the tightening torque.
(k) Perform check the trim tab operation, flaps and ailerons deflections (see 6.4.3), possibly
adjusting of theirs deflections (see 6.4.4).
(l) Install access cover plates on the seats floor and access cover on the bottom wing root.
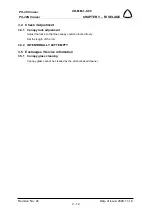
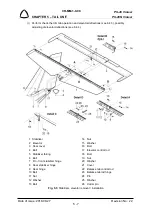
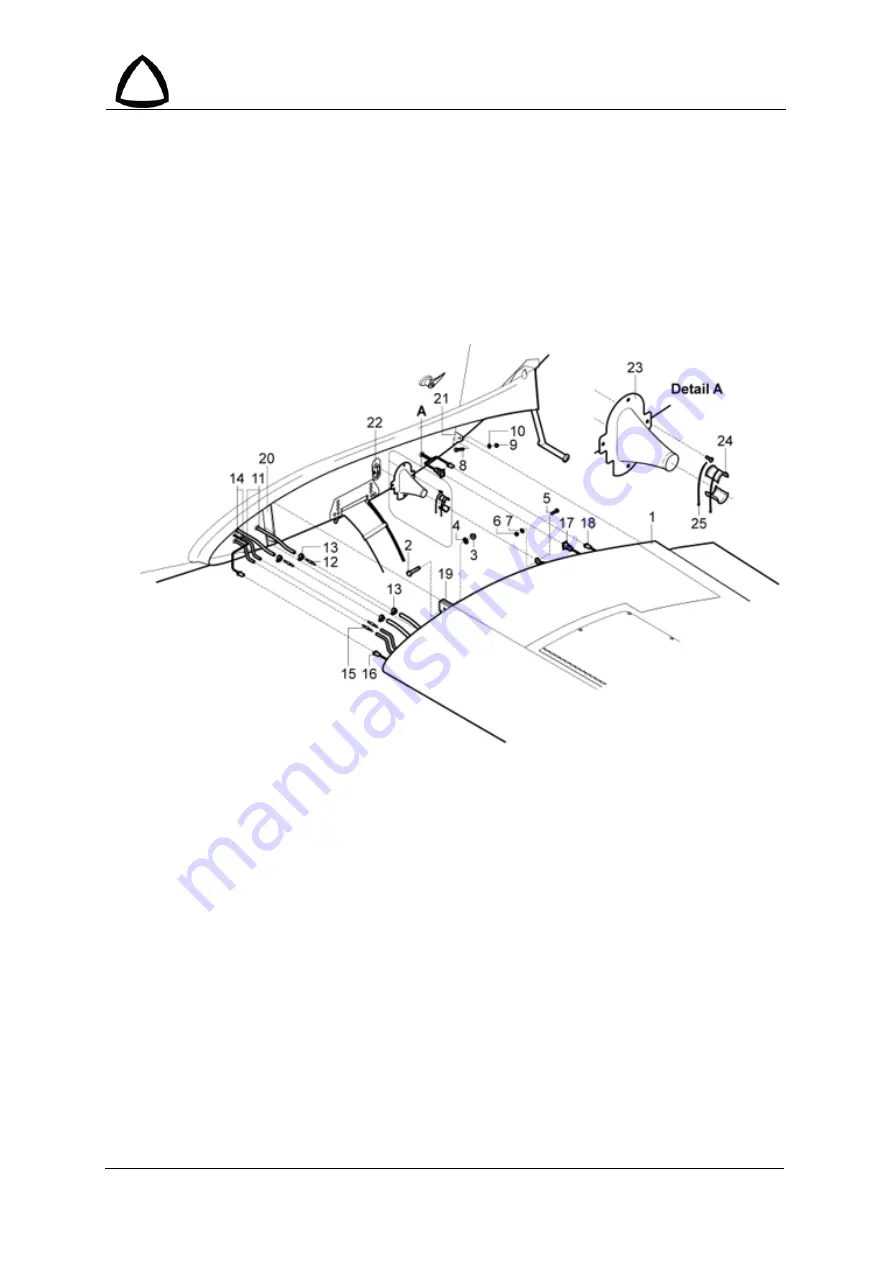
1
Wing, left
14 Pitot static hose
2
Bolt (6 pcs)
15 Hose connector
3
Nut (6 pcs)
16 Fuel quantity sensor wiring
4
Washer (10 pcs)*
17 Aileron trim tab wiring (only right side)
5
Bolt
18 Position light wiring
6
Nut
19 Front attachment
7
Washer
20 Front attachment
8
Bolt
21 Rear attachment
9
Nut
22 Control lever
10 Washer
23 Aileron rod sealing
11 Fuel hose
24 Bush (2 pcs.)
12 Hose connector
25 Cable tie (2 pcs.)
13 Hose clamp
Fig. 4-6
: Wing removal / installation
* There are one or two washers used depending on bolt thread protrusion (2 washers for less
protruding two bolts and 8 washers for the other four bolts).

