background image

16


PROBLEM

No  sound  from  the  unit.  The 
SIGNAL LED does not light up.

Full power cannot be obtained. The 
LIMIT LED never lights up.

Sound is distorted. The LIMIT LED is 
not on, or only lights up occasionally.

Sound  is  distorted  and  very  loud 
and LIMIT LED lights up.

Hum  or  buzz  when  a  mixer  is 
connected to the unit.

Hum  or  buzz  when  using  lighting 
controls in the same building.

The ON LED does not light up when 
the  mains  connector  is  connected 
and the unit is switched to ON.

CAUSE

1 – The signal source is sending no 
signal.
2 – Defective cable.

The signal source does not have a 
hot enough output.

The  mixer  or  signal  source  is 
distorting.

The system is overloaded and has 
reached maximum power.

1.– The console probably has un-
balanced outputs. You may be using 
an 

incorrect 

un-balanced 

to 

balanced cable.
2.–  The  mixer  and  the  powered 
speaker  are  not  plugged  into  the 
same mains outlet.
3.–  The  audio  signal  cable  is  too 
long or too close to an AC cable

1.–  The  audio  signal  cable  is  too 
long  or  too  close  to  the  lighting 
cable.

2.– On a sound system with three-
phase  AC,  the  lighting  equipment 
and the UNIT are connected to the 
same phase.
1.– Bad or loose AC connection to 
the UNIT or the mains outlet.
2 – Faulty AC cable.

3 – Blown Fuse.

4  -  The  mains  voltage  is  out  of 
range.

SOLUTION

1 – Check that the mixer or sound 
source is sending signal to the UNIT.
2 – Check that the cable from the 
sound  source  to  the  UNIT  is 
connected  correctly.  Replace  the 
cable if defective.

If using a mixer, use the balanced 
output 

if 

available. 

Use 

professional  mixer  with  a  hotter 
output.

Turn  mixer  channel  gains  down. 
Check  that  none  of  your  signal 
sources are distorting.

Turn down the mixer's output.

1.–  Read  the  appendix  of  this 
manual  to  make  a  correct  un-
balanced to balanced cable.

2.– Connect the mixer and the unit 
to the same mains outlet.

3.– Use a cable that is as short as 
possible  and/or  move  the  audio 
signal  cable  away  from  mains 
cables.
1.–  Move  the  audio  signal  cable 
away from lighting cables. Try to find 
out at what point the noise is leaking 
into the system.
2.– Connect the sound system to a 
different phase than the lights. You 
may need the help of an electrician.

1.– Check your connections.

2.–  Check  the  cables,  connectors 
and AC power with a suitable mains 
tester.
3.-  Replace  the  blown  fuse  for 
another of the same type and size.
4.- If the multimeter determines that 
the mains voltage is out the range, 
you may need the assistance of an 
electrician  to  find  an  appropriate 
solution.

TroubleShooting 


Manual del Usuario

 / convert series / 

User’s Manual

Summary of Contents for convert 12A

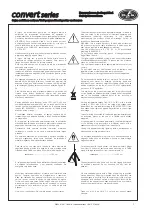
Page 1: ... de utilizar el equipo lea la sección Precauciones de seguridad de este manual Conserve este manual para futuras consultas Before operating the device please read the Safety precautions section of this manual Retain this manual for future reference ...

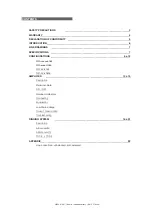
Page 2: ...t 18A ON OFF With avant 118A Overload indicators With LX 215A Overheating With LX 218CA Equalisation Low Main Voltage Current consumption CONFIGURATIONS Troubleshooting Description AX convert12 AXS convert12 TRD 2 y TRD 6 Line conections unbalanced and balanced SAFETY PRECAUTIONS WARRANTY DECLARATION OF CONFORMITY Manual del Usuario convert series User s Manual ...

Page 3: ...puede ser tratado como residuo doméstico normal sino que debe entregarse en el correspondiente punto de recogida de equipos eléctricos y electrónicos This symbol on the product indicates that this product should not be treated as household waste Instead it shall be handed over to the appicable collection point for the recycling of electrical and electronic equipment El cableado exterior conectado ...

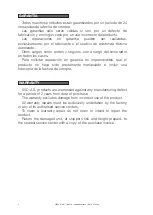
Page 4: ...ía es imprescindible que el producto no haya sido previamente manipulado e incluir una fotocopia de la factura de compra GARANTÍA All D A S products are warrantied against any manufacturing defect for a period of 2 years from date of purchase The warranty excludes damage from incorrect use of the product All warranty repairs must be exclusively undertaken by the factory or any of its authorised se...

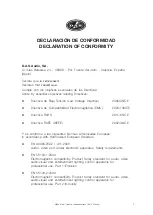
Page 5: ... CE l Directiva RAEE WEEE 2002 96 CE Y es conforme a las siguientes Normas Armonizadas Europeas In accordance with Harmonized European Standars l EN 60065 2002 A11 2008 Audio video and similar electronic apparatus Safety requirements l EN 55103 1 2009 Electromagnetic compatibility Product family standard for audio video audio visual and entertainment lighting control apparatus for professional use...

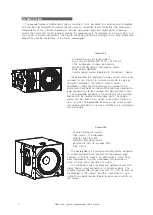
Page 6: ...ng and optimized D A S components have been combined with enclosures designed for rapid deployment precise coverage and high acoustic output The Convert 12A enclosure is constructed of birch plywood finished with the durable Iso Flex black paint The rigging system can be used to form vertical curved source arrays of up to 6 units The Convert 12A includes a pole mount socket with variable inclinati...

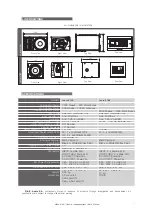
Page 7: ...nal 131 dB LF 1 x 12V4 GM 12P4 HF 2 x M 60N GM M 60N Trapezoidal 15º Birch Plywood Black or White ISO flex Paint 15º Maximum 6 cabinets 7 1 INPUT Female XLR LOOP THRU Male XLR AC INPUT PowerCon AC OUTPUT PowerCon 3 4A 115V 50 Hz 60 Hz 1 7A 230V 50 Hz 60 Hz 32 2 x 57 6 x 41 7 cm 12 7 x 22 7 x 16 4 in 27 5 kg AX convert12 AXS convert12 Pick up AX convert12 2000 Wpeak 1000 Wcontinuous Balanced Differ...

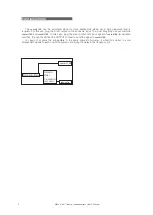
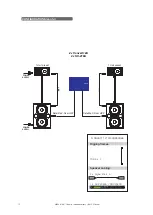
Page 8: ...ase plug the mixer output with input signal of convert18A subwoofer and then through the SATELLITE OUTPUT connector send the signal to convert12A In case of not place the subwoofers in the same convert12A cluster it whould be better to send independent signals to each one of the systems controling the delay in the frequency cut subwoofer Mezclador Mixer Retardo Delay Procesador processor convert 1...

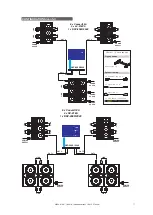
Page 9: ...én el subwoofer CONFIGURATIONS cont d DSP 2060 2040 LINK LINK LINK LINK POWER SUPPLY POWER SUPPLY OUT 1 OUT 2 POWER SUPPLY POWER SUPPLY LINK LINK LINK LINK OUT 4 OUT 5 6 x Convert12A 2 x Convert 18A 1 x DSP 2060 2040 9 Convert 12 Accessories Speaker cabling 4 x Signal link 0 5 m 1 x DSP 2060A DSP 2040A Rigging frames AX Convert12 x 2 4 x PowerCon link 0 5 m Manual del Usuario convert series User s...

Page 10: ...ER SUPPLY POWER SUPPLY LINK LINK LINK LINK OUT 5 OUT 4 6 x Convert12A 2 x Avant 118A 1 x DSP 2060 2040 POWER SUPPLY DSP 2060 2040 DSP 2060 2040 LINK LINK LINK POWER SUPPLY OUT 2 OUT 1 POWER SUPPLY LINK LINK LINK LINK OUT 5 OUT 4 6 x Convert12A 4 x LX 215A 1 x DSP 2060 2040 POWER SUPPLY POWER SUPPLY LINK LINK LINK LINK LINK Manual del Usuario convert series User s Manual CONFIGURATIONS cont d ...

Page 11: ... OUT 2 OUT 1 POWER SUPPLY POWER SUPPLY LINK LINK LINK LINK OUT 5 6 x Convert12A 3 x LX 218CA 1 x DSP 2060 2040 POWER SUPPLY POWER SUPPLY LINK LINK LINK LINK LINK LINK POWER SUPPLY POWER SUPPLY LINK LINK LINK LINK DSP 2060 2040 POWER SUPPLY POWER SUPPLY LINK OUT 1 OUT 2 OUT 4 OUT 5 6 x Convert12A 4 x SX 218A 1 x DSP 2060 2040 LINK LINK LINK Manual del Usuario convert series User s Manual CONFIGURAT...

Page 12: ...X 218A 1 Unit preset 1 Unit preset Satellite X Over HPF Satellite X Over HPF Convert 12 Accessories Speaker cabling Rigging frames TRD 6 x 2 2 x Signal link 2 m 1 x DSP 2060A DSP 2040A 12 Manual del Usuario convert series User s Manual CONFIGURATIONS cont d ...

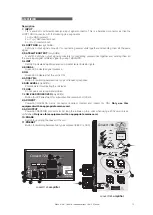
Page 13: ... SATELLITE OUTPUT only SUBs A and B XLR type output signal connectors for connecting several units together and sending them all the same input signal or filtered signal by using THRU HPF 3 LIMIT Red LED indicates amplifier saturation Amplifier limiter indicator lights 4 SIGNAL Green LED indicates signal presence 5 ON Green LED indicates that the unit is ON 6 ARRAY EQ Button for switching between ...

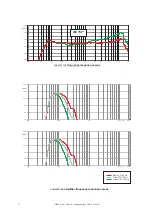
Page 14: ...t 12A frequency response curves convert 18A amplifier frequency response curves 10 100 1k 10k 20k 10 Hz 120 0 dBSPL 110 0 100 0 90 0 80 0 70 0 10 100 1k 10k 20k 10 Hz 120 0 dBSPL 110 0 100 0 90 0 80 0 70 0 Red LPF 160 Hz Grey LPF 125 Hz Green LPF 100 Hz 14 Manual del Usuario convert series User s Manual ...

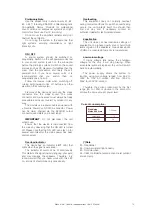
Page 15: ... Power can be daisy chained via the NC3FCB output connector see details on product label IMPORTANT Do not disconnect the unit while in use Ensure that the device is disconnected from the mains by observing that the ON LED is turned off Please note that the ON LED can stay on for several seconds after the mains power has been disconnected Low mains voltage Therefore the current consumed by the firs...

Page 16: ...to the UNIT or the mains outlet 2 Faulty AC cable 3 Blown Fuse 4 The mains voltage is out of range SOLUTION 1 Check that the mixer or sound source is sending signal to the UNIT 2 Check that the cable from the sound source to the UNIT is connected correctly Replace the cable if defective If using a mixer use the balanced output if available Use a professional mixer with a hotter output Turn mixer c...

Page 17: ...esearch and development is on going at D A S Specifications are subject to change without notice To this date there is no international standard regarding the flying of acoustic systems However it is common practice to apply 5 1 safety factors for enclosures and static elements For slings and elements exposed to material fatigue due to friction and load variation the following ratios must be met 5...

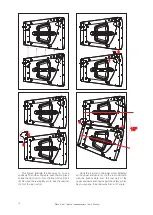
Page 18: ...e rear safety pin to free the rear rod 3 Turn the rear rod 4 Hook the rear rod in the lower screw indicated on the upper enclosure 5 Up the rear until mach with the anchor slots from the rear part of the upper enclosure and insert again the safety pin 6 As you can see the enclosures form a 15º angle 1 6 5 3 2 4 15º 18 Manual del Usuario convert series User s Manual ...

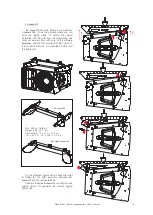
Page 19: ...n to this structure with the rod described before and the safety pins WLL 190 kgf 418 lbf Weight 6 Kg 13 2 lbs Dimmensions 15 x 57 4 x 44 6 cm Al x An x P 5 9 x 22 6 x 17 56 in AX convert12 Pick UpAX convert12 3 1 6 5 2 4 On the attached figures can be seen the order to follow for the right assembly between AX convert12 and the first convert12A Adding a Pick UpAX convert12 we will get extra riggin...

Page 20: ...lb Dimmensions 10 9 x 56 6 x 31 cm Al x An x P 4 29 x 22 28 x 12 2 in AXS convert12 The structure AXS convert12 is adecuated for stack maximum 3 convert 12A enclosures To control the vertical inclination of the column use the slots from the side pieces like other accessories and with help of the software Ease Focus To this structure will join the first enclosure of the column with the rods describ...

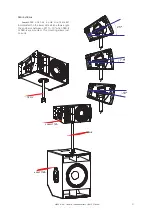
Page 21: ...ole mount socket incorporated on the lower side which allows angle the enclosure between 25º to 10º when TRD 2 or TRD 6 are mounted This mounting allows just one unit TRD 2 TRD 6 convert 12A avant 118A 21 Manual del Usuario convert series User s Manual ...

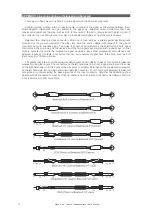
Page 22: ...s in the same way At the device s input the two signals get summed with opposite sign so that noise is cancelled out while the programme signal doubles in level Most professional audio devices use balanced inputs and outputs Connectors that can carry balanced signal have three pins such as XLR Cannon and 6 35mm stereo The graphs that follow show the recommended connection with different types of c...

Page 23: ...888DAS4USA Tel 1 305 436 0521 Fax 1 305 436 0528 D A S AUDIO ASIA PTE LTD 25 Kaki Bukit Crescent 01 00 02 00 Kaki Bukit Techpark 1 Singapore 416256 Tel 65 6742 0151 Fax 65 6742 0157 D A S AUDIO S A C Islas Baleares 24 46988 Fuente del Jarro Valencia SPAIN Tel 96 134 0525 Tel Intl 34 96 134 0860 Fax 96 134 0607 Fax Intl 34 96 134 0607 ...

Reviews: