


TITLE
OPERATOR MANUAL
PAGE
PRINTERS
ARTRIX H8
21
VERSION
2017SEP01/1
OUT OF
REVISED BY
MUNOZ, ANTONIO
support@dgen.com
77
FOR THE USER
d·gen, Inc. - COMPANY PRIVATE (LEVEL 1)
NOT TO BE DISCLOSED TO UNAUTHORIZED PERSONS – PROHIBIDA SU DIVULGACIÓN A PERSONAS NO AUTORIZADAS
DO NOT REPRODUCE WITHOUT AUTHORIZATION – NO REPRODUCIR SIN AUTORIZACIÓN
3
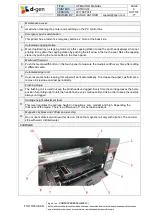
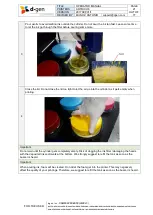
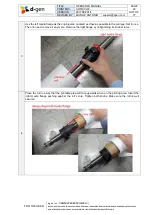
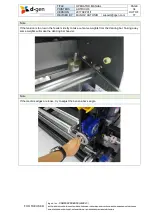
Pour gently to avoid spilling ink outside the cylinder. Do not pour the ink too fast. Leave some time
to let the ink go through the filter before pouring some more.
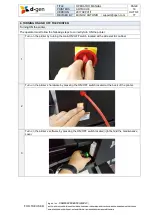
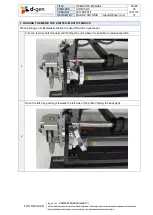
4
Close the lid. Do not close the lid too tight to let the air go into the cylinder as it gets empty when
printing.
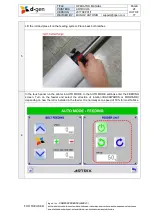
Important
Do not wait until the cylinder gets completely empty. Risk of clogging the ink filter / damaging the heads
with the deposited ink sediments at the bottom. We strongly suggest to refill the tank as soon as the
buzzer is heard.
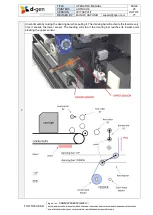
Important
When pouring ink, foam will be created. Do not let the foam get into the printer. This may negatively
affect the quality of your printings. Therefore, we suggest to refill the tank as soon as the buzzer is heard.
Summary of Contents for Artrix H8
Page 1: ...OPERATOR MANUAL ...


