background image

14

Configuration

Using the Configuration Utility

Network Type:

Infrastructure 

is the factory default setting.  Ad-Hoc mode is used for peer

to peer networking.  See the 

Getting Started 

section in this manual for

examples of these network types.

SSID:

The Service Set Identifier is the name assigned to the wireless network.  The

factory SSID setting is set to 

default

.  Make changes here to match the

SSID on existing Wireless Router or Access Point.

Tx Rate:

You can adjust the transmission rate to get the best signal possible depend-

ing on your usage and your environment.

WEP Setting:

Will allow you to configure the Encryption for your DWL-120.  By default

WEP is

 disabled

.

Default Setting:

Reverts the DWL-120 back to its factory default settings

Advanced  Setting:

To configure advanced settings for Power, RTS and Fragmentation Threshold.

Summary of Contents for Air DWL-120

Page 1: ...Manual 10 15 2002 Building Networks for People Air DWL 120 D LINK 2 4GHz Wireless USB Adapter...

Page 2: ...ents 3 Introduction 4 Wireless Basics 6 Getting Started 10 Using the Configuration Utility 13 Networking Basics 19 Troubleshooting 32 Technical Specifications 35 Contacting Technical Support 36 Warran...

Page 3: ...of the above items are missing please contact your reseller System Requirements Windows XP Windows 2000 Windows Me or Windows 98SE A computer with an available USB port At least 32 MB of memory and a...

Page 4: ...ws ME or Windows 98SE in either Ad Hoc mode without an Access Point or Infrastructure mode with an Access Point The IEEE 802 11b standards compliance means this adapter gives you the flexibility to co...

Page 5: ...a an Access Point and peer to peer communication in ad hoc mode Operates in the 2 4 to 2 4835 GHz Direct Sequence Spread Spectrum Provides high speed wireless connection at up to 11Mbps Cost effective...

Page 6: ...ficiently Increased mobility and the absence of cabling and other fixed infrastructure have proven to be beneficial for many users Wireless users can use the same applications they use on a wired netw...

Page 7: ...WLANs can operate in locations where installation of wiring may be impractical Installation Speed and Simplicity Installing a wireless LAN system can be fast and easy and can eliminate the need to pul...

Page 8: ...laptop computers DWL 650 2 4GHz Wireless PCI cards used with desktop computers DWL 520 Wireless Access Points DWL 900AP Standards Based Technology Based on the IEEE 802 11b standard the DWL 120 is in...

Page 9: ...an reduce your D Link Air Wireless product s range from 3 90 feet 1 30 meters Position your receiving devices so that the number of walls or ceilings is minimized 3 Be aware of the direct line between...

Page 10: ...ure using an Access Point such as the DWL 900AP Ad Hoc directly connecting to another computer for peer to peer communication using wireless network adapters on each computer such as two or more DWL 1...

Page 11: ...WL 120 If you are connecting a laptop computer to your network install the drivers for the wireless cardbus adapter e g DWL 650 or the DWL 650 into a laptop computer See the Quick Installation Guide i...

Page 12: ...Mask of 255 255 255 0 etc IMPORTANT If computers or other devices are assigned the same IP Address one or more of the devices may not be visible on the network IP Address Install the D Link Air DWL 1...

Page 13: ...ouble click on the icon shown above The screen below will be displayed with the following default settings With its default settings the DWL 120 will connect with other D Link Air products right out o...

Page 14: ...ork The factory SSID setting is set to default Make changes here to match the SSID on existing Wireless Router or Access Point Tx Rate You can adjust the transmission rate to get the best signal possi...

Page 15: ...curity protocol for Wireless Local Area Networks Hexadecimal format consists of numbers 0 9 and letters a f RTS Threshold Request to Send threshold measures the value in bytes Any packet size exceedin...

Page 16: ...t a pop up window will ap pear allowing you to edit the profile See the example on the next page Click OK if you have made any changes Configuration Save Click Save to save the new profile Duplicate H...

Page 17: ...Select Infrastructure or Ad Hoc TxRate Choose the data rate speed WEP Choose Enable or Disable Disable is the default setting If you enable WEP you must Enable WEP on all devices on the network in ord...

Page 18: ...18 Using the Configuration Utility About The About tab displays the utility firmware version...

Page 19: ...oft Windows XP Note Please refer to websites such as http www homenethelp com and http www microsoft com windows2000 for information about networking computers using Windows 2000 ME or 98SE Go to Star...

Page 20: ...ctions in this window Networking Basics Click Next In the following window select the best description of your computer If your computer connects to the internet through a gateway router select the se...

Page 21: ...21 Enter a Computer description and a Computer name optional Networking Basics Click Next Enter a Workgroup name All computers on your network should have the same Workgroup name Click Next...

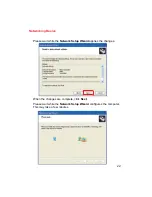
Page 22: ...wait while the Network Setup Wizard applies the changes Networking Basics When the changes are complete click Next Please wait while the Network Setup Wizard configures the computer This may take a fe...

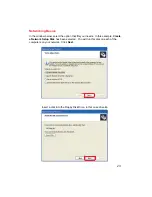
Page 23: ...w select the option that fits your needs In this example Create a Network Setup Disk has been selected You will run this disk on each of the computers on your network Click Next Insert a disk into the...

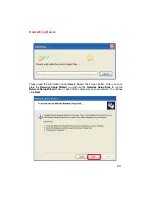
Page 24: ...he information under Here s how in the screen below After you com plete the Network Setup Wizard you will use the Network Setup Disk to run the Network Setup Wizard once on each of the computers on yo...

Page 25: ...ings will take effect when you restart the computer Click Yes to restart the computer You have completed configuring this computer Next you will need to run the Network Setup Disk on all the other com...

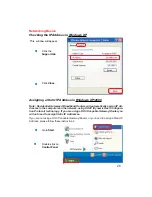
Page 26: ...dows XP Click Start in the lower left corner of the screen Right click on My Computer Select Properties and click Select the Computer Name Tab in the System Properties window You may enter a Com puter...

Page 27: ...same Workgroup name Click OK Checking the IP Address in Windows XP The wireless adapter equipped computers in your network must be in the same IP Address range see Getting Started in this manual for...

Page 28: ...Routers will automatically assign IP Ad dresses to the computers on the network using DHCP Dynamic Host Configura tion Protocol technology If you are using a DHCP capable Gateway Router you will not n...

Page 29: ...29 Networking Basics Assigning a Static IP Address in Windows XP 2000 Double click on Network Connections Double click on Properties Right click on Local Area Connections...

Page 30: ...the other computers should have IP Addresses that are sequential like 192 168 0 3 and 192 168 0 4 The subnet mask must be the same for all the computers on the network Input your DNS server addresses...

Page 31: ...x xxx xxx where xxx is the IP Address of the Wireless Router or Access Point A good wireless connection will show four replies from the Wireless Router or Acess Point as shown Go to Start Run type com...

Page 32: ...erties This chapter provides solutions to problems that can occur during the installation and operation of the DWL 120 Read the following descriptions if you are having problems The examples below are...

Page 33: ...Wireless USB Adapter Select Properties to check that the drivers are installed properly Look under Device Status to check that the device is working properly Click OK D Link Air DWL 120 Wireless USB A...

Page 34: ...nna Orientation Try different antenna orientations for the DWL 120 Try to keep the antenna at least 6 inches away from the wall or other objects If you are using 2 4GHz cordless phones X 10 equipment...

Page 35: ...tus Diagnostic LED 95 non condensing Humidity Antenna Type Integrated DSSS Modulation Technique L 3 3 inches W 2 1 inches H 0 2 inches Physical Dimensions 1 2 5 5 11 Mbps with Automatic Fallback Data...

Page 36: ...period on this product U S customers can contact D Link technical support through our web site or by phone D Link Technical Support over the Telephone 877 453 5465 24 hours a day seven days a week D L...

Page 37: ...ants that during the Warranty Period the magnetic media on which D Link delivers the Software will be free of physical defects D Link s sole obligation shall be to replace the non conforming Software...

Page 38: ...ARRANTY SPECIFIED HEREIN THE PRODUCT IS PROVIDED AS IS WITHOUT ANY WARRANTY OF ANY KIND WHATSOEVER INCLUDING WITHOUT LIMITATION ANY WARRANTY OF MERCHANTABILITY FITNESS FOR A PARTICULAR PURPOSE AND NON...

Page 39: ...uarantee that interference will not occur in a particular installation If this equipment does cause harmful interference to radio or television reception which can be determined by turning the equipme...

Reviews: