background image


Installing the DWL-520+ Wireless PCI 
Adapter Into Your Computer


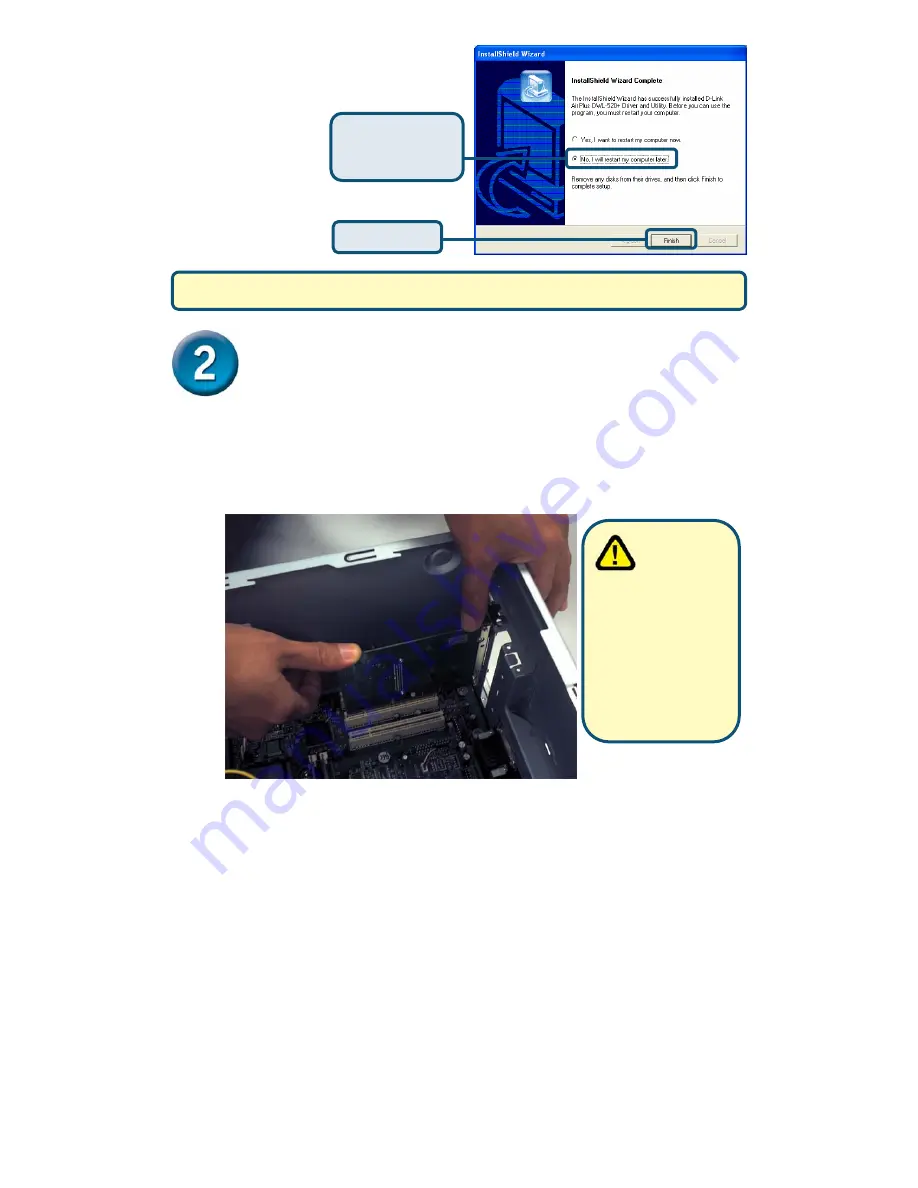
A.


Make sure to turn off your computer and unplug the power cord.

 Remove 

the back cover of the computer. 

B.


Install the DWL-520+ carefully

 and firmly seat it into an available PCI slot 

(which is usually “white” or “cream” colored). 


C.

   Secure the DWL-520+ back panel shield with a screw. 

D.

   Replace the computer’s cover.  

E.

   Place the computer back in its normal position. 

F.

   Attach the DWL-520+’s antenna to the socket on the back panel shield.


Click 

No, I will 

restart my 
computer later


Click 

Finish

Shut down

your computer and 

unplug

it


 To 

avoid 

 damage 


 caused 

by 

static electricity, make 
sure to properly 
ground yourself by 
first touching a metal 
part of your computer 
to discharge any static 
electricity before 
working with the DWL-
520+ Wireless PCI 
Adapter.


Summary of Contents for AirPlus DWL-520+

Page 1: ...k AirPlus DWL 520 Driver CD in the CD ROM drive Thestep by stepinstructionsthatfollowareshownin WindowsXP Thestepsandscreensaresimilarfor theotherWindowsoperatingsystems 2003 D Link Systems Inc All ri...

Page 2: ...n your computer does not automatically start type D Setup exe If it does start proceed to the next screen Click Install Driver PC Utility Type D Setup exe The letter D represents the letter of the CD...

Page 3: ...520 back panel shield with a screw D Replace the computer s cover E Place the computer back in its normal position F Attach the DWL 520 s antenna to the socket on the back panel shield Click No I wil...

Page 4: ...his is the connector that fits into the PCI slot on your computer s motherboard Antenna Used to wirelessly connect to 802 11b AirPlus Air networks Screw Mount The screw to secure the PCI Adapter to th...

Page 5: ...may appear after your computer restarts For Windows Me and 98 after your computer restarts this Systems Settings Change screen may appear For Windows XP this Hardware Installation alert screen may ap...

Page 6: ...start and the utility icon will appear in the bottom right hand corner of the desktop screen systray If this icon appears GREEN then you have successfully installed the DWL 520 are connected to a wire...

Page 7: ...ou wish to use the DWl 520 utility please do the following steps Click the XP Networking icon to use the Zero Configuration Wireless Settings Click Advanced Click OK Uncheck Use Windows to configure m...

Page 8: ...bps however TxRate settings are auto matically determined by the DWL 520 depending on the distance from the access point D Channel Displays the channel information By default the channel is set to 6 a...

Page 9: ...adjust the transmission rate to get the best signal possible depending on your usage and your environment K Preamble By default D Link AirPlus Products are set to Long Preamble The Preamble defines th...

Page 10: ...dress on the same network which will correspond with the Wireless Router or Access Point Your Internet service provider provides preferred DNS server information Click Properties Select Obtain an IP a...

Page 11: ...ame network which will correspond with the Wireless Router or Access Point Your Internet service provider provides preferred DNS server information Select Obtain an IP address automatically if the Wir...

Page 12: ...al support through our website or by phone Tech Support for customers within the United States D Link Technical Support over the Telephone 877 453 5465 24 hours a day seven days a week D Link Technica...

Reviews: