background image

Networking Basics 


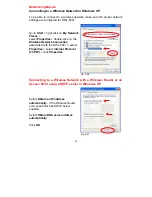
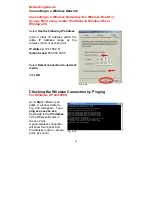
Assigning a Static IP Address 


• 

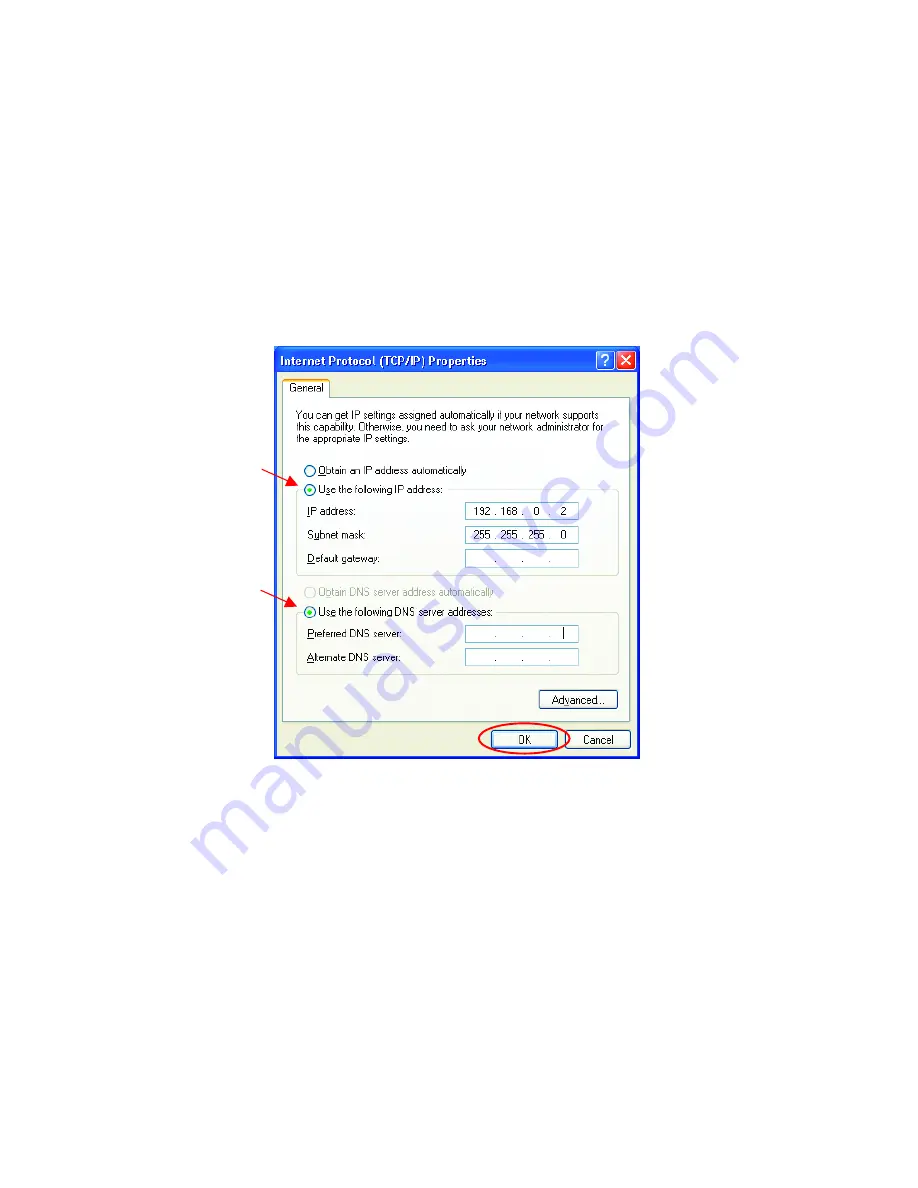
Select


Use the following IP address  


in the 

Internet Protocol (TCP/IP) Properties

 window,  

• 

Input your 

IP address and subnet mask. 

(The IP Addresses on your 

network must be within the same range. For example, if one computer 
has an IP Address of 192.168.0.2, the other computers should have IP 
Addresses that are between 192.168.0.3 and 192.168.0.254.  No two 
computers can have the same IP Address.  The subnet mask must be the 
same for all the computers on the network.) 

• 

Input your 

DNS server address only if you plan to use the Internet.  

(Note:  If you are entering a DNS server address, you must also enter the IP 
Address of the Default Gateway.)


The DNS server information will be provided by your ISP (Internet Service 
Provider.) 


Fig. 8.25 


• 

Click

 OK 

You have completed the assignment of a Static IP Address.  

(You do not need to 

assign a Static IP Address if you have a DHCP-capable Gateway/Router.)


38

Summary of Contents for AirPlus DWL-520+

Page 1: ...D Link AirPlus DWL 520 Enhanced 2 4 GHz Wireless PCI Adapter Manual Rev 051002 Building Networks for People ...

Page 2: ... Wireless Basics 6 4 Getting Started 9 5 Installing the DWL 520 12 6 Using the Configuration Utility 15 7 Troubleshooting 22 8 Networking Basics 26 9 Technical Specifications 58 10 Contacting Technical Support 60 11 Limited Warranty and Registration 61 ...

Page 3: ...y of the above items are missing please contact your reseller System Requirements A laptop computer with an available 32 bit PCI slot Windows XP Windows 2000 Windows Me or Windows 98 At least 32 MB of memory and a 300 MHz processor An 802 11b Access Point e g DWL 900AP for Infrastructure Mode or another 802 11b wireless adapter e g DWL 650 for Ad Hoc mode 3 ...

Page 4: ...work WLAN After completing the steps outlined in the Quick Installation Guide included in the package you will have the ability to share information and resources such as files and printers and take full advantage of a connected environment for work or play The DWL 520 includes software drivers for the most popular Microsoft Windows operating systems Windows XP Windows 2000 Windows Me Windows 98 a...

Page 5: ...yption Maximum reliability throughput and connectivity with automatic data rate switching Automatically discovers available networks when using the included Configuration utility Supports infrastructure networks via an Access Point and peer to peer communication in ad hoc mode Quick and Easy installation into desktop PCs LEDs LED stands for Light Emitting Diode The DWL 520 has one LED Power Activi...

Page 6: ...ss adapter cards used on laptop and desktop systems support the same protocols as Ethernet adapter cards For most users there is no noticeable functional difference between a wired Ethernet desktop computer and a wireless computer equipped with a wireless adapter other than the added benefit of the ability to roam within a wireless cell Under many circumstances it may be desirable for mobile netwo...

Page 7: ...d 2 4GHz Wireless Cardbus Adapters used with laptop computers DWL 650 Enhanced 2 4GHz Wireless Access Point DWL 900AP Enhanced 2 4GHz Wireless Broadband Gateway DI 614 The DWL 520 is also compatible with the D Link Air 802 11b family of products that include 2 4GHz Wireless Cardbus Adapters used with laptop computers DWL 650 2 4GHz Wireless PCI cards used with desktop computers DWL 520 Wireless Ro...

Page 8: ...Points Residential Gateways and computers so that the number of walls or ceilings is minimized 2 Be aware of the direct line between Access Points Residential Gateways routers and computers A wall that is 1 5 feet thick 5 meters at a 45 degree angle appears to be almost 3 feet 1 meter thick At a 2 degree angle it looks over 42 feet 14 meters thick Try to make sure that the Access Points and Adapte...

Page 9: ...net with all the computers on your local network without sacrificing speed or security using D Link AirPlus networking products There are basically two modes of networking Infrastructure using an Access Point such as the DWL 1000AP Ad Hoc directly connecting to another computer for peer to peer communication using wireless network adapters on each computer such as two or more DWL 520 wireless netw...

Page 10: ...ck Installation Guide included with the router Install the drivers for the DWL 520 See the Quick Installation Guide included with the DWL 520 Install the drivers for the wireless network adapter such as the D Link AirPlus DWL 650 into the laptop computer See the Quick Installation Guide included with the DWL 650 Please refer to the following sections of this manual for additional information about...

Page 11: ...ration for the adapters to Ad Hoc mode set the adapters to the same channel and assign an IP Address to each computer on the Ad Hoc network See Box below IP Address 11 When assigning IP Addresses to the computers on the network please remember that the IP Address for each computer must be in the same IP Address range as all the computers in the network and the subnet mask must be exactly the same ...

Page 12: ...slot which is usually white or cream colored Secure the DWL 520 with a screw Replace the computer s cover Fig 5 1 Installing the Drivers Plug in the power cord and turn on your computer The Found New Hardware Wizard screen appears Fig 5 2 D Link AirPlus Wireless PCI Adapters Insert the Driver CD into the CD ROM drive Close the initial Autorun screen and continue with the installation Select Instal...

Page 13: ...d and unzipped Click Next D Link AirPlus DWL 520 Wireless PCI Adapter Please wait while the drivers are being installed Fig 5 4 13 For Windows XP Fig 5 5 may appear after the laptop computer restarts Click Continue Anyway to finalize the installation This device has been successfully tested to work on Windows XP as well as Windows 2000 Windows Me and Windows 98 Microsoft certification is pending F...

Page 14: ... Install Configuration Utility If the Autorun program does not appear go to Start Run type in D Setup exe where D represents the CD ROM drive Fig 5 7 Connecting to the Wireless Network Once you have the DWL 520 properly installed you will see the icon shown here Fig 5 8 Right click on the icon in the task bar Select View Available Wireless Networks Fig 5 9 Note If View Available Wireless Networks ...

Page 15: ...te Out of the box with its default settings the DWL 520 will associate with D Link Air AirPlus wireless routers and access points e g DI 713P DI 714 DWL 900AP DWL 1000AP After the computer restarts the configuration utility will automatically start and the utility icon will appear in the bottom right hand corner of the screen systray 15 Double click on the Configuration Utility icon Fig 6 1 shown ...

Page 16: ...o the wireless network The factory SSID setting is set to default TxRate The factory setting is set to 11 Mbps however TxRate settings are automatically determined by the DWL 520 depending on the distance from the access point Channel Displays the channel information By default the channel is set to 6 and selection is automatically determined by the DWL 520 Link Quality Signal Strength Displays th...

Page 17: ...nvironment Channel The default channel setting is channel 6 However the DWL 520 will automatically select the channel to match the channel setting for the selected Access Point In Ad Hoc mode the channel must be manually set to the same channel for each wireless adapter TX Rate Select the transmission rate on the network 11Mbps is the default setting Preamble Select Long or Short Preamble The Prea...

Page 18: ...d Authentication allows communication only with other devices with identical WEP settings Auto will automatically adjust to the Authentication mode of the wireless client Network Key enter a key in either ASCII e g a word or hexadecimal format Key Format ASCII or Hexadecimal Hexadecimal digits consist of the numbers 0 9 and the letters A F ASCII American Standard Code for Information Interchange i...

Page 19: ...on the Connect button Profiles In the lower half of the screen you can manage the profiles that you have created for the wireless network at home at the office and in public places Scroll up and down and highlight the profile that you wish to configure You can ADD or REMOVE a profile or configure the Properties of the profile in order to connect with an available network Properties Click on Proper...

Page 20: ...ng Current Setting Default Setting default Fig 6 7 In this window you can configure all the properties of a profile in order to connect with a network of your choice After you have entered your changes in this window click OK to save the changes 20 ...

Page 21: ...ration Utility About D Link AirPlus Configuration Utility D Link AirPlus Configuration Utility PCI Card Fig 6 8 The ABOUT screen gives you information about the Firmware and Utility Versions of the DWL 520 21 ...

Page 22: ... are having problems The examples below are illustrated in Windows XP If you have another operating system these solutions will still apply although the appearance on your computer screen may differ 1 Checking the Installation of the Drivers for the Wireless Adapter Fig 7 1 Go to Start Right click on My Computer Click Properties Select the Hardware Tab Click Device Manager Fig 7 2 22 ...

Page 23: ...dapter Select Properties to check that the drivers are installed properly 23 D Link AirPlus DWL 520 Wireless PCI Adapter D Link AirPlus DWL 520 Wireless PCI Adapter D Link AirPlus DWL 520 Wireless PCI Adapter Fig 7 3 Look under Device Status to check that the device is working properly Click OK Fig 7 4 ...

Page 24: ...erly seated in the computer s PCI slot If Windows does not detect the hardware upon insertion of the adapter make sure to completely remove drivers that were previously loaded To remove the drivers do the following A Under Tools select Folder Options select View under Hidden files and folders select Show hidden files and folders B Uncheck Hide extension for known file types click on Apply C Search...

Page 25: ...set up one client to establish a BSS Basic Service Set and wait briefly before setting up other clients This prevents several clients from trying to establish a BSS at the same time which can result in multiple singular BSSs being established rather than a single BSS with multiple clients associated to it Check that the Network Connection for the wireless client is configured properly Select AP In...

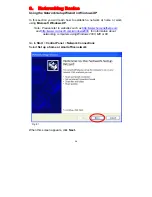
Page 26: ...k using Microsoft Windows XP Note Please refer to websites such as http www homenethelp com and http www microsoft com windows2000 for information about networking computers using Windows 2000 ME or 98 Go to Start Control Panel Network Connections Select Set up a home or small office network Fig 8 1 When this screen appears click Next 26 ...

Page 27: ...P Please follow all the instructions in this window 27 Click Next In the following window select the best description of your computer If your computer connects to the Internet through a gateway router select the second option as shown Fig 8 2 Fig 8 3 Click Next ...

Page 28: ...Networking Basics Enter a Computer description and a Computer name 28 Click Next Enter a Workgroup name All computers on your network should have the same Workgroup name Fig 8 4 Fig 8 5 Click Next ...

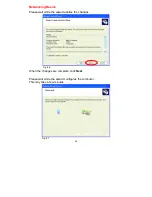
Page 29: ...working Basics Please wait while the wizard applies the changes Fig 8 6 When the changes are complete click Next Please wait while the wizard configures the computer This may take a few minutes 29 Fig 8 7 ...

Page 30: ... In this example Create a Network Setup Disk has been selected You will run this disk on each of the computers on your network Click Next 30 Insert a disk into the Floppy Disk Drive in this case drive A Fig 8 8 Fig 8 9 Format the disk if you wish and click Next ...

Page 31: ...Fig 8 10 Please read the information under Here s how in the screen below After you complete the Network Setup Wizard you will use the Network Setup Disk to run the Network Setup Wizard once on each of the computers on your network To continue click Next 31 Fig 8 11 ...

Page 32: ...ll take effect when you restart the computer Click Yes to restart the computer Fig 8 12 Fig 8 13 You have completed configuring this computer Next you will need to run the Network Setup Disk on all the other computers on your network After running the Network Setup Disk on all your computers your new wireless network will be ready to use ...

Page 33: ...ick Start in the lower left corner of the screen Right click on My Computer Select Properties and click 33 Fig 8 14 Select the Computer Name Tab in the System Properties window You may enter a Computer description if you wish this field is optional To rename the computer or join a domain Click Change Fig 8 15 ...

Page 34: ... the Computer name Select Workgroup and enter the name of the Workgroup All computers on your network must have the same Workgroup name Click OK Fig 8 16 Checking the IP Address in Windows XP 2000 Go to Start All Programs Accessories Command Prompt 34 Fig 8 17 ...

Page 35: ...ll the configuration settings are displayed as shown below D Link AirPlus DWL 520 Wireless PCI car Fig 8 19 Type ipconfig renew at the prompt to get a new IP Address shown below Fig 8 20 35 Windows 98 ME users go to Start Run Type Command Type winipcfg at the prompt Click Release and Renew to obtain a new IP Address ...

Page 36: ...DHCP Dynamic Host Configuration Protocol technology If you are using a DHCP capable Gateway Router you will not need to assign Static IP Addresses If you are not using a DHCP capable Gateway Router or you need to assign a Static IP Address please follow these instructions Go to Start Double click on Control Panel 36 Double click on Network Connections Fig 8 21 Fig 8 22 ...

Page 37: ...g Basics Assigning a Static IP Address Right click on Local Area Connections Click Properties 37 D Link AirPlus DWL 520 Wireless PCI Adapter Fig 8 23 Highlight Internet Protocol TCP IP Click Properties Fig 8 24 ...

Page 38: ...2 168 0 3 and 192 168 0 254 No two computers can have the same IP Address The subnet mask must be the same for all the computers on the network Input your DNS server address only if you plan to use the Internet Note If you are entering a DNS server address you must also enter the IP Address of the Default Gateway The DNS server information will be provided by your ISP Internet Service Provider Fig...

Page 39: ...the Wireless Network Connection associated with the DWL 520 select Properties select Internet Protocol TCP IP click Properties Connecting to a Wireless Network with a Wireless Router or an Access Point using a DHCP server in Windows XP D Link AirPlus DWL 520 Wireless PCI Adapter Fig 8 26 Select Obtain an IP address automatically if the Wireless Router or Access Point has DHCP server enabled Select...

Page 40: ... Router or Access Point IP address 192 168 0 51 Subnet mask 255 255 255 0 Default Gateway Enter the LAN IP address of the Wireless Router Select Use the following DNS server address Enter the LAN IP address of the Wireless Router Click OK Fig 8 28 Connecting to a Wireless Network in Windows 2000 D Link AirPlus DWL 520 Wireless PCI Adapter Go to Start Settings Network and Dial up Connections Double...

Page 41: ...Connecting to a Wireless Network with a Wireless Router or an Access Point using a static IP address in Windows 2000 41 Select Use the following IP address Input a static IP Address within the same IP Address range as the wireless router or the access point IP address 192 168 0 51 Subnet mask 255 255 255 0 Default Gateway Enter the LAN IP address of the Wireless Router Select Use the following DNS...

Page 42: ... the DWL 520 click Properties select Internet Protocol TCP IP click Properties TCP IP D Link AirPlus DWL 520 Wireless PCI Ad Fig 8 32 Connecting to a Wireless Network with a Wireless Router or an Access Point using a DHCP server in Windows Me and 98 42 Select the IP Address tab Then select Obtain an IP address automatically Select Detect connection to network media Fig 8 33 Click OK ...

Page 43: ...he wireless router or access point Fig 8 34 IP address 192 168 0 51 Subnet mask 255 255 255 0 Select Detect connection to network media Click OK Checking the Wireless Connection by Pinging For Windows XP and 2000 Go to Start Run type cmd A window similar to Fig 8 35 will appear Type ping xxx xxx xxx xxx where xxx is the IP address of the Wireless Router or Access Point A good wireless connection w...

Page 44: ...ase see the Network Setup Wizard section at the beginning of Networking Basics you can use the Add Printer Wizard to add or share a printer on your network Whether you want to add a local printer a printer connected directly to one computer share an LPR printer a printer connected to a print server or share a network printer a printer connected to your network through a Gateway Router use the Add ...

Page 45: ...er that is not shared on the network and is connected directly to one computer is called a local printer If you do not need to share your printer on a network follow these directions to add the printer to one computer Go to Start Printers and Faxes 45 Click on Add a printer Fig 8 37 Fig 8 38 ...

Page 46: ...ched to this computer Deselect Automatically detect and install my Plug and Play printer if it has been selected Click Next Select Use the following port From the pull down menu select the correct port for your printer Most computers use the LPT1 port as shown in the illustration Click Next Fig 8 41 ...

Page 47: ...t driver is not displayed insert the CD or floppy disk that came with your printer and click Have Disk 47 Fig 8 42 At this screen you can change the name of the printer optional Click Next Fig 8 43 Select Yes to print a test page A successful printing will confirm that you have chosen the correct driver Click Next Fig 8 44 ...

Page 48: ...Networking Basics Adding a local printer This screen gives you information about your printer 48 Click Finish Fig 8 45 When the test page has printed Fig 8 46 Click OK ...

Page 49: ...cessfully added a local printer Fig 8 47 Sharing a Network Printer After you have run the Network Setup Wizard on all the computers on your network you can run the Add Printer Wizard on all the computers on your network Please follow these directions to use the Add Printer Wizard to share the printer on your network Go to Start Printers and Faxes Fig 8 48 49 ...

Page 50: ...Networking Basics Sharing a network printer Click on Add a Printer 50 Fig 8 49 Click Next Fig 8 50 Select Network Printer Click Next Fig 8 51 ...

Page 51: ...Networking Basics Sharing a network printer 51 Select the printer you would like to share Click Next Click Finish Fig 8 54 Fig 8 53 Fig 8 52 Select Browse for a printer Click Next ...

Page 52: ...lation You have completed adding the printer To share this printer on your network Remember the printer name Run the Add Printer Wizard on all the computers on your network Make sure you have already run the Network Setup Wizard on all the network computers After you run the Add Printer Wizard on all the computers in the network you can share the printer Fig 8 55 Fig 8 56 ...

Page 53: ...as the DP 101P Please make sure that you have run the Network Setup Wizard on all the computers on your network To share an LPR printer please follow these directions Go to Start Printers and Faxes Click on Add a Printer The screen to the right will display Click Next Fig 8 57 Select Local Printer Click Next Fig 8 58 53 ...

Page 54: ...ect Create a new port From the pull down menu select Standard TCP IP Port as shown Click Next Fig 8 59 Please read the instructions on this screen Click Next Fig 8 60 Enter the Printer IP Address and the Port Name as shown Click Next Fig 8 61 54 ...

Page 55: ...nter In this screen select Custom Click Settings Fig 8 62 Enter the Port Name and the Printer Name or IP Address Select LPR Enter a Queue Name If there is more than one port on the print server you must name the Queue Click OK Fig 8 63 55 ...

Page 56: ... about your printer Click Finish 56 Fig 8 64 Select the printer you are adding from the list of Printers Insert the printer driver disk that came with your printer Click Have Disk Fig 8 65 If the printer driver is already installed Select Keep existing driver Click Next Fig 8 66 ...

Page 57: ...s on your network Click Next 57 Fig 8 67 Select Yes to print a test page Click Next Fig 8 68 This screen will display information about your printer Click Finish to complete the addition of the printer Please run the Add Printer Wizard on all the computers on your network in order to share the printer Fig 8 69 Note You must run the Network Setup Wizard on all the computers on your network before y...

Page 58: ...02 11b Bus Type 32 bit PCI 2 2 Supported Operating Systems Windows XP Windows 2000 Windows ME Windows 98 Data Security 256 bit WEP Wired Equivalent Privacy Encryption Data Rate Mbps 22 11 5 5 2 1 Range Indoors up to 328 feet 100 meters Outdoors up to 1 312 feet 400 meters Network Architecture Supports Ad Hoc Mode Peer to Peer without Access Point or Infrastructure Mode Communications to wired netw...

Page 59: ...d Spectrum DSSS 11 chip Barker Sequence Transmitter Output Power 15dBm 2dB External Antenna Type Detachable Reverse SMA Over Driving Levels Tolerates up to 17dBm at the Antenna Frequency Range 2 4 2 462 GHz Physical Dimensions L 5 24 inches 133 mm W 4 76 inches 121 mm H 71 inches 18 mm Temperature Operating Temperature 32ºF to 131ºF 0 C to 55 C Humidity Maximum up to 95 Non condensing Warranty 3 y...

Page 60: ...ty period on this product U S customers can contact D Link technical support through our web site or by phone D Link Technical Support over the Telephone 800 758 5489 24 hours a day seven days a week D Link Technical Support over the Internet http support dlink com When contacting technical support please provide the following information Serial number of the unit Model number or product name Soft...

Page 61: ...which D Link delivers the Software will be free of physical defects D Link s sole obligation shall be to replace the non conforming Software or defective media with software that substantially conforms to D Link s functional specifications for the Software Except as otherwise agreed by D Link in writing the replacement Software is provided only to the original licensee and is subject to the terms ...

Page 62: ...ARRANTY IS REPAIR REPLACEMENT OR REFUND OF THE DEFECTIVE OR NON CONFORMING PRODUCT GOVERNING LAW This 3 Year Warranty shall be governed by the laws of the state of California Some states do not allow exclusion or limitation of incidental or consequential damages or limitations on how long an implied warranty lasts so the foregoing limitations and exclusions may not apply This limited warranty prov...

Reviews: