4
2. INSTALLATION
2.1 Packing List
Verify that all of the following items are included with the unit:
??
Indoor unit.
??
Outdoor unit (includes integrated antenna).
??
Pole mounting kit for the Outdoor unit (includes two brackets and four
sets of screws, nuts and washers).
??
110/220 VAC Power Cord.
??
20 meter Indoor-to-Outdoor cable.
??
3 shielded RJ-45 connectors.
??
Configuration Utility CD including manual.
2.2 Installation Overview
1. Select appropriate locations for the outdoor unit, the antenna and
the Indoor unit.
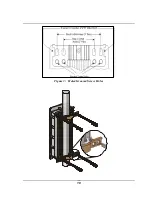
2. Mount the outdoor unit.
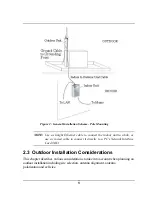
3. Connect a ground cable from the outdoor unit to an appropriate
grounding point.
4. Connect the Indoor-to-Outdoor cable to the outdoor unit and route it
to the location selected for the indoor unit. Refer to Appendix B for
instructions on preparing the Indoor-to-Outdoor cable.
5. Mount the indoor unit. Connect the Indoor-to-Outdoor cable to the
indoor unit’s Radio
port.
6. Connect the indoor
unit’s Ethernet port to the user’s network
using an Ethernet cable.
7. Configure the unit’s parameters.
8. Align the antenna and verify connectivity with any other units.
NOTE:
The indoor unit should be connected to the power source only
after
it has been connected to the outdoor
unit.
Summary of Contents for AirPremier DWL-1800
Page 15: ...10 Figure 3 Holes Grooves Screw Holes ...
Page 77: ...72 ...


