3
Proprietary items for COVR-3902
Q1: How to setup my COVR-3902?
Method 1: Setup by using a web browser
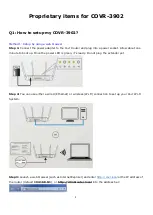
Step 1:
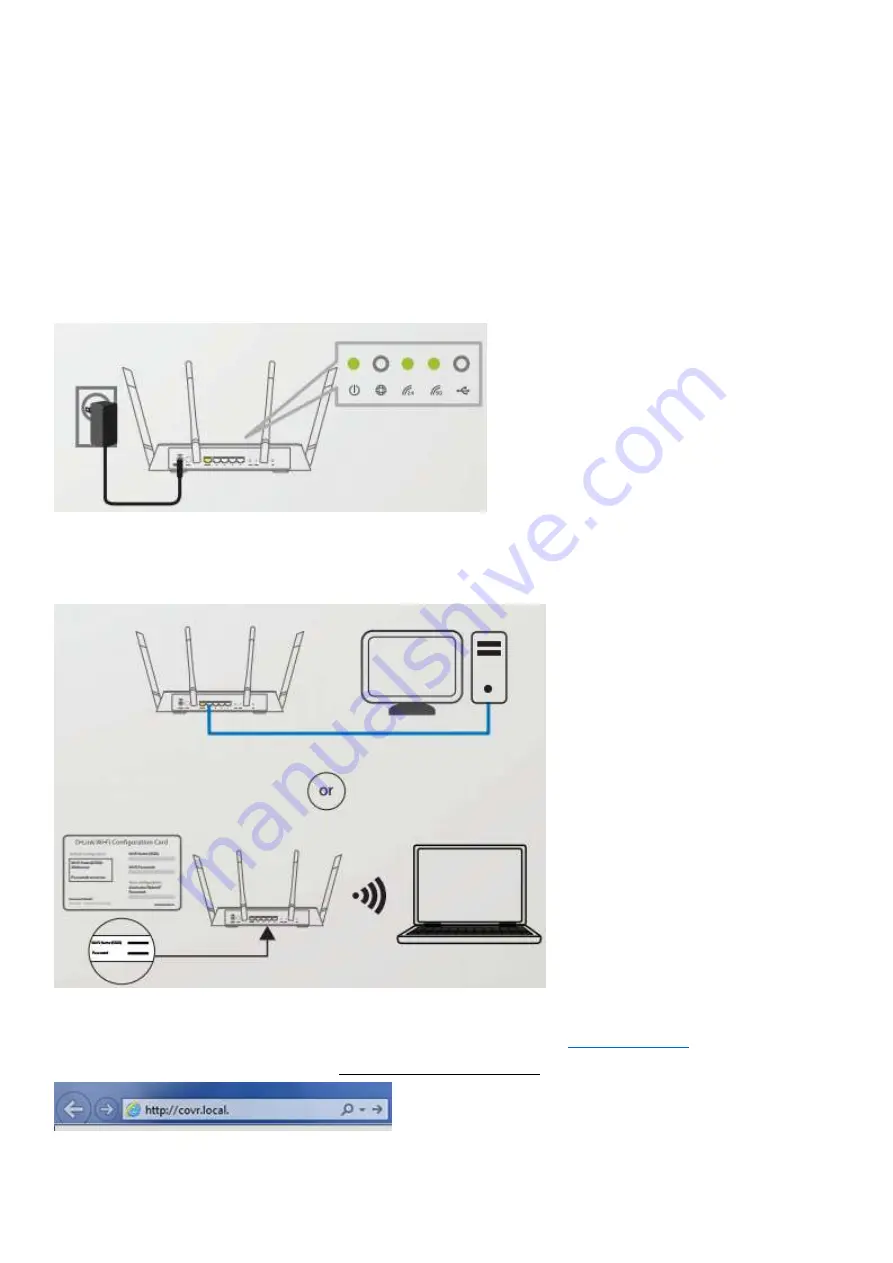
Connect the power adapter to the Covr Router and plug into a power socket. Allow about one
minute to boot up. Once the power LED is green, it’s ready. Do not plug the extender yet.
Step 2:
You can use either a wired (Ethernet) or wireless (Wi-Fi) connection to set up your Covr Wi-Fi
System.
Step 3:
Launch a web browser (such as Internet Explorer) and enter
http://covr.local
or the IP address of
the router (default
192.168.0.1
), or
http://dlinkrouter.local
into the address bar:
Summary of Contents for COVR-3902
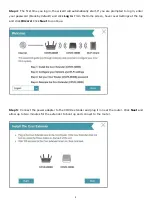
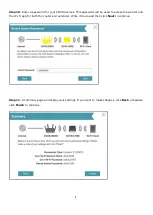
Page 6: ...5 Step 6 Once the following screen appears click Next to continue ...
Page 26: ...25 Step 2 Click Advanced Setting ...
Page 27: ...26 Step 3 Key in Mac address or select one Mac address from the drop down menu and click Save ...
Page 33: ...32 Step 2 Change the IP address as needed under Network Setting and click Save ...
Page 37: ...36 ...
Page 39: ...38 Step 5 Select your desired Drive Letter and Click Finish ...
Page 41: ...40 Q18 Does DIR 883 support VLAN No DIR 883 does not support VLAN feature ...
Page 43: ...42 Step 2 Click Select File to browse for the firmware ...
Page 44: ...43 Step 3 Click Upload Firmware you selected to upload ...
Page 48: ...47 Step 3 Click Save to save the configuration to local hard drive ...
Page 52: ...51 Step 3 Configure Guest Zone and click Save ...
Page 57: ...56 Step 2 Then click Advanced Settings ...
Page 58: ...57 Step 3 Then try to click SIP to disable SIP ALG and click Save ...
Page 63: ...62 Step 4 Click Save after finish adding your rule ...
Page 65: ...64 Step 3 Click Save after finish adding your rule ...
Page 74: ...73 Step 4 You ll be able to check the log in Kiwi Syslog Service Manager as below ...
Page 76: ...75 Q34 How to check statistics for router Click Management Statistics ...
Page 81: ...80 Step 2 Click to disable DNS Relay then click Save ...
Page 92: ...91 Step 3 Select Connect to a workplace ...
Page 99: ...98 Step 3 Fill in the WAN IP address Step 4 Fill in the Pre shared key ...
Page 100: ...99 Step 5 Connect to your VPN server ...
Page 101: ...100 Step 6 Make sure if you can ping your client under DUT ...
Page 106: ...105 ...


