background image

56

D-Link DAP-2230 User Manual

Section 3 - Configuration

Login Page Upload

In this window, users can upload a custom login page picture that will be used by the captive portal feature. Click the 

Browse 

button to navigate to the image file, located on the managing computer and then click the Upload button to initiate the upload.

Upload 

picture 

from file:

In this field the path to the image file that will be uploaded will be displayed. 

Alternatively, the path can be manually entered here.

Login Page 

Style List:

Select the wireless band and login style that will be used for each SSID. 

Click the Download button to download the login page template file and 

Click the Del button to delete the template file.

Login Page Upload

Summary of Contents for DAP-2230

Page 1: ......

Page 2: ...ed trademarks of D Link Corporation or its subsidiaries in the United States or other countries All other company or product names mentioned herein are trademarks or registered trademarks of their respective companies Copyright 2015 by D Link Corporation Inc All rights reserved This publication may not be reproduced in whole or in part without prior expressed written permission from D Link Corpora...

Page 3: ... Configuration 14 Web based Configuration Utility 14 Save and Activate Settings 15 Basic Settings 16 Wireless 16 Access Point mode 16 WDS with AP mode 18 WDS mode 20 Wireless Client mode 22 Authentication Types 24 Open System Shared Key Authentication 24 WPA WPA2 Personal Authentication 25 WPA WPA2 Enterprise Authentication 26 802 1x Authentication 27 LAN 28 IPv6 29 Advanced Settings 30 Performanc...

Page 4: ...C ACL 62 WLAN Partition 63 Traffic Control 64 Uplink Downlink Settings 64 QoS 65 Traffic Manager 66 Status 67 Device Information 67 Client Information 68 WDS Information 69 Channel Analyze 70 Statistics 71 Ethernet 71 WLAN Traffic 72 Log 73 View Log 73 Log Settings 74 Maintenance 76 Administration Settings 76 Limit Administrator 77 System Name Settings 78 Login Settings 79 Console Settings 80 SNMP...

Page 5: ... 95 Using Windows XP 95 Configure WPA PSK 96 Using Windows Vista 98 Configure WPA PSK 100 Using Windows 7 101 Troubleshooting 104 Wireless Basics 108 What is Wireless 109 Tips 111 Wireless Modes 112 Networking Basics 113 Check your IP address 113 Statically Assign an IP address 114 Technical Specifications 115 Antenna Pattern 117 Regulatory Information 118 ...

Page 6: ...age rating will cause damage and void the warranty for this product Package Contents DAP 2230 Wireless N PoE Access Point Quick Installation Guide 12 V DC 1 A Power Adapter included with some models Wall mounting bracket with mounting kit If any of the above items are missing please contact your reseller ...

Page 7: ...k AP Mode Web based Configuration Utility Requirements Computer with the following Windows Macintosh or Linux based operating system An installed Ethernet adapter Browser Requirements Microsoft Internet Explorer 7 Mozilla Firefox 12 0 Google Chrome 20 0 or Safari 4 or higher Windows Users Make sure you have the latest version of Java installed Visit www java com to download the latest version ...

Page 8: ...WLAN in offices or other workplaces hotels resorts trade shows and special events The DAP 2230 features four different operation modes Access Point Wireless Distribution System WDS WDS with AP and WirelessClientmode allowingittoadapttomanysituations AsastandardwirelessAccessPoint AP theDAP 2230canconnect to a wide range of devices that are 802 11 n g b compliant InWDS mode it can expand current wi...

Page 9: ...AP 2230 supports IEEE 802 3af PoE Power over Ethernet which enables it to be supplied with power over an Ethernet cable or IEEE 802 3af PoE switch ComprehensiveWeb Interface FinetunenetworksettingsusingtheDAP 2230 srobustnetwork basedconfiguration software Central WiFiManager management software compatibility The real time display of the network s topology and AP s information makes network config...

Page 10: ...r Manual Section 1 Product Overview Hardware Overview Top Panel Power Status LED 1 Static Green Ready Working Properly Flashing Green Transmitting Receiving data Flashing Red Malfunction during boot Solid Red Boot failure 1 ...

Page 11: ... 10 100 LAN PoE Port Connect an Ethernet cable to this device and your network Power may be supplied to this port via a LAN cable that is connected to a PoE injector or PoE switch 4 Reset Button Press and hold the reset button with a paperclip for at least 5 seconds to reset the device back to the factory default settings The LED will turn on for 2 seconds and then begin the reboot process 1 2 3 4...

Page 12: ...hysical Installation Before You Begin Professional Installation Required 1 Please seek assistance from a professional installer who is well trained in RF installation and knowledgeable about local regulations 2 This product is distributed through distributors and system installers with professional technicians and is not to be sold directly through retail stores ...

Page 13: ... To power the access point you can use one of the following 3 methods Method 1 Powered by PoE Switch Method 2 Powered by PoE Injector Method 3 Powered by DC Adapter 1 Connect one end of an Ethernet cable into the LAN PoE port on the DAP 2230 and then connect the other end to a PoE switch DAP 2230 PoE Switch ...

Page 14: ...to the DATA IN port on the PoE injector and the other end into a port on a switch router or computer 2 Connect one end of a different Ethernet cable into the P DATA OUT port on the PoE injector and the other end into the LAN PoE port on the DAP 2230 access point 3 Connect the supplied power adapter to the POWER IN connector on the PoE Injector 4 Plug the power adapter into a power outlet DAP 2230 ...

Page 15: ...me DAP 2230 models 1 Connect an Ethernet cable from your network device to the LAN PoE port on the DAP 2230 2 Connect the supplied power adapter to the DC IN connector on the DAP 2230 3 Plug the power adapter into a power outlet Method 3 DC Adapter DAP 2230 Switch or Router PC Power Adapter ...

Page 16: ...ce the mounting bracket on a wall or ceiling and mark holes where you will insert the screws with a marker Drill holes in the marked points and insert the plastic wall anchors Usethesuppliedscrewstoattachthemountingplatetothewall Reattach the DAP 2230 to the mounting bracket ...

Page 17: ...that is 1 5 feet thick 5 meters at a 45 degree angle appears to be almost 3 feet 1 meter thick At a 2 degree angle it looks over 42 feet 14 meters thick Position devices so that the signal will travel straight through a wall or ceiling instead of at an angle for better reception 3 Building materials make a difference A solid metal door or aluminum studs may have a negative effect on range Try to p...

Page 18: ...nly supports 1 mode at a time Function Access Point AP Create a wireless LAN WDS with AP Wirelessly connect multiple networks while still functioning as a wireless AP WDS Wirelessly connect multiple networks Wireless Client AP acts as a wireless network adapter for your Ethernet enabled device ...

Page 19: ...lity If you wish to change the default settings or optimise the performance of the DAP 2230 you may use the web based configuration utility To access the configuration utility open a web browser such as Internet Explorer and enter http 192 168 0 50 Type admin and then enter your password Leave the password blank by default If you get a Page Cannot be Displayed error please refer to Troubleshooting...

Page 20: ...es on most of the configuration screens in this section use the button at the bottom of each screen to save not activate your configuration changes You may change settings to multiple pages before activating Once you are finished click the Configuration button located at the top of the page and then click Save and Activate Save and Activate Settings ...

Page 21: ...e SSID can be up to 32 characters and is case sensitive SSID Visibility Enable or Disable SSID visibility Enabling this feature broadcasts the SSID across the network thus making it visible to all network users This feature is enabled by default Auto Channel Selection Enabling this feature automatically selects the channel that provides the best wireless performance Enable is set by default The ch...

Page 22: ...own menu to choose Open System Shared Key WPA Personal WPA Enterprise or 802 11x Select Open System to communicate the key across the network Select Shared Key to limit communication to only those devices that share the same WEP settings If multi SSID is enabled this option is not available SelectWPA Personaltosecureyournetworkusingapasswordanddynamic key changes No RADIUS server is required Selec...

Page 23: ... this feature broadcasts the SSID across the network thus making it visible to all network users Auto Channel Selection Enabling this feature automatically selects the channel that will provide the best wireless performance This feature is not supported in WDS with AP mode The channel selection process only occurs when the AP is booting up Channel To change the channel use the drop down menu to ma...

Page 24: ...uration Authentication Use the drop down menu to choose Open System or WPA Personal Select Open System to communicate the key across the network Select WPA Personaltosecureyournetworkusingapasswordanddynamic key changes No RADIUS server is required ...

Page 25: ...e broadcasts the SSID across the network thus making it visible to all network users Auto Channel Selection Enabling this feature automatically selects the channel that will provide the best wireless performance This feature is not supported in WDS with AP mode The channel selection process only occurs when the AP is booting up Channel To change the channel use the drop down menu to make the desir...

Page 26: ...uration Authentication Use the drop down menu to choose Open System or WPA Personal Select Open System to communicate the key across the network Select WPA Personaltosecureyournetworkusingapasswordanddynamic key changes No RADIUS server is required ...

Page 27: ...sts the SSID across the network thus making it visible to all network users Disabling SSID is not supported in Wireless Client mode Auto Channel Selection Enabling this feature automatically selects the channel that will provide the best wireless performance This feature is automatically enabled in Wireless Client mode The channel selection process only occurs when the AP is booting up Channel To ...

Page 28: ...PA Personal to secure your network using a password and dynamic key changes No RADIUS server is required Wireless Mac Clone Enable Check to enable clone MAC This feature will allow you to change the MAC address of the access point to the MAC address of a client MAC Source Select the MAC source from the drop down menu MAC Address Enter the MAC address that you would like to assign to the access poi...

Page 29: ...red Key Authentication Encryption Use the radio button to disable or enable encryption Key Type Select HEX or ASCII Key Size Select 64 Bits or 128 Bits Key Index 1 4 Select the 1st through the 4th key to be the active key Key Input up to four keys for encryption You will select one of these keys in the Key Index drop down menu Hexadecimal HEX digits consist of the numbers 0 9 and the letters A F A...

Page 30: ...p down menu Group Key Update Selecttheintervalduringwhichthegroupkeywillbevalid Thedefaultvalue of 3600 is recommended Select Manual to enter your key PassPhrase YoucanselectPeriodicalKeyChangetohavetheaccesspointautomatically change your PassPhrase Periodical Key Change Enter the Activate From time and the time in hours to change the key PassPhrase When you select WPA Personal please enter a Pass...

Page 31: ... Enterprise is selected you must also select a cipher type from the drop down menu Auto AES or TKIP Group Key Update Interval Selecttheintervalduringwhichthegroupkeywillbevalid Therecommended value is 3600 A lower interval may reduce data transfer rates Network Access Protection Enable or disable Microsoft Network Access Protection RADIUS Server Enter the IP address of the RADIUS server RADIUS Por...

Page 32: ...rval during which the group key will be valid 300 is the recommended value A lower interval may reduce data transfer rates RADIUS Server Enter the IP address of the RADIUS server RADIUS Port Enter the RADIUS port RADIUS Secret Enter the RADIUS secret 802 1x Authentication can only be enabled for Access Point mode ...

Page 33: ...erver in your network or if you wish to assign a static IP address to the DAP 2230 When Dynamic IP DHCP is selected the other fields here will be grayed out Please allow about two minutes for the DHCP client to be functional once this selection is made IP Address The default IP address is 192 168 0 50 Assign a static IP address that is within the IP address range of your network Subnet Mask Enter ...

Page 34: ...on The DAP 2230 will get an IPv6 address automatically or use Static to set IPv6 address manually When Auto is selected the other fields here will be grayed out IP Address Enter the LAN IPv6 address used here Prefix Enter the LAN subnet prefix length value used here Default Gateway Enter the LAN default gateway IPv6 address used here ...

Page 35: ...evice Ifthereareobstaclesorinterference theAPwillstepdown the rate This option is enabled in Mixed 802 11g and 802 11b mode The choicesavailableareBest Upto54 54 48 36 24 18 12 9 6 11 5 5 2or1 Beacon Interval 25 500 Beacons are packets sent by an access point to synchronize a wireless network Specify a value in milliseconds The default 100 is recommended Setting a higher beacon interval can help t...

Page 36: ... routers and an IGMP host wireless STA When IGMP snooping is enabled the AP will forward multicast packets to an IGMP host based on IGMP messages passing through the AP Multicast Rate Select the multicast rate for 2 4G band Multicast Bandwidth Control Adjust the multicast packet data rate here The multicast rate is supported in AP mode and WDS with AP mode including Multi SSIDs Maximum Multicast B...

Page 37: ...entage that has been specified the DAP 2230 will not allow clients to associate with the AP User Limit Set the maximum amount of users that are allowed access zero to 64 us ers to the device using the specified wireless band The default setting is 20 11n Preferred Use the drop down menu to Enable the 11n Preferred function The wire less clients with 802 11n protocol will have higher priority to co...

Page 38: ...ts Data Rate Threshold When Data Rate is selected in the Aging out drop down menu select the threshold of data rate here When the data rate of wireless clients is lower than the specified number the device disconnects the wireless clients ACL RSSI Use the drop down menu to Enable the function When enabled the de vice denies the connection request from the wireless clients with the RSSI lower than ...

Page 39: ... SSID s factory default setting is dlink The SSID can be easily changed to connect to an existing wireless network or to establish a new wireless network SSID Visibility Enable or Disable SSID visibility Enabling this feature broadcasts the SSID across the network thus making it visible to all network users Security The Multi SSID security can be Open System WPA Personal WPA Enterprise or 802 1x F...

Page 40: ...ple SSID and WDS connection can be assigned to VLANs as they are physical ports Any packet which enters the DAP 2230 without a VLAN tag will have a VLAN tag inserted with a PVID The VLAN List tab displays the current VLANs VLAN Status Use the radio button to toggle between Enable or Disable Next go to the Add Edit VLAN tab to add or modify an item on the VLAN List tab ...

Page 41: ...te step configure a port on the switch for handling VLAN tagged packets as described in the IEEE 802 1Q standard VLAN Status Use the radio button to toggle to Enable Next go to the Add Edit VLAN tab to add or modify an item on the VLAN List tab Port Name The name of the port is displayed in this column Tag VID The Tagged VID is displayed in this column Untag VID The Untagged VID is displayed in th...

Page 42: ...tab is used to configure VLANs Once you have made the desired changes click the Save button to let your changes take effect VLAN Status Use the radio button to toggle to Enable VLAN ID Provide an ID number between 1 and 4094 for the Internal VLAN VLAN Name Enter the VLAN to add or modify ...

Page 43: ...le the PortVLAN Identifier Auto Assign Status as well as to configure various types of PVID settings Click the Save button to let your changes take effect VLAN Status Use the radio button to toggle between Enable and Disable PVID Auto Assign Status Use the radio button to toggle PVID auto assign status to Enable ...

Page 44: ... Wireless Intrusion Protection window is used to set APs as All Valid Neighborhood Rogue and New Click the Save button to let your changes take effect AP List The choices include All Valid Neighbor Rogue and New Detect Click this button to initiate a scan of the network ...

Page 45: ...ply to from the drop down menu SSID Enter the name of your wireless network SSID Day s Toggle the radio button between AllWeek and Select Day s If the second option is selected check the specific days you want to apply the rule to All Day s Check this box to have your settings apply 24 hours a day Start Time Enter the start time for your rule If you selected All Day this option will be greyed out ...

Page 46: ...io buttons allow the user to enable or disable the RADIUS account Click the icon in the delete column to remove the RADIUS account We suggest you limit the number of accounts to under 30 User Name Enter a name to authenticate user access to the internal RADIUS server Password Enter a password to authenticate user access to the internal RADIUS server The length of your password should be 8 64 Statu...

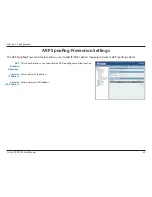
Page 47: ...P Spoofing Prevention feature allows users to add IP MAC address mapping to prevent ARP spoofing attacks ARP Spoofing Prevention This check box allows you to enable the ARP spoofing prevention function Gateway IP Address Enter a gateway IP address Gateway MAC Address Enter a gateway MAC address ...

Page 48: ...wnlink bandwidth of the device in Mbits per second Uplink Bandwidth Enter the uplink bandwidth of the device in Mbits per second Rule Type Use the drop down menu to select the type that is applied to the rule Available options are Allocate average BW for each station Allocate maximum BW for each station Allocate different BW for 11b g n stations and Allocte specific BW for SSID Allocate average BW...

Page 49: ...nd Use the drop down menu to toggle the wireless band 2 4 Ghz SSID Index Use the drop down menu to select the SSID for the specified wireless band Downlink Speed Enter the downlink speed limit in either Kbits sec or Mbits sec for the rule Uplink Speed Enter the upload speed limit in either Kbits sec or Mbits sec for the rule ...

Page 50: ...ill sync the Master AP to the Slave AP and the Backup Master AP when a Slave AP and a Backup Master AP join the AP array AP Array Name Enter an AP array name for the group here AP Array Password Enter an AP array password for the group here This password must be the same on all the APs in the group Scan AP Array List Click this button to initiate a scan of all the available APs currently on the ne...

Page 51: ...less Basic Settings Select this option to specify the basic wireless settings that the APs in the group will inherit Wireless Advanced Settings Select this option to specify the advanced wireless settings that the APs in the group will inherit Multiple SSID VLAN Select this option to specify the multiple SSIDs and VLAN settings that the APs in the group will inherit Advanced Functions Select this ...

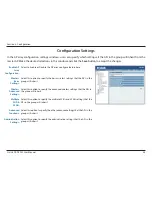
Page 52: ...ure here Initiate Auto RF Click the Auto RF Optimize button to initiate the auto RF optimization feature Auto Initiate Select the Enable or Disable the auto initiate feature here Auto Initiate Period After enabling the auto initiate option the auto initiate period value can be entered here This value must be between 1 and 24 hours RSSI Threshold Select the RSSI threshold value here This value is l...

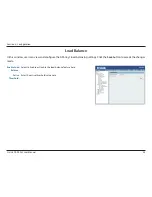
Page 53: ...ce In this window users can view and configure the AP array s load balancing settings Click the Savebutton to accept the changes made Enable Load Balance Select to Enable or Disable the load balance feature here Active Threshold Enter the active threshold value here ...

Page 54: ...ID Index Select the SSID for this Authentication Authentication Type Select the captive portal encryption type here Options to choose from are Web Redirection Username Password Passcode Remote RADIUS LDAP and POP3 Web Redirection State Web Redirection State is automatically enabled when Web Redirection Authentication is selected URL Path Select whether to use either HTTP or HTTPS here After select...

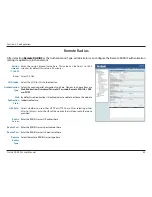
Page 55: ...4 Ghz SSID Index Select the SSID for this Authentication Authentication Type Select the captive portal encryption type here Options to choose from are Web Redirection Username Password Passcode Remote RADIUS LDAP and POP3 Web Redirection State By default web redirection is disabled Select enable to activate the website redirection feature URL Path Select whether to use either HTTP or HTTPS here Af...

Page 56: ...pe Select the captive portal encryption type here Options to choose from are Web Redirection Username Password Passcode Remote RADIUS LDAP and POP3 Web Redirection State By default web redirection is disabled Select enable to activate the website redirection feature URL Path Select whether to use either HTTP or HTTPS here After selecting either http or https enter the URL of the website that will ...

Page 57: ...tive portal encryption type here Options to choose from are Web Redirection Username Password Passcode Remote RADIUS LDAP and POP3 Web Redirection State By default web redirection is disabled Select enable to activate the website redirection feature URL Path Select whether to use either HTTP or HTTPS here After selecting either http or https enter the URL of the website that will be used in the sp...

Page 58: ...to choose from are Web Redirection Username Password Passcode Remote RADIUS LDAP and POP3 Web Redirection State By default web redirection is disabled Select enable to activate the website redirection feature URL Path Select whether to use either HTTP or HTTPS here After selecting either http or https enter the URL of the website that will be used in the space provided Server Enter the LDAP server...

Page 59: ... name here Account Attribute Enter the LDAP account attribute string here Identity This string will be used to search for clients Enter the identity s full path string here Alternatively select the Auto Copy checkbox to automatically add the generic full path of the web page in the identity field ...

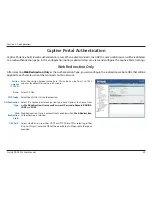
Page 60: ...n Type Select the captive portal encryption type here Options to choose from are Web Redirection Username Password Passcode Remote RADIUS LDAP and POP3 Web Redirection State By default web redirection is disabled Select enable to activate the website redirection feature URL Path Select whether to use either HTTP or HTTPS here After selecting either http or https enter the URL of the website that w...

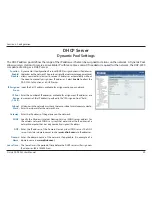
Page 61: ...ng computer and then click the Upload button to initiate the upload Upload picture from file In this field the path to the image file that will be uploaded will be displayed Alternatively the path can be manually entered here Login Page Style List Select the wireless band and login style that will be used for each SSID Click the Download button to download the login page template file and Click th...

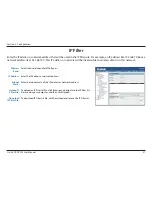
Page 62: ...ireless clients on this network Wireless Band Select the wireless band for MAC Bypass IP Address Enter the IP address or network address Subnet Mask Enter the subnet mask of the IP address or networks address Upload IP Filter File To upload an IP filter list file click Browse and navigate to the IP filter list file saved on your computer and then click Upload Download IP Filter File To download IP...

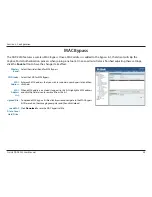
Page 63: ...Band Select the wireless band for MAC Bypass SSID Index Select the SSID for MAC Bypass MAC Address Enter each MAC address that you wish to include in your bypass list and then click Add MAC Address List When a MAC address is entered it appears in this list Highlight a MAC address and click the Delete icon to remove it from this list Upload File To upload a MAC bypass list file click Browse and nav...

Page 64: ... address available for assignment on your network IP Pool Range 1 254 Enter the number of IP addresses available for assignment IP addresses are increments of the IP address specified in the IP Assigned From field Subnet Mask Alldevicesinthenetworkmusthavethesamesubnetmasktocommunicate Enter the submask for the network here Gateway Enter the IP address of the gateway on the network WINS Specify th...

Page 65: ...ic Pool After you have assigned a static IP address to a device via its MAC address click Save the device will appear in the Assigned Static Pool at the bottom of the screen You can edit or delete the device in this list Assigned MAC Address Enter the MAC address of the device requesting association here Subnet Mask DefinethesubmaskoftheIPaddressspecifiedintheIPAssignedFromfield Gateway Specify th...

Page 66: ...ic pool Binding MAC Address The MAC address of a device on the network that is assigned an IP address from the DHCP dynamic pool Assigned IP Address The current corresponding DHCP assigned IP address of the device Lease Time The length of time that the dynamic IP address will be valid Current DHCP Static Pools These are the IP address pools of the DHCP server assigned through the static pool setti...

Page 67: ...hedeviceswithMACaddressesontheAccessControl List All other devices not on the list will be accepted Upload ACL File Enter each MAC address that you wish to include in your filter list and click Add WhenyouenteraMACaddress itappearsinthislist HighlightaMACaddress and click Delete to remove it from this list You may create an ACL list and upload it to the access point instead of manually entering th...

Page 68: ...to WLAN Access The default is Enable When disabled all data from the Ethernet port to associated wireless devices will be blocked Wireless devices can still send data to the Ethernet port Internal Station Connection The default value is Enable which allows stations to inter communicate by connectingtoatargetAP Whendisabled wirelessstationscannotexchange data through the AP ...

Page 69: ...specifyingdownlink uplink bandwidth rates in Mbits per second These values are also used in the QoS and Traffic Manager windows Once the desired uplink and downlink settings have been selected click the Save button to let your changes take effect Downlink Bandwidth The downlink bandwidth in Mbits per second Uplink Bandwidth Uplink Bandwidth The uplink bandwidth in Mbits per second ...

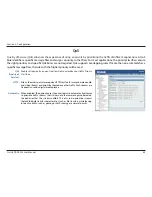
Page 70: ... will be used QoS Quality of Service Enable this option if you want to allow QoS to prioritize your traffic Priority Classifiers HTTP AllowstheaccesspointtorecognizeHTTPtransfersformanycommonaudio and video streams and prioritize them above other traffic Such streams are frequently used by digital media players Automatic When enabled this option causes the access point to automatically attempt to ...

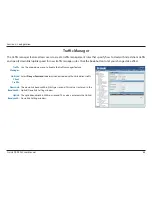
Page 71: ...er rules Click the Save button to let your changes take effect Traffic Manager Use the drop down menu to Enable the traffic manager feature Unlisted Client Traffic SelectDenyorForwardtodeterminehowtodealwithunlistedclienttraffic Downlink Bandwidth The downlink bandwidth in Mbits per second This value is entered in the Uplink Downlink Setting window Uplink Bandwidth TheuplinkbandwidthinMbitsperseco...

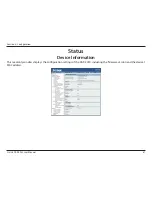
Page 72: ...ink DAP 2230 User Manual Section 3 Configuration Status Device Information This read only window displays the configuration settings of the DAP 2230 including the firmware version and the device s MAC address ...

Page 73: ...at the client is connected to Authentication Displays the type of authentication being used Signal Displays the client s signal strength Power Saving Mode Displays the status of the power saving feature This window displays the wireless client information for clients currently connected to the DAP 2230 The following information is available for each client communicating with the DAP 2230 ...

Page 74: ...ntication Displays the type of authentication being used Signal Displays the client s signal strength Status Displays the status of the power saving feature This window displays the Wireless Distribution System information for clients currently connected to the DAP 2230 The following information is available for each client communicating with the DAP 2230 ...

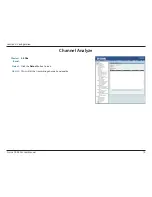
Page 75: ...70 D Link DAP 2230 User Manual Section 3 Configuration Wireless Band 2 4 Ghz Detect Click the Detect button to scan AP List This will list the transmitting channels and quality Channel Analyze ...

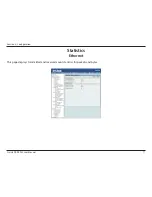
Page 76: ...71 D Link DAP 2230 User Manual Section 3 Configuration Statistics Ethernet This page displays transmitted and received count statistics for packets and bytes ...

Page 77: ...72 D Link DAP 2230 User Manual Section 3 Configuration WLAN Traffic This page displays wireless network statistics for data throughput transmitted and received frames and frame errors ...

Page 78: ...P s embedded memory displays system and network messages including a time stamp and message type The log informationincludesbutisnotlimitedtothefollowingitems coldstartAP upgradingfirmware clientassociateanddisassociate with AP and web login The web page holds up to 500 logs ...

Page 79: ...log Server Settings Enter the EU Directive Log Server IP Address Email Notification Check to enable Email notification Outgoing Mail Server SMTP Select the SMTP server from the drop down menu Authentication Check to enable authentication SSL TLS Check to enable SSL TLS authentication From Email Address Enter the From email address To Email Address Enter the destination email address Email Server A...

Page 80: ...0 User Manual Section 3 Configuration Password Enter your email password Confirm Password Enter your email password again Schedule Selectwhentosendthelogtoyouremail inhours Youwillreceiveanemail when the log is full too ...

Page 81: ...30 User Manual Section 3 Configuration Check one or more of the five main categories to view the various hidden administrator parameters and settings displayed on the next five pages Maintenance Administration Settings ...

Page 82: ...eters and settings Limit Administrator VLAN ID Check the box provided and the enter the specific VLAN ID that the administrator will be allowed to log in from Limit Administrator IP Check to enable the Limit Administrator IP address IP Range Enter the IP address range that the administrator will be allowed to log in from and then click the Add button ...

Page 83: ... System Name Settings Each of the five main categories display various hidden administrator parameters and settings System Name The name of the device The default name is D Link DAP 2230 Location The physical location of the device e g 72nd Floor D Link HQ ...

Page 84: ...me Enter a user name The default is admin Old Password When changing your password enter the old password here New Password When changing your password enter the new password here The password is case sensitive A is a different character than a The length should be between 0 and 12 characters Confirm Password Enter the new password a second time for confirmation purposes ...

Page 85: ...ain categories display various hidden administrator parameters and settings Status Status is enabled by default Uncheck the box to disable the console Console Protocol Select the type of protocol you would like to use Telnet or SSH Timeout Set to 1 Min 3 Mins 5 Mins 10 Mins 15 Mins or Never ...

Page 86: ...tor parameters and settings Status Check the box to enable the SNMP functions This option is disabled by default Public Community String Enter the public SNMP community string Private Community String Enter the private SNMP community string Trap Status Check the box to enable Trap Status Trap Server IP Enter the Trap Server IP address ...

Page 87: ...tion Status Check the box to enable Ping control Ping works by sending ICMP echo request packets to the target host and listening for ICMP echo response replies The default is enabled If not enabled the access point will not reply to pings Ping Control ...

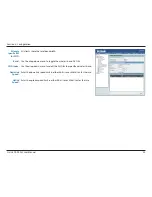
Page 88: ...The Central WiFiManager section is used to configure and manage a set of APs on the network into a single group in order to simplify management Central WiFiManager and AP Array may not be used simultaneously Enable Central WiFiManager Select to enable or disable the Central WiFiManager ...

Page 89: ...or the DAP 2230 from http support dlink com to your local computer use the Browse button to locate the firmware file on your computer Click Upload to updatethefirmwareversion Pleasedon tturnthepoweroffwhileupgrading Language Pack Upgrade You may load a language pack to display the utility in another language Click Browse to locate the language pack file on your local computer After selecting and o...

Page 90: ... Click the Browse button to locate a previously saved configuration file on your local computer After selecting the file click Upload to apply the configuration settings to the DAP 2230 Download Configuration File Click Download to save the current DAP 2230 configuration to your local computer ...

Page 91: ...me Zone Use the drop down menu to select your correct Time Zone Enable Daylight Saving Check the box to Enable Daylight Saving Time Daylight Saving Dates Use the drop down menu to select the correct Daylight Saving offset Set the Date and Time Manually You can either manually set the time for your AP here or you can click the Copy Your Computer s Time Settings button to copy the time from the comp...

Page 92: ...ser Manual Section 3 Configuration System System Settings Restart the Device Click Restart to restart the DAP 2230 Restore to Factory Default Settings Click Restore to restore the DAP 2230 back to factory default settings ...

Page 93: ...88 D Link DAP 2230 User Manual Section 3 Configuration Help Help Scroll down the Help page for topics and explanations ...

Page 94: ...eless Security This section will show you the different levels of security you can use to protect your data from intruders The DAP 2230 offers the following types of security WEP Wired Equivalent Privacy WPA Personal Wi Fi Protected Access WPA Enterprise Wi Fi Protected Access ...

Page 95: ...ieved to be as effective anymore WEP uses a passphrase or key to authenticate your wireless connection For 64 Bit WEP the key is an alpha numeric password that is 10 hex digits or an ASCII password consisting of 5 text characters The hex digits are either numbers from 0 to 9 or letters from A to F For 128 Bit WEP the key is an alpha numeric password that is 26 hex digits or an ASCII password with ...

Page 96: ...etup on the left side 2 Next to Security Mode select WEP Note ChoosingWEP means the device will only operate in Legacy wireless mode 802 11B G and will not provide 802 11N performance 3 Next to WEPEncryption select 64 Bit 10 hex digits 64 Bit 5 ASCII characters 128 Bit 26 hex digits or 128 Bit 13 ASCII characters 4 Next to WEP Key 1 enter a set of digits or letters from A to F or a string of text ...

Page 97: ...xtensible authentication protocol EAP WEP regulates access to a wireless network based on a computer s hardware specific MAC address which is relatively simple to be sniffed out and stolen EAP is built on a more secure public key encryption system to ensure that only authorized network users can access the network WPA PSK WPA2 PSK uses a passphrase or key to authenticate your wireless connection T...

Page 98: ...linkap local Click on Setup and then click Wireless Setup on the left side 2 Next to Security Mode select WPA Personal 3 Next to WPA Mode select Auto WPA or WPA2 WPA2 only or WPA only 4 Next to Cipher Type select TKIP AES or TKIP and AES 5 Next to Pre SharedKey enter a key The key is entered as a passphrase in ASCII format at both ends of the wireless connection The passphrase must be between 8 63...

Page 99: ...access point dlinkap local Click on Setup and then click Wireless Setup on the left side 2 Next to Security Mode select WPA Enterprise 3 Next to WPA Mode select Auto WPA or WPA2 WPA2 only or WPA only 4 Next to Cipher Mode select TKIP AES or Auto 5 Next to RADIUS Server IP Address enter the IP Address of your RADIUS server 6 Next to RADIUS Server Port enter the port you are using with your RADIUS s...

Page 100: ...e a site survey option similar to the Windows XP utility as seen below Right click on the wireless computer icon in your system tray lower right corner next to the time Select View Available Wireless Networks If you receive the Wireless Networks Detected bubble click on the center of the bubble to access the utility or The utility will display any available wireless networks in your area Click on ...

Page 101: ...onfiguring your wireless adapter If you are joining an existing network you will need to know the WEP key being used 2 Highlight the wireless network SSID you would like to connect to and click Connect 1 Open the Windows XP Wireless Utility by right clicking on the wireless computer icon in your system tray lower right corner of screen SelectViewAvailableWireless Networks ...

Page 102: ...work Connection box will appear Enter theWPA PSK passphrase and click Connect It may take 20 30 seconds to connect to the wireless network If the connection fails please verify that the WPA PSK settings are correct The WPA PSK passphrase must be exactly the same as on the wireless access point ...

Page 103: ...nvenient built in wireless utility Follow these instructions From the Start menu go to Control Panel and then click on Network and Sharing Center The utility will display any available wireless networks in your area Click on a network displayed using the SSID under Select a network to connect to and then click the Connect button ...

Page 104: ...ick Connect Anyway to continue The utility will display the following window to indicate a connection is being made The final window indicates the establishment of a successful connection Thenexttwopagesdisplaythewindowsusedtoconnecttoeither a WEP or a WPA PSK wireless network ...

Page 105: ...nnect to and then click the Connect button Enter the appropriate security key or passphrase in the field provided and then click the Connect button Configure WPA PSK It is recommended to enable WEP on your wireless bridge or access point before configuring your wireless adapter If you are joining an existing network you will need to know the WEP key being used ...

Page 106: ...WPA2 on your wireless router or access point before configuring your wireless adapter If you are joining an existing network you will need to know the security key or passphrase being used 1 Click on the wireless icon in your system tray lower right corner 2 The utility will display any available wireless networks in your area Wireless Icon ...

Page 107: ...would like to connect to and click the Connect button If you get a good signal but cannot access the Internet check your TCP IP settings for your wireless adapter Refer to the Networking Basics section in this manual for more information 4 The following window appears while your computer tries to connect to the router ...

Page 108: ...ase that is on your router and click Connect You can also connect by pushing the WPS button on the router It may take 20 30 seconds to connect to the wireless network If the connection fails please verify that the security settings are correct The key or passphrase must be exactly the same as on the wireless router ...

Page 109: ... The device has the utility built in to the device itself Your computer must be on the same IP subnet to connect to the web based utility Make sure you have an updated Java enabled web browser We recommend the following Microsoft Internet Explorer 7 and higher Mozilla Firefox 12 0 and higher Google Chrome 20 0 and higher Apple Safari 4 and higher Verifyphysicalconnectivitybycheckingforsolidlinklig...

Page 110: ... the login page for your the web management If you still cannot access the configuration unplug the power to the access point for 10 seconds and plug back in Wait about 30 seconds and try accessing the configuration If you have multiple computers try connecting using a different computer 2 What can I do if I forgot my password If you forgot your password you must reset your access point Unfortunat...

Page 111: ... in increments of ten Ex 1492 1482 1472 etc Note AOL DSL users must use MTU of 1400 To find the proper MTU Size you ll have to do a special ping of the destination you re trying to go to A destination could be another computer or a URL Click on Start and then click Run Windows 95 98 and Me users type in command Windows NT 2000 and XP users type in cmd and press Enter or click OK Once the window op...

Page 112: ... 1480 Once you find your MTU you can now configure your access point with the proper MTU size To change the MTU rate on your access point follow the steps below Open your browser enter the IP address of your access point 192 168 0 50 and click OK Enter your username Admin and password blank by default Click OK to enter the web configuration page for the device Click on Setup and then click Manual ...

Page 113: ...ssLANsareusedincreasinglyinbothhomeandofficeenvironments andpublicareassuchasairports coffeeshops and universities Innovative ways to utilize WLAN technology are helping people to work and communicate more efficiently Increased mobility and the absence of cabling and other fixed infrastructure have proven to be beneficial for many users Wireless users can use the same applications they use on a wi...

Page 114: ...oint A to point B But wireless technology has restrictions as to how you can access the network You must be within the wireless network range area to be able to connect your computer There are two different types of wireless networks Wireless Local Area Network WLAN and Wireless Personal Area Network WPAN Wireless Local Area Network WLAN In a wireless local area network a device called an Access P...

Page 115: ...phones laptops speakers and other devices that operate on batteries Who uses wireless Wireless technology has become so popular in recent years that almost everyone is using it whether it s for home office business D Link has a wireless solution for it Home Gives everyone at home broadband access Surf the web check email instant message etc Gets rid of the cables around the house Simple and easy t...

Page 116: ...owing where to start That s why we ve put together a few setup steps and tips to help you through the process of setting up a wireless network Tips Here are a few things to keep in mind when you install a wireless network Centralize your access point or Access Point Make sure you place the bridge access point in a centralized location within your network for the best performance Try to place the b...

Page 117: ...e All wireless clients will connect to an access point or wireless bridge Ad Hoc Directly connecting to another computer for peer to peer communication using wireless network adapters on each computer such as two or more wireless network Cardbus adapters An Infrastructure network contains an Access Point or wireless bridge All the wireless devices or clients will connect to the wireless bridge or ...

Page 118: ...r IP address please follow the steps below Click on Start Run In the run box type cmd and click OK Windows 7 Vista users type cmd in the Start Search box At the prompt type ipconfig and press Enter This will display the IP address subnet mask and the default gateway of your adapter Iftheaddressis0 0 0 0 checkyouradapterinstallation security settings and the settings on your router Some firewall so...

Page 119: ...2 Right click on the Local Area Connection which represents your network adapter and select Properties Step 3 Highlight Internet Protocol TCP IP and click Properties Step 4 Click Use the following IP address and enter an IP address that is on the same subnet as your network or the LAN IP address on your router Example If the router s LAN IP address is 192 168 0 1 make your IP address 192 168 0 X w...

Page 120: ...lt in 3 dBi antenna Wireless Frequency 2 4 GHz to 2 4835 GHz Maximum Transmit Power Ouput1 29 84dBm 964mW Operating voltage 48 VDC 0 5A or 802 3af PoE compliant 12 VDC 1 A auxillary power input Maximum Power Consumption 16 8 watts Operating Temperature 0 to 40 C 32 to 104 F Storage Temperature 20 to 65 C 4 to 149 F Operating Humidity 0 to 90 non condensing Storage Humidity 5 to 95 non condensing D...

Page 121: ...116 D Link DAP 2230 User Manual Appendix C Technical Specifications Certifications Safety Emissions FCC IC CE UL Wi Fi Certified ...

Page 122: ...Link DAP 2230 User Manual Appendix D Antenna Pattern Antenna Pattern Antenna Pattern Orientation H Plane E Plane Ceiling Mounted Wall Mounted Z Y X Wall E Plane Floor H Plane Z Y X Wall E Plane Floor H Plane ...

Page 123: ...he user is encouraged to try to correct the interference by one of the following measures Reorient or relocate the receiving antenna Increase the separation between the equipment and receiver Connect the equipment into an outlet on a circuit different from that to which the receiver is connected Consult the dealer or an experienced radio TV technician for help Non modifications Statement Any chang...

Page 124: ...ng interference that may cause undesired operation of the device Le présent appareil est conforme aux CNR d Industrie Canada applicables aux appareils radio exempts de licence L exploitation est autorisée aux deux conditions suivantes 1 l appareil ne doit pas produire de brouillage et 2 l utilisateur de l appareil doit accepter tout brouillage radioélectrique subi même si le brouillage est suscept...

Page 125: ...nd EFTA countries except in France where restrictive use applies This device may not be used for setting up outdoor radio links in France and in some areas the RF output power may be limited to 10 mW EIR P in the frequency range of 2454 2483 5 MHz For detailed information the end user should contact the national spectrum authority in France This equipment may be operated in AL AD BE BG DK DE FI FR...

Page 126: ...deloupe Martinique St Pierre et Miquelon Mayotte 2454 2483 5 MHz 100 mW indoor 10 mW outdoor Reunion et Guyane 2400 2483 5 MHz 100 mW Rest of EU community 2420 2483 5 MHz 100 mW R TTE 1999 5 EC WLAN 2 4 2 4835 GHz IEEE 802 11b g n Spectrum Regulation MHz Europa ETSI max EIRP Innenbereich max EIRP Außenbereich Europa 2400 2483 5 MHz 100 mW 100 mW Frankreich 2400 2454 MHz 100 mW 100 mW 2454 2483 5 M...

Page 127: ... Spanish PormediodelapresenteD LinkdeclaraqueelDAP 2230cumpleconlosrequisitosesenciales y cualesquiera otras disposiciones aplicables o exigibles de la Directiva 1999 5 CE Ελληνική Greek ΜΕΤΗΝ ΠΑΡΟΥΣΑ D Link ΔΗΛΩΝΕΙ ΟΤΙ DAP 2230 ΣΥΜΜΟΡΦΩΝΕΤΑΙ ΠΡΟΣΤΙΣ ΟΥΣΙΩΔΕΙΣ ΑΠΑΙΤΗΣΕΙΣ ΚΑΙ ΤΙΣ ΛΟΙΠΕΣ ΣΧΕΤΙΚΕΣ ΔΙΑΤΑΞΕΙΣ ΤΗΣ ΟΔΗΓΙΑΣ 1999 5 ΕΚ Français French Par la présente D Link déclare que l appareil DAP 2230 e...

Page 128: ...i postanowieniami Dyrektywy 1999 5 EC Português Portuguese D Link declara que este DAP 2230 está conforme com os requisitos essenciais e outras disposições da Directiva 1999 5 CE Slovensko Slovenian D Link izjavlja da je ta DAP 2230 v skladu z bistvenimi zahtevami in ostalimi relevantnimi določili direktive 1999 5 ES Slovensky Slovak D Link týmto vyhlasuje že DAP 2230 spĺňa základné požiadavky a v...

Page 129: ...e Doing so can cause a fire or an electrical shock by shorting out interior components The powering of this device must adhere to the power specifications indicated for this product Do not overload wall outlets and or extension cords as this will increase the risk of fire or electrical shock Do not rest anything on the power cord or on the device unless the device is made and expressly approved as...

Page 130: ...efore connecting the power cable to the power supply Unplug the power cable before removing the power supply If the system has multiple sources of power disconnect power from the device by unplugging all power cables from the power supplies Servicing Disassembling Do not service any product except as expressly set forth in your system documentation Opening or removing covers that are marked with t...

Page 131: ...painted metal surface on the chassis You can also take the following steps to help prevent damage from electrostatic discharge ESD 1 When unpacking a static sensitive component from its shipping carton do not remove the component from the antistatic packing material until you are ready to install the component in your system Just before unwrapping the antistatic packaging be sure to discharge stat...

Page 132: ...e about our environmentally responsible products and packaging please visit www dlinkgreen com DEUTSCH DE Dieses Symbol auf dem Produkt oder der Verpackung weist darauf hin dass dieses Produkt gemäß bestehender örtlicher Gesetze und Vorschriften nicht über den normalen Hausmüll entsorgt werden sollte sondern einer Wiederverwertung zuzuführen ist Bringen Sie es bitte zu einer von Ihrer Kommunalbehö...

Page 133: ...es et faiblement toxiques tant dans ses produits que ses emballages D Link recommande de toujours éteindre ou débrancher vos produits D Link lorsque vous ne les utilisez pas Vous réaliserez ainsi des économies d énergie et réduirez vos émissions de CO2 Pour en savoir plus sur les produits et emballages respectueux de l environnement veuillez consulter le www dlinkgreen com ESPAÑOL ES Este símbolo ...

Page 134: ...enti e dei propri prodotti Allo scopo di ridurre al minimo tale impatto D Link progetta e realizza i propri prodotti in modo che rispettino il più possibile l ambiente utilizzando materiali riciclabili a basso tasso di tossicità sia per i prodotti che per gli imballaggi D Link raccomanda di spegnere sempre i prodotti D Link o di scollegarne la spina quando non vengono utilizzati In questo modo si ...

Page 135: ...które odpowiednie do tego celu podmioty przyjmą takie produkty nieodpłatnie dlatego prosimy dostarczyć go do punktu zbiórki wskazanego przez lokalne władze Poprzez proces recyklingu i dzięki takiemu postępowaniu z produktem oraz jego opakowaniem pomogą Państwo chronić środowisko naturalne i dbać o ludzkie zdrowie D Link i środowisko W D Link podchodzimy w sposób świadomy do ochrony otoczenia oraz ...

Page 136: ...a adrese www dlinkgreen com MAGYAR HU Ez a szimbólum a terméken vagy a csomagoláson azt jelenti hogy a helyi törvényeknek és szabályoknak megfelelően ez a termék nem semmisíthető meg a háztartási hulladékkal együtt hanem újrahasznosításra kell küldeni Kérjük hogy a termék élettartamának elteltét követően vigye azt a helyi hatóság által kijelölt gyűjtőhelyre A termékek egyes helyeken ingyen elhelye...

Page 137: ...ormasjon angående våre miljøansvarlige produkter og forpakninger kan du gå til www dlinkgreen com DANSK DK Dette symbol på produktet eller emballagen betyder at dette produkt i henhold til lokale love og regler ikke må bortskaffes som husholdningsaffald mens skal sendes til genbrug Indlever produktet til et indsamlingssted som angivet af de lokale myndigheder når det er nået til slutningen af dets...

Page 138: ...ä Toimimalla näin autat säästämään energiaa ja vähentämään hiilidioksiidipäästöjä Lue lisää ympäristöystävällisistä D Link tuotteista ja pakkauksistamme osoitteesta www dlinkgreen com SVENSKA SE Den här symbolen på produkten eller förpackningen betyder att produkten enligt lokala lagar och föreskrifter inte skall kastas i hushållssoporna utan i stället återvinnas Ta den vid slutet av dess livsläng...

Page 139: ...rma ajuda a preservar o ambiente e protege a saúde humana A D Link e o ambiente Na D Link compreendemos e comprometemo nos com a redução do impacto que as nossas operações e produtos possam ter no ambiente Para minimizar este impacto a D Link concebe e constrói os seus produtos para que estes sejam o mais inofensivos para o ambiente possível utilizando meteriais recicláveis e não tóxicos tanto nos...

Reviews: