background image

27

D-Link DCS-1100/1130 User Manual

Section 4 - Configuration

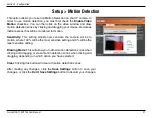
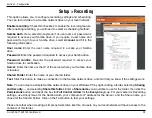
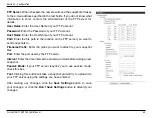
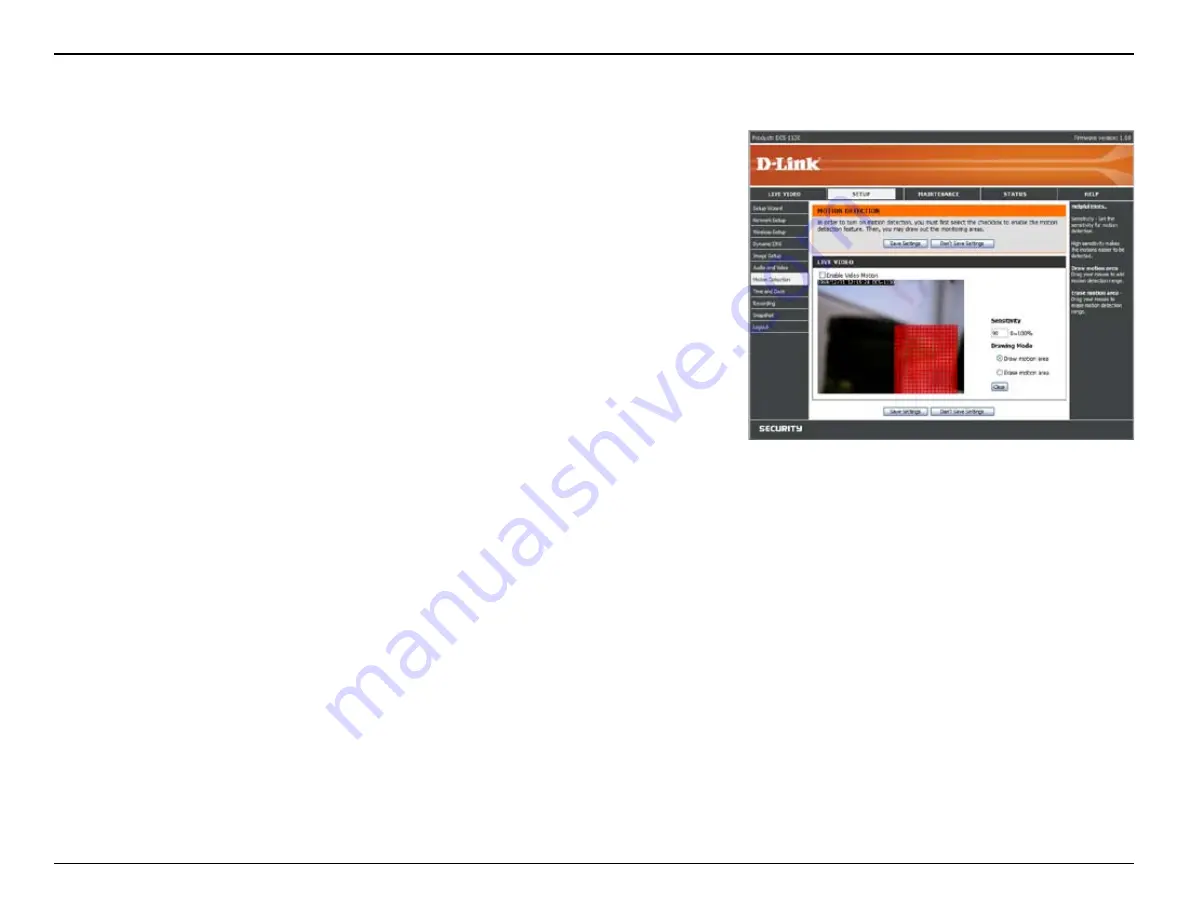
This option allows you to set up Motion Detection on your IP camera. In 

order to use motion detection, you must first check the 

Enable Video 

Motion

 checkbox. You can then click on the video window and draw 

motion detection zones by clicking and dragging your mouse. Red areas 

indicate areas that will be monitored for motion.

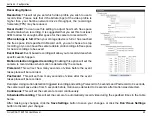
Sensitivity

:  This  setting  adjusts  how  sensitive  the  camera  will  be  to 

motion, where 100% will be the most sensitive setting and 0% will be the 

least sensitive setting.

Drawing Mode

: This will allow you to draw motion detection zones when 

clicking and dragging, or erase motion detection zones when clicking and 

dragging, depending on which option you have selected.

Clear

: Clicking this button will clear all motion detection zones.

After  making  any  changes,  click  the 

Save  Settings

  button  to  save  your 

changes, or click the 

Don’t Save Settings

 button to discard your changes.

Setup > Motion Detection

Summary of Contents for DCS-1130 - mydlink-enabled Wireless N Network Camera

Page 1: ......

Page 2: ...Portal provides detailed information on usage and configuration of your product with www mydlink com page 7 Section 3 Installation describes how to install the camera on your network page 12 Section 4 Configuration describes how to configure the settings on your DCS 1100 1130 camera page 16 Section 5 Troubleshooting explains how to resolve common issues page 41 Section 6 Appendix contains special ...

Page 3: ...tion Manual Revisions Trademarks D Link and the D Link logo are trademarks or registered trademarks of D Link Corporation or its subsidiaries in the United States or other countries All other company or product names mentioned herein are trademarks or registered trademarks of their respective companies Copyright 2009 by D Link Corporation All rights reserved This publication may not be reproduced ...

Page 4: ...amera Base 13 Connect the Ethernet Cable 14 Connect the Power Adapter 14 Connecting to a Wireless Network Using WPS DCS 1130 15 Using the Configuration Menu 16 Web based Configuration Utility 17 Live Video 18 Live Video Camera 18 Setup 19 Setup Wizard 19 Setup Network Setup 20 Setup Wireless DCS 1130 only 22 Setup Dynamic DNS 23 Setup Image Setup 24 Setup Audio and Video 25 Setup Motion Detection ...

Page 5: ... DCS 1100 1130 User Manual Table of Contents Appendix A Installing the DCS 1100 1130 on a Router Without UPnP 43 Appendix B Technical Specifications 49 Contacting Technical Support 51 Warranty 52 Registration 58 ...

Page 6: ...s with remote monitoring and motion detection features for a complete and cost effective home security solution Product Overview Remotely monitor your home or office over the Internet Web based Recording to a PC s local hard drive no software required Camera Setup Wizard technology simplifies setup by automatically configuring network settings Includes D ViewCam 2 0 for multi camera monitoring and...

Page 7: ...a standard Web browser administrators can configure and manage the Network Camera directly from its own Web page via the Intranet or Internet This means you can access your DCS 1100 1130 anytime from anywhere in the world Remote Monitoring Utility The D ViewCam application adds enhanced features and functionality for the Network Camera and allows administrators to configure and access the Network ...

Page 8: ...r CAT5 Ethernet Cable Camera Base and Mounting Kit Quick Installation Guide CD ROM Package Contents Note Using a power supply with a different voltage rating than the one included with the DCS 1100 1130 will cause damage and void the warranty for this product If any of the above items are missing from your package please contact your retailer ...

Page 9: ... ActiveX controls enabled Web based Configuration Utility Requirements Computer with the following Windows based operating system An installed Ethernet adapter Browser Requirements Internet Explorer 6 0 or higher Firefox 1 5 or higher Safari 1 0 or higher with Java 1 3 1 or higher Windows Users Make sure you have the latest version of Java installed Visit www java com to download the latest versio...

Page 10: ...s when pressed for 10 seconds WPS Button DCS 1130 Allows you to connect to a WPS router Focus ring Turning the ring will allow you to focus the camera Camera microphone Picks up sound from the surrounding area Camera lens Records video from the surrounding area Status LED Lights up and changes color to indicate the camera s status ...

Page 11: ...rview Back Power jack Connects to the power adapter Ethernet port Connects to a PC or network through an Ethernet connection Antenna connectors DCS 1130 Connects to the wireless antennas Camera base mounting points Allows you to attach the camera base or another mounting unit ...

Page 12: ...tal After registering your DCS 1100 1130 camera with a mydlink account in the Camera Installation Wizard You will be able to remotely access your camera from the www mydlink com website After signing in to your mydlink account you will see a screen similar to the following ...

Page 13: ...ntly cannot be accessed remotely If your camera is offline try the following Check to make sure that the Internet connection to your camera is working properly Try restarting your Internet router Check your camera s cable connections and make sure they are secure Check to make sure that the LED on your camera is lit solid green If you still cannot access your camera reset your camera and run the C...

Page 14: ...en the Live Video tab will be selected by default If the camera is available a Live Video feed will be displayed Video will be shown at VGA resolution 640x480 if viewing your camera from a PC on the same local network or at QVGA resolution 320x240 if viewing your camera from a PC on a remote network ...

Page 15: ...ydlink Portal Camera Settings The Camera Settings tab allows you to access your camera s configuration interface To open your camera s configuration interface click Camera web page and enter the password exactly as listed on the Camera Settings page ...

Page 16: ... camera s configuration interface Clicking on the Show Password checkbox will either show or hide the password Clicking on the Password will open a window for you to log in to your camera s configuration interface Then it will open the Maintenance Admin page where you can change your Password mydlink No This shows you the mydlink number of your device Model Name This shows you the model name of yo...

Page 17: ...OM drive to start the autorun program The CD ROM will open the Camera Installation Wizard Simply click Start to go through the Installation Wizard which will help you through the entire installation process from connecting your hardware to configuring your camera Starting the Camera Installation Wizard Installation ...

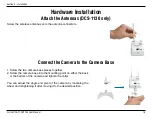
Page 18: ...e antenna connectors Connect the Camera to the Camera Base 1 Screw the two camera base pieces together 2 Screw the camera base into the mounting point on either the back or the bottom of the camera and tighten the collar You can adjust the angle and pivot of the camera by loosening the wheel and retightening it after moving it to the desired position ...

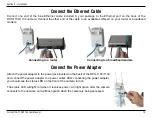
Page 19: ...f the cable to an available LAN port on your router or broadband modem Attach the power adapter to the power jack located on the back of the DCS 1100 1130 and connect the power adapter to a power outlet After connecting the power adapter you should see the status LED on the front of the camera turn on The status LED will light red when it receives power will light green after the camera connects t...

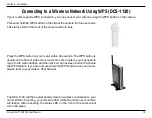
Page 20: ...on on your router within 60 seconds The WPS button is usually on the front or side of your router On some routers you may need to log in to the web interface and then click on an onscreen button to activate the WPS feature If you are not sure where the WPS button is on your router please refer to your router s User Manual The DCS 1130 will then automatically create a wireless connection to your ro...

Page 21: ...our DCS 1100 1130 At the end of the wizard click Go To Camera or enter the IP address of your camera into a web browser such as Internet Explorer To log in use the User name admin and the password you created in the Installation Wizard If you did not create a password the default password is blank After entering your password click OK Note If you are directly connecting your PC to the camera or if...

Page 22: ...7 D Link DCS 1100 1130 User Manual Section 4 Configuration Web based Configuration Utility Use the following sections to set up and configure your network camera LIVE VIDEO SETUP MAINTENANCE STATUS HELP ...

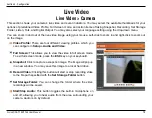
Page 23: ...orage Folder button Set Storage Folder You can change the folder where the video recordings will be saved Start Stop Audio This button toggles the built in microphone on and off allowing you to hear audio from the area surrounding your camera Audio is on by default Live Video Camera This section shows your camera s live video and event indicators You may select the available thumbnails for your op...

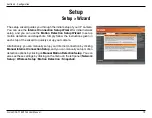
Page 24: ... motion detection and snapshots Simply follow the instructions given in each step of the wizard to quickly set up your camera Alternatively you can manually set up your Internet connection by clicking Manual Internet Connection Setup and you can manually set up motion detection options by clicking on Manual Motion Detection Setup You can also see these settings by clicking on the menu on the left ...

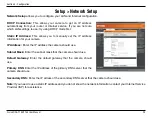
Page 25: ... the IP address information for your camera IP Address Enter the IP address the camera should use Subnet Mask Enter the subnet mask that the camera should use Default Gateway Enter the default gateway that the camera should use Primary DNS Enter the IP address of the primary DNS server that the camera should use Secondary DNS Enter the IP adress of the secondary DNS server that the camera should u...

Page 26: ... set to 554 You may change the port number if using multiple cameras Note You MUST also set up your router gateway for Port Forwarding Mapping this will enable remote viewing of your camera via the Internet Please refer to your router s instruction manual on how to open up ports For additional help on configuring your camera to work with your router please refer to Appendix A Installing the DCS 11...

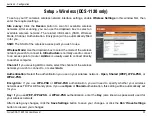
Page 27: ...Hoc mode select the channel of the wireless network you wish to connect to or select Auto Authentication Select the authentication you use on your wireless network Open Shared WEP WPA PSK or WPA2 PSK Encryption If you use WPA PSK or WPA2 PSK authentication you will need to specify whether your wireless network uses TKIP or AES encryption If you use Open or Shared authentication this setting will b...

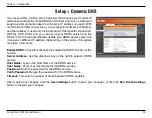
Page 28: ...y update your DDNS server every time it receives a different IP address Depending on the service this update may take a few hours Enable DDNS Check this checkbox to enable the DDNS function of the camera Server Address Use the dropdown box on the right to select a DDNS service Host Name Type in the Host Name of the DDNS service User Name Enter your User Name for the DDNS service Password Enter the...

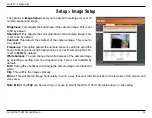
Page 29: ...he camera sensor s setting to avoid the image flickering under certain light sources such as florescent lights This is set to 60Hz by default White balance You can change the white balance of the camera image by selecting a setting from the dropdown box This is set to Auto by default B W Ticking this checkbox will change the camera image into black and white Flip This will flip the image verticall...

Page 30: ...will provide better quality video When the Encode Type is set to MJPEG you cannot change the bps setting Also available bps settings may change depending on what the Encode Type Sensor Output Resolution and FPS settings are set to JPEG Quality This sets the JPEG quality of any manual snapshots you take when this video profile is selected RTSP URL This setting allows you to set a suffix for your ca...

Page 31: ...e when Night Mode is enabled and the camera is viewing a low light scene Light Source Here you can set the kind of lighting used in the area your camera is monitoring to improve the image quality of the video Enable Microphone Checking this box will enable you to listen to audio picked up by the camera s microphone This will allow you to hear what is happening near your camera Volume This sets the...

Page 32: ...ensitivity This setting adjusts how sensitive the camera will be to motion where 100 will be the most sensitive setting and 0 will be the least sensitive setting Drawing Mode This will allow you to draw motion detection zones when clicking and dragging or erase motion detection zones when clicking and dragging depending on which option you have selected Clear Clicking this button will clear all mo...

Page 33: ...ing Offset This will set the Daylight Saving adjustment that will be used Daylight Saving Date This will set the beginning and ending dates of the Daylight Saving period Synchronize with NTP Server Checking this checkbox will allow the camera to automatically synchronize its clock with an NTP server NTP Server Use the dropdown box to the right to select an NTP server to use or you can type one in ...

Page 34: ...mba drive for verification Server Enter the name or the IP of the server where your Samba drive is located Shared Folder Enter the name of your shared folder Test Click this button to make a connection to the Samba network drive and it will let you know if the settings work Note You can create a simple Samba network drive on your Windows PC by right clicking a folder selecting Sharing and Security...

Page 35: ...saved Event Based Event based recording will allow you to record video when specific events happen Motion detection triggered recording Enabling this option will set the camera to record video when motion is detected by the camera Prerecord This will set how many seconds of video before the event takes place will be recorded Postrecord This will set how many seconds of video after the event takes ...

Page 36: ... whenever motion is detected Continuous FTP only This will set the camera to take snapshots continuously at intervals specified in FTP Server Interval below You can only save to an FTP server when taking continuous snapshots Scheduled FTP only This will set the camera to take snapshots continuously at intervals specified in FTP Server Interval below according to schedule you define by checking day...

Page 37: ...the username or login name for your e mail account Password Enter the password for your e mail account SMTP Mail Server Enter the SMTP server for your e mail account Sender E mail Address Enter the e mail address you want to appear as the From e mail address in the snapshot e mail Recipient E mail Address Enter the e mail address you want to send your snapshots to Port Enter the port used by your ...

Page 38: ... Enter the file path to the location on the FTP server you want to send snapshots to Filename Prefix Enter the prefix you want to attach to your snapshot files Port Enter the port used by the FTP server Interval Enter the time interval the camera will wait before taking a new snapshot Passive Mode If your FTP server requires you to use passive mode check this box Test Clicking this button will tak...

Page 39: ...e new admin password again for verification After entering the new password again click on the Save button to save your changes Add User Account The admin can create user accounts to allow others to log in to your camera to view the live camera feed User Name Enter the User Name you wish to use for the new user account New Password Enter the password for the new user account Retype Password Re ent...

Page 40: ...ra Name Enter the name of your camera Enable OSD This will enable the information bar On Screen Display OSD to appear when viewing video Label This is the text label that will appear on the OSD Show time If checked the current time will be displayed on the OSD LED light This will turn the camera s front LED indicator on or off After making any changes to this section click the Save button to save ...

Page 41: ...to save the current configuration to a hard drive Load From Local Hard Drive To load a saved configuration click on the Browse button to select a configuration file from your hard drive Then click the Load Configuration button to load the new configuration Restore To Factory Defaults Click this button to reset all settings to their factory defaults If you choose to reset your settings you will nee...

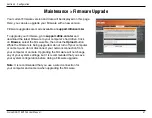
Page 42: ... the latest firmware to your computer s hard drive Click on Browse select the firmware file then click the Upload button While the firmware is being upgraded do not turn off your computer or camera and do not disconnect your network connection from your computer or camera Upgrading the firmware will not change any of your system settings but it is recommended that you save your system configuratio...

Page 43: ...38 D Link DCS 1100 1130 User Manual Section 4 Configuration Status This screen shows you various information about your camera and its current settings Status Device Info ...

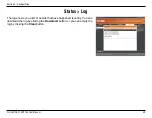
Page 44: ...30 User Manual Section 4 Configuration The log shows you a list of events that have happened recently You can download the log by clicking the Download button or you can empty the log by clicking the Clear button Status Log ...

Page 45: ...40 D Link DCS 1100 1130 User Manual Section 4 Configuration Help The Help screen provides you with support information about the DCS 1100 1130 for your reference ...

Page 46: ...ess simply go through the Camera Installation Wizard included on the Installation CD that came in your package You can also download the wizard from the following websites DCS 1100 http dcs 1100 mydlink com DCS 1130 http dcs 1130 mydlink com After going through the wizard you should see Remote Status Enabled on the summary page If you see Remote Status Disabled make sure that the front LED on your...

Page 47: ...there another way to access my camera remotely over the Internet Yes you can access your camera over the Internet through the following URL after successfully installing your camera through the Camera Installation Wizard http mydlink No mydlink com For example if your camera s mydlink No was 12345678 you would be able to access your camera remotely by opening your web browser and going to http 123...

Page 48: ...wish to connect or if you do not want to use DMZ follow these steps to allow multiple remote access to your cameras 1 Identify your camera on the network 2 Assign a local IP address and port for your camera 3 Determine your router s WAN IP Address Enable Remote Viewing 4 Open virtual server ports for your router Enable Remote Viewing 1 Identify Your Camera on the Network Log in to your camera s we...

Page 49: ... local IP address is required to configure your camera and to view your camera within your local network You may use the default camera IP address of 192 168 0 20 If you wish to use a different IP address be sure that the camera settings correspond to your network settings The Default Gateway will be the IP address of your router s local IP address e g 192 168 0 1 if you are using a D Link router ...

Page 50: ...o run a Web server or your ISP blocks access on port 80 you MUST open a second port and designate a new Web server port 800 801 802 etc Similarly if port 554 is not available you will need to open a different port for RTSP Note Be sure to take note of these settings since these same settings will be used to configure your router Note Some ISPs block traffic on commonly used ports like port 80 to d...

Page 51: ... to clarify the configuration process Note Because a dynamic WAN IP address can change from time to time depending on your ISP you may want to obtain a Static IP address from your ISP A Static IP address is a fixed IP address that will not change over time and will be more convenient for you to use to access your camera from a remote location You can also use DDNS to obtain an IP address Please re...

Page 52: ...ra s IP address in the private local IP field Select TCP under Traffic Type Enter the HTTP port your camera is set to use in the Start and End settings Note If you are using more than one camera you will need to select a different public port for each camera If you cannot use port 80 for your public port for example if you are already running a web server select a different public port for your ca...

Page 53: ... 3gpp For example if your camera s IP is 192 168 0 35 and you set the RTSP port to 100 rtsp 192 168 0 35 100 3gpp To access your camera from a computer on your local home network simply enter the local IP address of your camera i e 192 168 0 35 If using a port other than port 80 you must enter the IP address followed by a colon and the assigned port number Note If your camera is connected to the I...

Page 54: ... Supports Full Duplex operation MDI MDIX auto negotiation 802 3x Flow Control support for Full Duplex mode Wireless Connectivity DCS 1130 only 802 11 n g Wireless with WEP WPA WPA2 Security WPS Support Sensor inch color VGA CMOS Sensor Lens Focal length 5 01mm F2 8 Microphone Signal noise ratio 40dB 3dB Omni directional Reset Button Reset to factory default Video Codec MPEG 4 MJPEG simultaneous du...

Page 55: ...0 240VAC 50 60Hz Output 5VDC 2 5A Powered by an external power adapter Maximum power consumption DCS 1100 4W DCS 1130 6 3W Dimensions WxDxH 120 0mm x 81 5mm x 38 0mm without bracket and stand Weight DCS 1100 250g without bracket and stand DCS 1130 280g without bracket and stand Operation Temperature 0 to 40 C 32 to 104 F Storage Temperature 20 to 70 C 4 to 158 F Humidity 20 80 RH non condensing Em...

Page 56: ...Hardware Revision located on the label on the bottom of the Network Camera e g rev A1 Serial Number s n number located on the label on the bottom of the Network Camera You can find software updates and user documentation on the D Link website as well as frequently asked questions and answers to technical issues For customers within the United States Phone Support 877 354 6555 Internet Support http...

Page 57: ...under this Limited Warranty will be at D Link s option to repair or replace the defective Hardware during the Warranty Period at no charge to the original owner or to refund the actual purchase price paid Any repair or replacement will be rendered by D Link at an Authorized D Link Service Office The replacement hardware need not be new or have an identical make model or part D Link may at its opti...

Page 58: ...censee for the non conforming Software will be refunded by D Link provided that the non conforming Software and all copies thereof is first returned to D Link The license granted respecting any Software for which a refund is given automatically terminates Non Applicability of Warranty The Limited Warranty provided hereunder for Hardware and Software portions of D Link s products will not be applie...

Page 59: ...and return shipping charges for any product that is not packaged and shipped in accordance with the foregoing requirements or that is determined by D Link not to be defective or non conforming What Is Not Covered The Limited Warranty provided herein by D Link does not cover Products that in D Link s judgment have been subjected to abuse accident alteration modification tampering negligence misuse ...

Page 60: ...SOLE REMEDY FOR A BREACH OF THE FOREGOING LIMITED WARRANTY IS REPAIR REPLACEMENT OR REFUND OF THE DEFECTIVE OR NONCONFORMING PRODUCT THE MAXIMUM LIABILITY OF D LINK UNDER THIS WARRANTY IS LIMITED TO THE PURCHASE PRICE OF THE PRODUCT COVERED BY THE WARRANTY THE FOREGOING EXPRESS WRITTEN WARRANTIES AND REMEDIES ARE EXCLUSIVE AND ARE IN LIEU OF ANY OTHER WARRANTIES OR REMEDIES EXPRESS IMPLIED OR STAT...

Page 61: ...ver Connect the equipment into an outlet on a circuit different from that to which the receiver is connected Consult the dealer or an experienced radio TV technician for help FCC Caution Any changes or modifications not expressly approved by the party responsible for compliance could void the user s authority to operate this equipment This device complies with Part 15 of the FCC Rules Operation is...

Page 62: ...nce and 2 this device must accept any interference received including interference that may cause undesired operation IMPORTANT NOTE Radiation Exposure Statement This equipment complies with IC radiation exposure limits set forth for an uncontrolled environment This equipment should be installed and operated with minimum distance 20cm between the radiator and your body This device has been designe...

Page 63: ...ppendix E Registration 58 D Link DCS 1100 1130 User Manual Version 1 3 March 03 2009 Product registration is entirely voluntary and failure to register will not diminish your warranty rights Registration ...

Reviews: