D-Link Switch User Manual
2
Hardware Installation
This chapter provides unpacking and installation information for the D-Link DES-1018P/MP.
Step 1: Unpacking
Open the shipping carton and carefully unpack the contents. Please consult the packing list to make sure all
items are present and undamaged.
One D-Link DES-1018P/MP device
One power cord
One power cord retainer
One rack-mount kit and rubber feet
One Multi-lingual Quick Installation Guide
If any item is found missing or damaged, please contact
your local retailer
for replacement.
Step 2: Switch Installation
Please follow the steps below to set up the Switch:
1. Install the DES-1018P/MP in a cool and dry place. Refer to the Technical Specifications for the
acceptable operating temperature and humidity ranges.
2. Install the Switch in a site free from strong electromagnetic source, vibration, dust, and direct
sunlight.
3. Leave at least 10 cm of space at the left and right-hand side of the Switch for ventilation.
4. Visually inspect the power jack and make sure that it is fully secured to the power adapter.
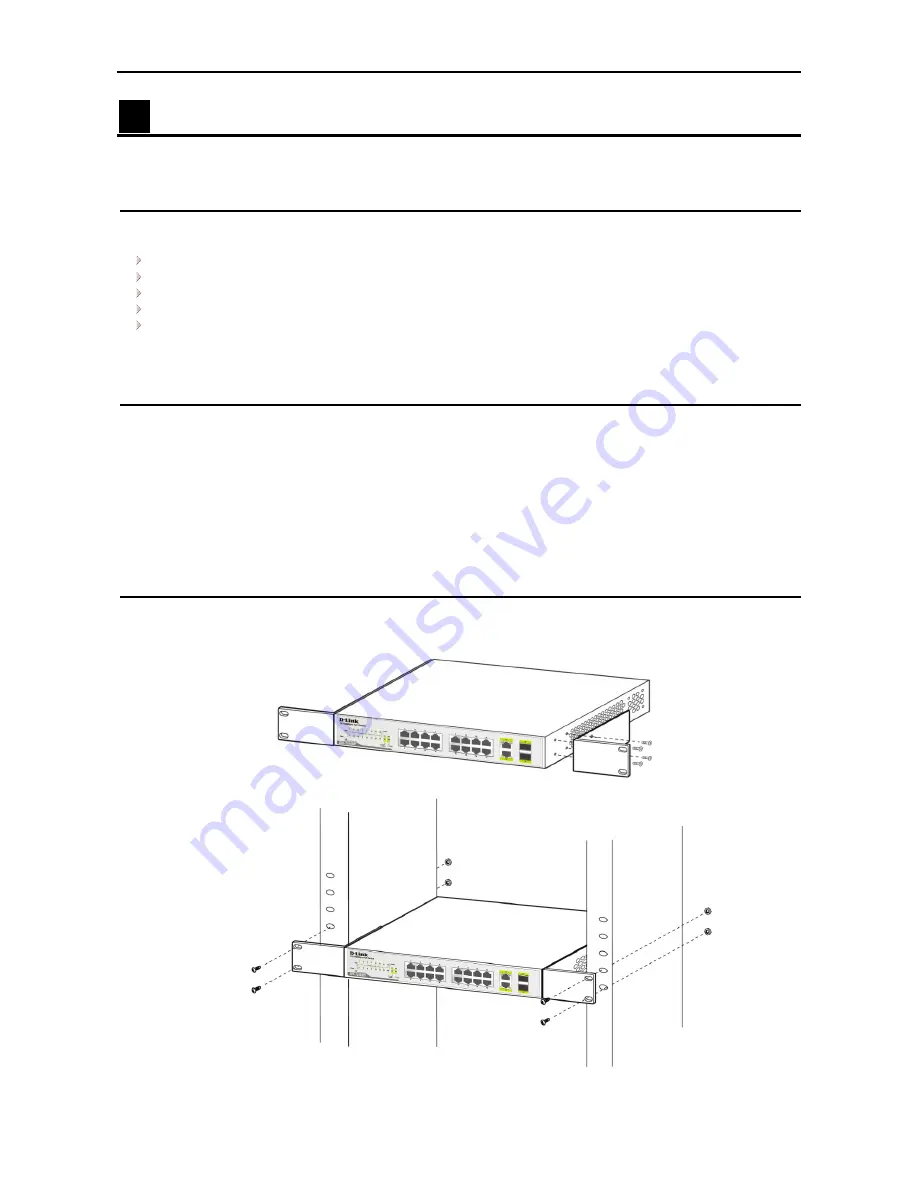
Step 3: Mounting the Switch on a Rack
The DES-1018P/MP can easily be mounted on a rack. Two mounting ears are provided for this purpose.
Make sure that the front panel is exposed in order to view the LEDs. Please refer to the following illustrations:
Mounting the Switch to a Rack
6


