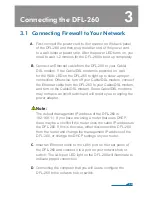
3.1 Connecting Firewall to Your Network
A
. First, connect the power cord to the receptor on the back panel
of the DFL-260 and then plug the other end of the power cord
to a wall outlet or power strip. After the power LED turns on, you
need to wait 1-2 minutes for the DFL-260 to boot up completely.
B
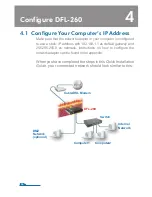
. Connect an Ethernet cable from the DFL-260 to your Cable/
DSL modem. If the Cable/DSL modem is powered on, wait
for the WAN LED on the DFL-260 to light up to show a proper
connection. Otherwise, turn off your Cable/DSL modem, connect
the Ethernet cable from the DFL-260 to your Cable/DSL modem,
and turn on the Cable/DSL modem. Some Cable/DSL modems
may not have an on/off switch and will require you to unplug the
power adapter.
Note:
The default management IP address of the DFL-260 is
192.168.1.1. If you have are using a router that uses DHCP,
there may be a conflict if the router uses the same IP address as
the DFL-260. If this is the case, either disconnect the DFL-260
from the router and change the management IP address of the
DFL-260, or change the DHCP settings on your router.
C
. Insert an Ethernet cable to the LAN1 port on the rear panel of
the DFL-260 and connect it to a port on your network hub or
switch. The LAN port LED light on the DFL-260 will illuminate to
indicate proper connection
D
. Connecting the computer that you will use to configure the
DFL-260 to the network hub or switch.
Connecting the DFL-260
3
04


