background image

70

D-Link DNR-326 User Manual

Section 3 - Configuration

Set Connections to the Units

Step 1:

 Click the 

Remote Server

 button.

Step 2:

 Input the name of your unit.

Step 3: 

Input the IP address of that unit.

Step 4:

 Modify the port if necessary.

Step 5: 

Input the user name.

Step 6:

 Input the password.

Step 7: 

Check the 

Save Password

 option.

Step 8: 

Click the 

Test Server 

button to test the connection  


   between the local application and the remote unit.

Step 9: 

Click the 

Add

 button to add this  


  unit into the remote server list.

Step 10:

 Click the 

OK

 button.

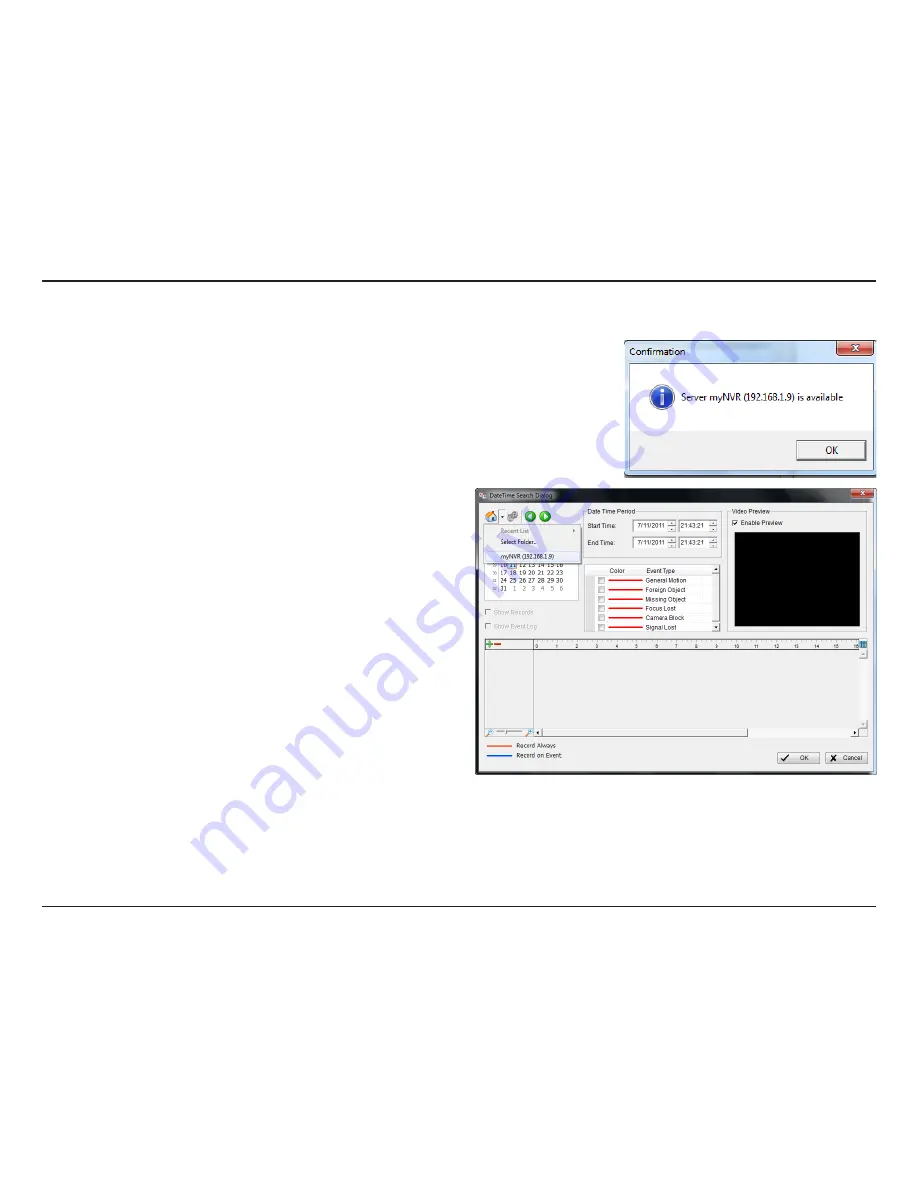
The Search, Playback, Video Enhancement, Print Image, Save 

Video, Save Image, Backup functions are the same as the steps 

for the Internet Explorer, please see pages 52-65.

Summary of Contents for DNR-326

Page 1: ......

Page 2: ...the www mydlink com website for the most current information Trademarks D Link and the D Link logo are trademarks or registered trademarks of D Link Corporation or its subsidiaries in the United States or other countries All other company or product names mentioned herein are trademarks or registered trademarks of their respective companies Copyright 2011 by D Link Corporation All rights reserved ...

Page 3: ...k Setup 24 Recording Schedule 25 Event Setup 28 Auto Backup 29 E mail Setup 31 Time and Date Setup 32 Maintenance 33 User Management 33 System 35 Firmware Update 36 RAID 37 Dynamic DNS 39 Status 40 Camera Status 40 System Info 41 System Log 42 NVR Log 43 Support 44 Live Video 45 LiveView Setting 48 Multiple View 51 Playback 52 Record and Playback Settings 55 Search the Recorded Video For Playback ...

Page 4: ...pplication 66 Playback Manager Application 68 Set Connections to the Units 70 Backup and File Manager Application 71 Verification Tool 73 Verify Image Video 74 Troubleshooting 75 Choose a RAID Level 77 Replacing or Adding a New Hard Drive 79 Technical Specifications 80 ...

Page 5: ...Ethernet Cable Power Adapter Cable Holder Manual and Software on CD Quick Installation Guide Note Using a power supply with a different voltage than the one included with your product will cause damage and void the warranty for this product If any of the above items are missing please contact your reseller Package Contents ...

Page 6: ...onnection for remote access Network camera s refer to the D Link website for a list of supported cameras 10 100 1000Mbit Gigabit Ethernet switch or router Web based Configuration Utility Requirements Remote PC Minimum Requirements Computer with the following Microsoft Windows 7 Vista or XP 32 bit Pentium 4 2 4GHz or higher 512 MB or higher Browser Requirements Internet Explorer 7 0 or higher Makes...

Page 7: ...hrough PPPoE and DDNS It supports real time monitoring and playback from anywhere via a web browser The triplex function allows the DNR 326 to keep recording while the user is viewing live footage or searching playback at the same time With complete video management and a full set of display and playback functionality the DNR 326 is a convenient and stable video recorder The DNR 326 is a professio...

Page 8: ...igh resolution megapixel recording for vivid video with high clarity Complete Network Functionality PPPoESupport TheD LinkNVRutilizesADSLservices ItcanconnecttotheInternetviaanADSLmodemoverEthernet DDNS Support Dynamic DNS is a solution for users without a fixed IP address With DDNS service users can connect to the NVR from the Internet using an easy to remember domain name NTP Support Maintaining...

Page 9: ...ecoveredafterapoweroutage Access List Control Users can specify safe and blocked IP addresses to filter the external connections this feature increases data security Multiple User Privilege Control Administrators may also choose access privileges for users by specifying the cameras they may have access to live view playback audio and PTZ functions UPS Status Monitor A UPS can be used as an emergen...

Page 10: ...n be enlarged by digital zoom Multi NVR Viewer Up to 128 channels of live video footage can be simultaneously viewed Intelligent Playback AVI ASF Outputs During playback if a user uncovers video that needs to be exported two formats are available The AVI format will export raw video The ASF file format will transpose a timestamp on the exported video Playback Speed Control Playback speed control a...

Page 11: ... button until the LED begins to blink to power down the NVR Power LED Power LED will blink when boot turn steady when working normal Drive LED These LEDs will be solid blue when the drives are connected but inactive The LEDs will blink when the drives are being accessed formatted or synchronized They will illuminate orange if a drive has failed USB Port USB port for UPS status updates Power Button...

Page 12: ...rature rises above 49 C Reset Button Press this button for more than 5 seconds to reset the unit to the factory defaults Power Receptacle Connect the supplied power cord to the receptacle Gigabit Ethernet Port Use the Gigabit Ethernet Port to connect the device to the local network The port is equipped with both a LAN LINK R and Traffic LED L to indicate connectivity and traffic respectively to th...

Page 13: ...26 s hard drive bays by sliding the top cover back until it unlatches from the device Once the faceplate is unlatched pull it off the device bay Slide either one or two hard drives into the open hard drive bays of your device Align the drives with the grooves in the enclosure and insert one or two 3 5 SATA hard drives into the drive bays until they are firmly seated Installation ...

Page 14: ...ink DNR 326 User Manual Section 3 Installation Once the hard drives are installed you can reattach the top cover Use a standard CAT5E Ethernet cable with a RJ 45 connector to connect your NVR to your network ...

Page 15: ...1 D Link DNR 326 User Manual Section 3 Installation Connect the power adapter to the power receptor on the back of the device Press the power button located under the faceplate LEDs to turn on the device ...

Page 16: ...n does not automatically start on your computer go to Start Run In the Run box type D autorun exe where D represents the drive letter of your CD ROM drive and click OK When the autorun screen appears click NVR Search Utility Step 2 Highlight an available NVR and click Configuration to access the NVR s web User Interface For more detailed configuration instructions please refer to the user manual o...

Page 17: ...eded changes D Link NVR Search Utility Network Video Recorder Refresh Configuration LAN Apply Drive Mapping Available Drive Letters About Exit The D Link NVR Search Utility displays any NVR devices it detects on the network Click to refresh the device list Click Configuration to access the Web based configuration of the NVR Configure the LAN Settings for the NVR here Click Apply to save and activa...

Page 18: ...direct it to the IP address listed for the device Make sure the browser is not configured to use a proxy server Note The computer used to access the NVR web based configuration manager must be on the same subnet as the NVR If your network is using a DHCP server and the computer receives IP settings from the DHCP server the NVR will automatically be in the same subnet ...

Page 19: ...l appear When logging in to the NVR for the first time you will be asked to choose a drive configuration type and format the drives There are four options Standard JBOD RAID 0 and RAID 1 Standard configures each disk as a separate volume while JBOD combines both disks into a single volume See page 37 for more details on using the RAID configurations Note Refer to page 34 for instructions on how to...

Page 20: ...N andaddthemtotheNVRListintheNVRautomatically The NVR will use the default login ID admin and a blank password to add new camera s If there are camera s found the NVR will start manual recording at the last step Note If you have existing camera s with different ID and password NVR will add the camera s but it will not be able to connect and record You can change the settings in the NVR Setup page ...

Page 21: ...17 D Link DNR 326 User Manual Section 3 Configuration After login you will be redirected to the NVR web UI ...

Page 22: ...etup wizard as well as the LAN configuration settings camera search camera settings recording schedule auto backup event settings time and system settings and device settings MAINTENANCE Contains the Administrator account configuration options Hard Disk management options and RAID configuration options System configuration backup and restore functions are also available STATUS Contains system NVR ...

Page 23: ...the NVR camera list Step 2 Recording Schedule Configure a camera for recording and create a detailed schedule Users can also simply choose Always Record and select connected cameras After completing the above settings the NVR will be fully functional ADVANCED OPERATION Step 1 E mail Setup Configure the e mail address and messages for event notification Step 2 Event Setup Configure event options wi...

Page 24: ...to determine if the destination is in the same subnet The gateway forwards frames to destinations in a different subnet Invalid gateway settings may cause the failure of transmissions to a different subnet Primary domain name server that translates names to IP addresses Secondary domain name server to backup the primary one Enable this setting if your ISP DSL service is using PPPoE You may already...

Page 25: ...e camera name user name and password of the camera Note Some cameras will limit the login authority to the administrator only To add cameras without the UPnP function please go to the camera Setup menu and enter the IP address manually You may not be able to see all the cameras on your first search It may take a moment for the devices to respond to the UPnP request Please click Search again if cam...

Page 26: ...a modify its address port user name and password and then click the Save Settings button Camera Channel Vendor Auto Detection Select the number of analog cameras supported by one video server from the list Displays the manufacturer s name If you have already input the camera IP you may simply click this button to automatically detect camerainformation suchasthechannel protocol vendor and model num...

Page 27: ...Select the frame rate Select the resolution Select the image quality Check the Enable Audio option for live view and recording Click to connect to the web page of the selected networkcameraforadvancedsetup Forexample motion detection should be configured via the camera web interface to enable the NVR to receive the trigger message Step 3 Click the Save Settings button Note The system will adjust t...

Page 28: ... the playback transmission port Enterthemaximumnumberofuserswhocanaccessplayback functions at the same time The maximum number of users for the playback server is 8 Upload your map with camera location to the NVR Max size 20 KB of BMP and JPG file The NVR supports 3rd party CMS Central Management System It is able to be connected to CMS as a client CMS Server Check the Enable option to enable CMS ...

Page 29: ... schedule Manual record will record video by default as it has the highest priority It can be enabled disabled at the Live Video page Selectthisoptiontoautomaticallyemptydiskspace when the disk space is full This will overwrite the earliest recorded video with the latest video one day at a time Set the duration to store recorded video clips After the duration the clips will be purged Set Recording...

Page 30: ...the schedule of the camera which needs to be modified Step 2 Click the column at the bottom of the page Step 3 The default recording schedule is from 00 00 to 24 00 If you would like to modify the time slot click theConfigure button to modify the default settings first Insert new schedules Delete the selected schedule Modify the schedule and recording mode setting Copy the current Day Schedule to ...

Page 31: ...ep 5 Click OK to add this new schedule Step 6 If you would like to add another new schedule click the Insert button Note When configuring the Motion Detection event be sure to set up the motion detection function on your camera first After changing the motion detection settings of your camera be sure to disconnect the camera from the NVR and then re connect it to update all new changes Alternative...

Page 32: ...ing when HDD full Step 1 Select an event below E mail If the event occurs the system will send an e mail to the pre set contacts Step 2 Click the Add button to setup the actions of the event Step 3 Click the action and then click the Configure button to modify the details of that action if necessary Step 4 Repeat step 2 through 3 to add more actions ...

Page 33: ...The daily scheduled time to start backup process The start time of recorded video of the previous date The end time of recorded video of the previous date Select the channel s to backup Note The system backs up recorded video files one by one If the connection between the unit and FTP server is normal but there are some FTP problems that are preventing the system from being able to write files on ...

Page 34: ... remote FTP server The remote FTP site port number the default FTP port is 21 The user name to log in to the FTP server The password to log in to the FTP server The folder format is FolderName FolderName SubFolderName and so on After setting up all the information click the Test FTP button and the system will create a folder to FTP Backup Server ...

Page 35: ...ter the sender s name Enter the e mail subject Enter the e mail content Provide the user name and password to the SMTP server for identification before sending e mail Input the SMTP server login user name Input the SMTP server login user password Click this button and the system will send a test mail to the sender Please check it after testing Add Contacts Step 1 Insert the name of a new contact S...

Page 36: ...Click SetTime to have the NVR set its own clock according to the time on your computer Select your time zone from the pull down list Click Save Settings to apply the settings Select or enter an NTP Server here An NTP Server is a server on the Internet that maintains time The NVR will contact the server you entered and receive the correct time ClickSave Settings after entering an NTP Server There a...

Page 37: ...ess Step 5 Click the Finish button to create a new user Note The Administrator account can configure all functions of the NVR This account cannot be deleted The default password for admin is blank Setting a password after the first login is strongly recommended Iftheadministratorpasswordislost youmayhold the reset button on the rear panel of the device to reset the NVR to factory defaults Please n...

Page 38: ...e user name and click the Modify button Step 2 Input the password of the user Type the password again to confirm Step 3 Click the Finish button to save Click Exit to abort Delete A User Step 1 Select the user name you want to delete and click Delete button Step 2 In the confirmation box click the OK button ...

Page 39: ...ton to select the configuration file and restore it by clicking the Load button When the administrator enters the Setup pages except the Live Video and Playback pages the NVR will keep track of the idle time when there is no action taken by the user After a certain period of time it will then force the user to log out and request the user to log in again for security concerns Change the idle time ...

Page 40: ...be upgraded from this page The firmware update must be saved on the local hard drive of your computer Click the Browse button to search the local hard drive for the firmware update file Click Apply to upgrade You can check for firmware updates on the D Link Support Page at http support dlink com ...

Page 41: ... up a RAID configuration on your current hard drive You can choose from four different hard drive configurations Step 1 Begin by clicking the Set RAID Type and Re Format button Information about the installed HDD will then be displayed Step 2 Click Next to select a new RAID configuration Note All data will be lost during this process ...

Page 42: ...olumegearedtowards maximum available space Combines both hard drives in a striped fashion whichwillcreateonelargevolumegearedtowards maximum performance Note If one drive fails all the data will be lost Mirrors the hard drives for redundancy If one hard drive fails the other still has all of the data Replace the failed hard drive and it will re mirror restoring maximum data protection The main RAI...

Page 43: ...he username or key provided by your service provider If the Dynamic DNS provider supplies only a key enter that key in all three fields Enter the password or key provided by your service provider Re type the password or key provided by your service provider Displays the current status of connection to the DDNS server EnablethisoptiononlyifyouhavepurchasedadomainnameandregisteredwithadynamicDNSserv...

Page 44: ...te If the Frame Rate or Bit Rate is too low please check your network configuration between the cameras and the NVR If the bit rate is too high it will cause the Live Video display to slow or lag Please modify the quality or bitrate setting in the camera web GUI accordingly Showstheharddrivespaceandestimatedremainingrecording time status Note The recording time information is estimated by current ...

Page 45: ...formation Hard Drive Information Displays the local network settings of the NVR Displaysthedevicenameandcurrenttemperature of the NVR Displays the hard drive information including the disk mode total size used and remaining drive space This section displays the summary information of your NVR ...

Page 46: ...System Log This page displays the system event list of your NVR The System Log is different from the NVR Log as it includes the following items 1 User login logout 2 Modify delete account 3 System restart 4 System reset to default 5 System firmware update ...

Page 47: ...VR Log NVR Log NVR Event Log Displays the NVR log information such as stop recording or NVR system start Displays the event log information such as motion detection or lost camera connection The NVR Log displays the event log information for your NVR device ...

Page 48: ...44 D Link DNR 326 User Manual Section 3 Configuration Support The NVR Help page provides a list of support topics ...

Page 49: ...upports PTZ users can control the selected camera from the PTZ panel Users can also right click on the video and check Enable Move to control the PTZ function directly Please note that when EnableMove is checked the video will be marked with a red outline This indicates that another camera cannot be adjusted until the PTZ function has been deactivated 4 If the camera supports audio users can check...

Page 50: ...you may select to show only 4 split screen on the liveview while connecting 16 channels to the system With auto scan function you are able to see all 16 channels by turns Select to display the video with full screen Press ESC button on the keyboard to return to normal display You may control the camera view by utilizing the PTZ camera control panel to adjust the camera s view This is only availabl...

Page 51: ...e Go button to go to the preset position This is only available with cameras that support the PTZ function Click the button to adjust focus or select the auto focus Select a camera video and click this button to play stop disconnect a particular channel Display video information including camera name video status and bit rate for a selected channel Click to start recording immediately Click again ...

Page 52: ...ay while increasing the CPU loading OSD On screen display Setting 1 Check the Enable camera OSD option 2 Set the foreground and background settings of the OSD 3 Select which kinds of information will be displayed on the screen 4 Click the Apply button to preview the result 5 Click the Default button to back to the default settings if necessary The LiveView Setting enables you to configure options ...

Page 53: ...when activating auto scan Enter the time interval for auto scan 2 Select the screen division of NxN type Notification 1 Check Show recording status to show the crystal ball with recording status on monitor display 2 Check Show camera event to display the words of detected camera events on the correspondent screen 3 Check Popup system event to pop up system event message dialog as a warning when a ...

Page 54: ...ontrol Function Parameter Default Import Export You can choose the function from the drop down menu for the button of the joystick Choose the preset point from the drop down menu Click to go back to default settings Click to import the settings Click to export the settings ...

Page 55: ...cated camera will be shown with a green indicator If you combine this function with digital PTZ users are able to enlargedifferentspotsandviewthemindifferentchannelswhile recording the whole view Click to connect or disconnect the designated camera Click to connect or disconnect all cameras You can right click on camera list to duplicate and connect disconnect designate cameras and do other functi...

Page 56: ...PLAYBACK tab at the top of the menu Step 3 Click the Open Record button Step 4 The Record Display Window will show information about the available video clips Select the date you would like to find the video records Step 5 Highlight the video records that you would like to review Step 6 Click the OK button This feature allows you to search and playback the recorded video ...

Page 57: ...a time Select to display the video with full screen Press the ESC key on the keyboard to return to normal display Display video date and time cue in out points time and speed Adjust the sound level Click the icon to digitally zoom in or out Every camera can use this function Single Quad split Screen Full Screen Real Size view Audio Volume Control Information Window Digital Zoom Open Record ...

Page 58: ...ck the or button to increase or decrease the playback speed Click the Cue In or Cue Out button to set the period for Save Video Click to pause the playback and move to next frame or last frame Click to pause the playback and move to next minute or last minute Play Stop Pause Step Forward Reverse Fast Forward Reverse Cue In Cue Out Speed Setting Export Video Audio Save Image Print Enhancement Post ...

Page 59: ...us Interval Recordings are displayed as a calendar Recordings are displayed as a list When selecting this option the system will startplayingthevideoclipwheneverarecord is withdrawn Check the option to set up the system to automaticallyskiptothepointswheremotion is recorded Set the interval for the video to go forward when you click the Forward button on the control panel Set the interval for the ...

Page 60: ...ions You can manually select where you would like to save the image name the saved file and choose the desired format for the image By pre setting a path URL and the image format the system will autmatically save the image accordingly when you click the Save Image button in the control panel Miscellaneous Check Synchronize video frames to avoid the tearing problem occurring in video display while ...

Page 61: ...time period you would like to view Check the Enable Preview option to view the selected video Click the Open Record button to access the Date Time Panel and select the video records which you would like to review Users can refresh the DateTime Search DialogWindow or go to the previous or next recording date by clicking the upper left corner buttons Refresh Previous Next Recording Date Time Table S...

Page 62: ...an be modified using the icon at the bottom left corner Step 4 Select the Enable Preview option to get the preview of the video you select Step 5 Click the camera name to select the cameras you would like to play back Step 6 Click the OK button to begin playback Note The Record Display Window can be shown in a calendar view or b list control view To modify the settings of the record display window...

Page 63: ...pulldown menu you would like to search for General Motion Detect all movements in the defined area 1 Define a detection zone by clicking and dragging to draw an area on the image You may define more than one zone by repeating this step 2 Modify the sensitivity setting by adjusting the slider control Moving the slider toward the right will increase the sensitivity level which means a relatively sma...

Page 64: ...ing at the moment an event is found 5 Click the Search button Missing Object The alarm triggers when the selected object is removed from the defined area on the screen 1 Define the detection object by clicking and dragging to draw an area on the image 2 Modify the sensitivity setting 3 Set the Interval 4 Check the Stop when found option If unchecked the search tool will list all the events it foun...

Page 65: ...tting Visibility Sharpen Brightness Contrast Greyscale Default OK Select this option and adjust the gamma to change the luminance Select this option to activate the function Move the slider control to the right to sharpen the image to the left to soften it Select this option and move the slider control to the right or left to make the image brighter or dimmer Select this option and move the slider...

Page 66: ...e shown on the information window Then click the Save Video button Step 3 Choose the folder where you would like to save the file Step 4 Input the file name and click the Save button Step 5 Choose the export format Step 6 Choose the use profile Step 7 Select the Export Audio option if the video has audio and you would like to export the audio with the video Step 8 Click the OK button Note The asf ...

Page 67: ...Image button when the desired image is shown on the screen Step 3 Click the Save Image button again to choose the folder where you would like to save the file to Step 4 Choose the desired image format BMP or JPEG Step 5 Input the file name Step 6 Click the Save button Note Youmayskipstep3bypre selectingafolderandformatforimages See the Setting option for more details ...

Page 68: ...the screen Step 3 Select desired print settings Print Setup Step 4 Click the Print button Print Content Print in original size Fit the page Align Image Print the image from the currently selected channel or all the channels shown on the screen Select this option to have the image print in the original size Select this option to fit the image to the page Align to the top center or bottom of the pag...

Page 69: ...nstead of a single video clip Step 1 Use Open Record to select the desired data Step 2 Click the Backup button Step 3 Set the Start Time and End Time that you would like to backup Step 4 Select the cameras that you would like to backup Step 5 Select the directory where you would like to backup the data to Step 6 Click the Backup button The system will then begin the backup process automatically ...

Page 70: ... utilizing the PTZ camera control panel to adjust the camera s view This is only availablewithcamerasthatsupportthePTZfunction Click the or button to zoom in or zoom out the view Minimize the Remote Live Viewer window Shut down the application Click the icon to digitally zoom in or out Select the camera video and click this button to play stop disconnect a particular channel Display video informat...

Page 71: ...pplication and the remote unit Step 9 Click the Add button to add this unit into your remote server list Step 10 Click the OK button Set Groups for Cameras Step 1 Click the Group tab Step 2 Log in to all the servers that contain the camera s you would like to put into group s Step 3 Click the Insert button to create a new group Step 4 Name this group Step 5 Highlight the camera s that you would li...

Page 72: ...eed Adjust the sound level Click the icon to digital zoom in or digital zoom out the view Every camera can use this function Selectacamera videoandclickthisbuttontoplay stop pause a particular channel Click the or button to increase or decrease the playback speed Step 1 Please insert the product CD Step 2 Install the D ViewCam NVR Pro application from CD Step 3 Run the Playback Manager application...

Page 73: ...Cue out Step forward Reverse Fast forward Reverse Click the Cue In or Cue Out button to set the time period for Save Video Click to pause the playback and move to the next frame or last frame Click to pause the playback and move to the next minute or last minute ...

Page 74: ...e user name Step 6 Input the password Step 7 Check the Save Password option Step 8 Click the Test Server button to test the connection between the local application and the remote unit Step 9 Click the Add button to add this unit into the remote server list Step 10 Click the OK button The Search Playback Video Enhancement Print Image Save Video Save Image Backup functions are the same as the steps...

Page 75: ...ackup or highlight the video records that you would like to backup Step 8 Select the cameras you would like to backup Step 9 Click the OK button Step 10 Select the time slot which you would like to backup Step 11 Click the Backup button Step 12 Select the location where you would like to save the backup data In addition to the ways mentioned in the previous chapters you can apply the application t...

Page 76: ...72 D Link DNR 326 User Manual Section 3 Configuration Step 13 Check the Include Playback application option which will add Playback application into the backup folder Step 14 Click the OK button ...

Page 77: ...ch recorded video frame to ensure its authenticity There are two types of data that can be verified by Verification Tool 1 File in avi asf 2 File in bmp jpg Add File Add Folder Remove File Select All Insert the single file to list for verification Choose the folder with multiple files to list for verification Remove indicated file s from list Select all files in the list for verification Note Choo...

Page 78: ...erify Image Video 1 Select single or multiple files for verification 2 Click the Verify button to start verification 3 The verification result will show on watermark column If a file was tampered with it will show if a file passed verification it will show ...

Page 79: ...failed disk drive Step 3 Install a new disk drive into the slot If the failed drive belonged to a RAID Volume the RAID Volume will begin rebuilding as soon as the new drive is installed During the rebuild the Disk Status LED will blink If the replacement drive is free i e not assigned to a RAID Volume or as a spare the Disk Status LED remains dark after you install the new drive Respond to a Criti...

Page 80: ...t will cause data corruption Backup your recorded data before resetting your unit Install ActiveX If you cannot see the complete page of the system when using Internet Explorer the ActiveX installation process may not be complete Step 1 Click the Live View Playback button on the top right Step 2 The browser will ask whether to install ActiveX Step 3 Click the upper bar to begin the installation pr...

Page 81: ...ive I O performance is greatly improved by spreading the I O load across many channels and drives No parity calculation overhead is involved Disadvantage Not a true RAID because it is not fault tolerant The failure of just one drive will result in all data in an RAID Volume being lost Should not be used in mission critical environments RAID 1 Advantage Simplest RAID storage subsystem design Can in...

Page 82: ...pports RAID levels 0 and 1 RAID 0 RAID 0 provides data striping which spreads out blocks of data over both drives but does not provide data redundancy Although performance is improved the lack of fault tolerance means that if one drive fails all data in the array will be lost RAID 0 RAID 1 RAID1providesmirroringoverbothdisks withthe same read write speed of a single disk A RAID 1 array can only be...

Page 83: ...n the NVR and then connect to the Web UI The NVR will prompt you to format the new drive Standard RAID 1 mode or both drives JBOD RAID 0 mode Adding a New Hard Drive The NVR is able to work with one single hard drive under Standard mode Please make sure the power is off before installing a second hard drive After you have installed the new drive turn on the NVR and then connect to the Web UI The N...

Page 84: ...ted network cameras VIDEO SETTING Resolution quality frame rate enable audio go to camera interface RECORDING TYPE Record by schedule manual record and event recording DI trigger motion detection from camera REMOTE LIVE VIEW Supported via IE remote live viewer Max 9 simultaneous channels REMOTE LIVE VIEW CONTROL Live view preset go patrol focus PTZ functions snapshot full screen digital zoom REMOT...

Page 85: ...ink DNS Client DDNS Client D Link SMTP Client HTTP Server PPPoE UPnP IP filtering Samba Server USER INTERFACE HTTP Web browser Internet Explorer 7 or later 32 bit OS only NVR Search Utility Multiple language GUI Hardware Specifications STANDARDS IEEE 802 3 u z Auto MDI MDI X SATA I II HARD DISK1 Hard Disk control manage via PC Reformat Disk RAID 0 RAID 12 JBOD TWO RESET MODES Reset firmware GUI bu...

Page 86: ...Bay NVR Power Adapter Ethernet Cable Quick Installation Guide Power Cable Holder CD ROM with Software Product Documentation 1 An external SATA drive is required to store or share files Not included 2 RAID1 mirroring requires the use of two internal SATA drives To avoid data incompatibility in RAID 1 operation use identical SATA drives from the same manufacturer Formatted drive capacity for RAID 1 ...

Reviews: