

8
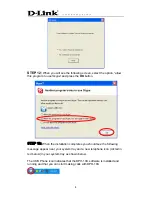
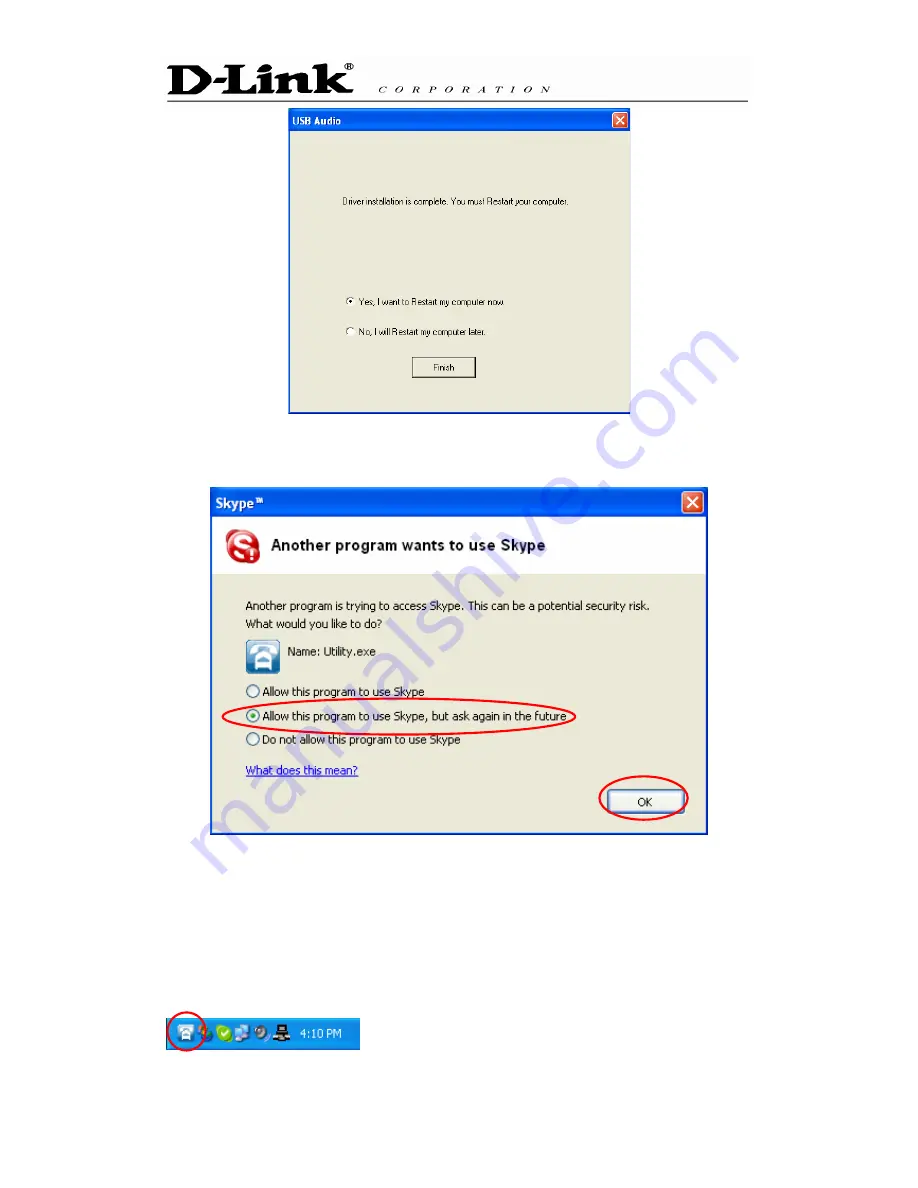
STEP 12:
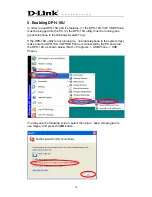
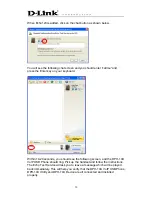
When you will see the following screen, select the option, “
allow
this program to use Skype”
and press the
OK
button.
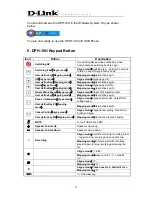
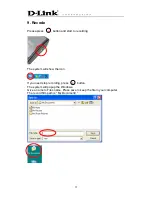
STEP 13:
When the installation completes you should see the following
message appear near your system tray and a new telephone icon (circled in
red below) in your system tray as shown below.
The USB Phone icon indicates that the DPH-10U software is installed and
running and that you can start making calls with DPH-10U