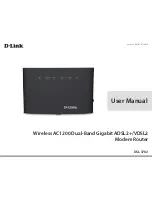
background image

Version 1.00 | 07/07/2016

User Manual

DSL-3782

Wireless AC1200 Dual-Band Gigabit ADSL2+/VDSL2 

Modem Router

Summary of Contents for DSL-3782

Page 1: ...Version 1 00 07 07 2016 User Manual DSL 3782 Wireless AC1200 Dual Band Gigabit ADSL2 VDSL2 Modem Router ...

Page 2: ...r countries App StoreSM is a service mark of Apple Inc Chrome browser Google Play and Android are trademarks of Google Inc Internet Explorer Windows and the Windows logo are trademarks of the Microsoft group of companies Copyright 2016 by D Link Corporation Inc All rights reserved This publication may not be reproduced in whole or in part without prior expressed written permission from D Link Corp...

Page 3: ...tting Started 12 Setup Wizard 13 Configuration 19 Home 19 Internet 20 IPv4 21 DSL 22 D Link 23 Connected Clients 24 USB Device 25 Settings 26 Wizard 26 Internet 26 ADSL 27 VDSL 29 WAN Settings 30 Dynamic IP DHCP 30 Static IP 31 PPPoE 32 PPPoA 34 Bridge Mode 35 Wireless 36 Advanced Settings 37 Guest Zone 43 Network 44 USB 47 Features 48 Firewall 48 Application 49 ACL 50 Port Forwarding 51 DMZ Expos...

Page 4: ...Storage Device 70 Connecting from a Windows Based PC 71 Connecting from a Mac 76 Connect a Wireless Client to Your Router 80 WPS Button 80 Windows 10 81 Windows 8 83 WPA WPA2 83 Windows 7 85 WPA WPA2 85 WPS 87 Windows Vista 91 WPA WPA2 92 Troubleshooting 94 Wireless Basics 98 What is Wireless 99 Tips 101 Wireless Modes 102 Networking Basics 103 Check your IP address 103 Statically Assign an IP add...

Page 5: ...ote Using a power supply other than the one included with the DSL 3782 may cause damage and void the warranty for this product If any of the above items are missing please contact your reseller DSL 3782 Wireless AC1200 Dual Band ADSL2 VDSL2 Modem Router Power Adapter Ethernet Cable Phone Cable ...

Page 6: ...ss or Ethernet port Web based Configuration Utility Requirements Computer with the following MicrosoftWindows 10 8 7 Vista XP SP3 or Mac with OS X 10 7 or higher An installed Ethernet adapter Browser Requirements Internet Explorer 8 or higher EDGE Browser 20 or higher Firefox 20 or higher Safari 4 or higher Chrome 17 or higher Windows Users Make sure you have the latest version of Java installed V...

Page 7: ...82 s USB sharing technology lets you take advantage of file sharing Simply plug in a USB storage drive into the USB port on the back of your DSL 3782 and you can access files stream videos view photos or listen to music on your laptop or mobile devices The intuitive interface lets anyone immediately connect to a variety of entertainment options stored securely on your own storage device The DSL 37...

Page 8: ... management features including Filtering Easily apply content filtering based on IP address MAC address URL and or domain name Scheduling The firewall wireless and port forwarding features can be scheduled to be active on a schedule you define User friendly SetupWizard Through its easy to use web based user interface the DSL 3782 lets you control what information is accessible to those on the wire...

Page 9: ...Port Connects to USB flash drives to share content 3 LAN Ports 1 4 Connects to Ethernet devices such as computers switches storage NAS devices and game consoles 4 Reset Button To reset the device to its factory default settings use a paper clip to press and hold the reset button for 5 seconds 5 DSL Port Connects to an DSL enabled telephone line 1 4 5 3 2 ...

Page 10: ...Manual Section 1 Product Overview Side Panel 1 WPS Button Press to start the WPS process and automatically create a secure connection to a WPS client 2 Power Button Press the power button to power the DSL 3782 on and off 1 2 ...

Page 11: ...nking Green A blinking green light indicates Internet activity Solid Red A solid red light indicates a PPP or DHCP failure Check your username and password Off An unlit light indicates there is no broadband connection available or the Internet connection attempt timed out 4 Wireless Solid Green A solid green light indicates that the 2 4 5 GHz wireless networks are enabled Blinking Green A blinking...

Page 12: ...information is likely to include your DSL account s username and password Your ISP may also supply you with additional WAN configuration settings which are necessary to establish a connection This information may include the connection type DHCP IP Static IP PPPoE or PPPoA and or ATM PVC details If you are connecting a considerable amount of networking equipment it may be a good idea to take the t...

Page 13: ...1 5 feet 0 5 meters thick at a 45 degree angle appears to be almost 3 feet 1 meter thick At a 2 degree angle it looks over 42 feet 14 meters thick Position devices so that the signal will travel straight through a wall or ceiling instead of at an angle for better reception 3 Building materials make a difference A solid metal door or aluminum studs may have a negative effect on range Try to positio...

Page 14: ...he modem router in an open area for better wireless coverage 2 Plug one end of the supplied DSL phone cable into the DSL port on the back of the modem router and the other end into the telephone wall jack Note If a DSL microsplitter microfilter is included in the package contents install it in line with your telephone wall jack PC DSL 3782 Phone PC DSL 3782 Phone ...

Page 15: ...on Use only the included power adapter with this product Plug one end of the supplied Ethernet cable into a yellow Ethernet port on the back of the modem router and the other end into the Ethernet port on your computer If you are setting up the DSL 3782 using a laptop or mobile device connect to it using theWi Fi network name and password printed on the label attached to the back of your router 3 ...

Page 16: ...uter to connect to the Internet and connect to your clients D Link Setup Wizard This wizard will launch when you log into the router for the first time Refer to Setup Wizard on page 13 Manual Setup Log into the router and manually configure your router Refer to Configuration on page 19 Getting Started ...

Page 17: ... The default password is admin Thewizardisdesignedtoguideyouthroughastep by stepprocesstoconfigure yournewD LinkrouterandconnecttotheInternet EnsurethatyourDSLphone cable is connected to both the router and the wall jack Click Next to continue First you must select your WAN AccessType The options are ADSL VDSL or Auto To quickly find your ISP s settings select your Country and ISP The VPI and VCI ...

Page 18: ...tion type this information can be obtained from your Internet Service Provider and click Next to continue If the router detected or you selected PPPoE enter your PPPoE username and password choose the Connection Type if asked and click Next to continue Note MakesuretoremoveyourPPPoEsoftwarefromyourcomputer Thesoftware is no longer needed and will not work through a router Setup Wizard continued ...

Page 19: ...if asked Click Next to continue Setup Wizard continued If the router detected or you selected PPPoA enter your PPPoA username and password choose the Connection Type if asked and click Next to continue Note MakesuretoremoveyourPPPoAsoftwarefromyourcomputer Thesoftware is no longer needed and will not work through a router PPPoA connection type is only available for ADSL connections ...

Page 20: ...Getting Started Setup Wizard continued If the router detected or you selected Dynamic IP Address DHCP choose the Connection Type if asked Click Next to continue If you selected Bridge choose the Connection Type if asked Click Next to continue ...

Page 21: ... and may include hyphens underscores periods and the symbol The passwords must be between 8 and 63 alphanumeric characters in length Your wireless clients must use these SSIDs and passwords in order to connect to your wireless networks Click Next to continue Inordertosecuretherouter pleaseenteranewpassword Youwillbeprompted for this password every time you want to use the router s web configuratio...

Page 22: ...Getting Started The Summary window will display your settings Click Next if you are satisfied or click Back to make changes to them The wizard will close and your settings will be saved Congratulations setup is complete Setup Wizard continued ...

Page 23: ...r and enter http dlinkrouter local Windows and Mac users may also connect by typing the IP address of the router by default this is http 192 168 1 1 in the address bar Home The Home page displays the current status of the router in the form of an interactive diagram There are four main sections Internet D Link Connected Clients and USB Device You can click each icon to display information about ea...

Page 24: ...ill reflect the status of the currently selected WAN interface If your Internet is disconnected indicated by a red X you can launch the Setup Wizard to correct the issue by clicking Wizard from the Settings menu on the bar on the top of the page You can see the DSL connection status and IPv4 information at the bottom of the page Clicking the DSL button will display DSL port information Internet ...

Page 25: ...onnection has been connected MAC Address Displays the MAC address of this interface IP Address Displays the current WAN IPv4 address Subnet Mask Displays the current subnet mask Default Gateway Displays the current IPv4 default gateway Primary DNS Server Displays the current primary DNS server Secondary DNS Server Displays the current secondary DNS server IPv4 Click the IPv4 button to see the IPv4...

Page 26: ... uptime SNR Margin Displays the Signal to noise margin Line Attenuation Displays the current signal attenuation Output Power Displays the output power of the DSL modem ES SES UAS FEC CRC These error correction counts are used for diagnostic purposes If you are having trouble with your ISP these values may provide useful information for technicians DSL Click the DSL button to see the DSL port conne...

Page 27: ... as well as the local area network MAC and IPv4 addresses To reconfigure the network settings click the Go to settings link from the Settings menu at the top of the page select Network Refer to page Network on page 44 for more information To reconfigure the wireless settings click the Go to settings link from the Settings menu at the top of the page select Wireless Refer to Wireless on page 36 for...

Page 28: ...es To edit each client s settings click the pencil icon on the client you want to edit Edit Rule Name Enter a custom name for this client Vendor Displays the vendor of the device MAC Address Displays the MAC address of the device IP Address Enter a specific IP address for this client if Reserve IP is enabled Reserve IP Enable to reserve this IP address for this client Click Save when you are done ...

Page 29: ... Sharing settings If you have a USB device connected you can see its name and how much free space it has To safely disconnect your USB drive click Unmount To configure your USB settings click Go to settings and refer to page USB Device on page 25 for more information For information on how to access your USB drive from a Windows based PC refer to Connect and Share a USB Storage Device on page 70 ...

Page 30: ... bar on the top of the page The DSL 3782 supports multiple WAN connection types and WAN failover We recommend setting up Internet WAN connections one at a time Save the configuration and confirm the connection works before returning to this section to add additional WAN connections The following configuration pages are divided by WAN Access Type WAN CONNECTIONTYPE Configure your WAN Connection Sel...

Page 31: ...Settings are available ATM VC Settings Interface Select the interface from the drop down menu PVC1 to PVC8 are available The default is PVC1 Enable Virtual Circuit Select whether to enable or disable this Virtual Circuit If you Enabled the selected interface the following options are available VPI Enter the Virtual Path Indicator 0 255 VCI Enter the Virtual Channel Indicator 32 65535 Service Categ...

Page 32: ...te PCR Enter the Peak Cell Rate in cells per second If you selected NRT VBR or RT VBR the additional following options are available Sustainable Cell Rate SCR Enter the Sustainable Cell Rate in cells per second Maximum Burst Size MB s Enter the Maximum Burst Size in MB per second To set your IPv4 connection parameters of WAN Settings refer to WAN Settings on page 30 ...

Page 33: ...our WAN connection Select VDSL to configure ADSL connection settings If you click on Advanced Settings the following WAN Settings are available PTM VC Settings Service Number Select the service number from the drop down menu 1 8 are available The default is 1 Enable Virtual Circuit Select whether to enable or disable this Virtual Circuit Vlan ID Enter the VLAN ID Enter a value from 10 4096 The def...

Page 34: ...ction Select Dynamic IP Address DHCP WAN Connection Type SelectBridgedIPLLC BridgedIPVC MUX RoutedIPLLC orRouted IP VC Mux MTU Maximum Transmission Unit you may need to change the MTU for optimal performance with your ISP Usage Select None or Default Route NAT Enable Enable or disable Network Address Translation Enable PPPoE Passthrough Enable or disable PPPoE Passthrough Option60 Vendor ID The ve...

Page 35: ...C Mux IP Address Enter the IP address provided by your ISP Subnet Mask Enter the subnet mask provided by your ISP Default Gateway Enter the default gateway address provided by your ISP MTU Maximum Transmission Unit you may need to change the MTU for optimal performance with your ISP Usage Select None or Default Route NAT Enable Enable or disable Network Address Translation Enable PPPoE Passthrough...

Page 36: ...PPPoE LLC or PPPoE VC Mux Service Name Enter name of your service Optional AC name Enter the AC name Optional MTU Maximum Transmission Unit you may need to change the MTU for optimal performance with your ISP Usage Select None or Default Route NAT Enable Enable or disable Network Address Translation Enable PPPoE Passthrough Enable or disable PPPoE Passthrough Authentication Protocol Select the aut...

Page 37: ...ation If you click enabled Connect On Demand the following option is available Maximum Idle Time Enter the amount of time the router will maintain the Internet connection before disconnecting if there is no activity Click Save when you are done PPPoE ...

Page 38: ...aximum Transmission Unit you may need to change the MTU for optimal performance with your ISP Usage Select None or Default Route NAT Enable Enable or disable Network Address Translation Authentication Protocol Select the authentication protocol your ISP uses The options are Auto PAP or CHAP Connect mode select Set the connection to be Always on Connect On Demand or Manual If you enabled Connect On...

Page 39: ... as a network bridge WAN Settings Connection Select Bridge WAN Connection Type Select Bridged Only LLC or Bridged Only VC Mux Enable Large Package passthrough Enable or disable 1514 byte packet support Click Save when you are done You will need to connect and configure another device to connect to your ISP ...

Page 40: ...using up to 32 characters Password Create a password to use for wireless security 5 GHz Status Enable or disable the 5 GHz wireless network SSID Create a name for your wireless network using up to 32 characters Password Create a password to use for wireless security Wi Fi Protected Setup PBC Start This triggers the WPS pairing process Refer to WPS Button on page 80 for more information about WPS C...

Page 41: ...curity WPA2 WPAType If you select 802 1x the following options are available Server IP Address Enter the IP address of the RADIUS Server Port Enter the port used by the RADIUS Server Secret Enter the secret used by the RADIUS Server Cipher Type Select either AES or Both AES TKIP AES is recommended Group Key Interval Enter the Group Key Interval The default is 3600 seconds If you select Pre shared ...

Page 42: ...ess Enter the IP address of the RADIUS Server Port Enter the port used by the RADIUS Server Secret Enter the secret used by the RADIUS Server Cipher Type Select AES TKIP or Both AES is recommended Group Key Interval Enter the Group Key Interval The default is 3600 seconds If you select Pre shared key the following options are available Cipher Type Select AES TKIP or Both AES is recommended Group K...

Page 43: ...PA2 or WPA WPA2 Mixed instead of WEP as they are more secure Security WEP 64Bit or WEP 128Bit Auth Type Select either Open or Shared Advanced Settings continued None Disabling encryption and leaving your wireless network open is not recommended Any wireless client will be able to access your network be able to use your Internet connection and leaves you open to security threats Security None If yo...

Page 44: ...Signal Interval Set the rate at which your wireless network is advertised The default is 100 milliseconds DTIM Specify the DeliveryTraffic Information Map DTIM message interval Transmitting Power Select the desired wireless transmission power The available options are 100 50 25 or 12 5 The default is 100 Threshold for fragmentation 2 4 GHz only The fragmentation threshold which is specified in byt...

Page 45: ...sired wireless networking standard s to use The available options are 11A Only 11A N Mixed Mode Mixed 11AC N A or Mixed 11AC N 5 GHz Channel Width Select the desired channel width The available options are 20 MHz 20 40 MHz or 20 40 80 MHz Depending upon the selected 5 GHz 802 11 Mode some options may be unavailable Short Guard Interval Enable or disable short guard interval Short Guard Interval ma...

Page 46: ...u to select the time schedule that the rule will be enabled on The schedule may be set to Always Enable or you can create your own schedules in the Schedules section Refer to Schedule on page 62 for more information Click Save when you are done Advanced Wireless Configuration continued ...

Page 47: ...eless bands To access this page click Wireless from the Settings menu on the bar on the top of the page and click Guest Zone 2 4 GHz 5 GHz Status Enable or disable the selected SSID Wi Fi Name SSID Enter a wireless network name SSID that is different from your main wireless network Password Create a password to use for wireless security Wireless clients will needtoenterthispasswordtosuccessfullyco...

Page 48: ...55 0 Enable Second IP Enable or disable the dual LAN IP capability of this router The default setting is Disabled Second IP Address EnterthesecondIPaddressoftherouterforthisinterface Thedefault IP address is 192 168 2 1 Second Subnet Mask Enter the second subnet mask of this interface The default subnet mask is 255 255 255 0 UPNP Settings UPNP Enable or disable UPNP Click Save when you are done or...

Page 49: ...ge Enter the starting and ending IP addresses for the DHCP server s IP assignment Note If you statically manually assign IP addresses to your computers or devices make sure the IP addresses are outside of this range or you may have an IP conflict DHCP Lease Time Select the DHCP lease time from the drop down menu Option60 Vendor ID Enter Option60 information here Optional Primary DNS Server Enter t...

Page 50: ...nk DSL 3782 User Manual Section 4 Configuration If you selected DHCP Relay the following options are available Server IP Enter the DHCP server IP address Click Save when you are done Network Advanced Settings ...

Page 51: ...nctions allowing connected DLNA clients access to media files over the network Samba Setup Samba Enable or disable Windows File Sharing or Samba Computers and devices which support Samba will be able to access the files on the USB device connected to this router Work Group Enter the Windows workgroup name Net BIOS Name Enter the name for this device as you wish it to appear on your network Click S...

Page 52: ...ures Firewall The router s firewall protects your network from malicious attacks over the Internet To access this page click Firewall from the Features menu on the bar on the top of the page It is recommended to leave all values at their default Enable setting ...

Page 53: ...n rule click on its trash can icon in the Delete column If you wish to edit an application rule click on its pencil icon in the Edit column If you wish to create a new application rule click the Add Rule button Create New Rule Enable Application Enable or disable the Application rule Name Enter a name for this application Trigger Port Start Enter the starting port range traffic will be forwarded f...

Page 54: ...e ACLs ACL Rule Index Select the ACL rule index number from the drop down menu Active Activate or deactivate the individual ACL rule Service IP address Enter the IP address range to apply the rule to Application Select a pre defined service ACL Rule IndexInterface Select the interface from the drop down menu to apply this access control list rule to Click Set to create or modify a rule or Delete t...

Page 55: ...ate a new rule click the Add Rule button Click Save when you are done If you edit or create a rule the following options will appear Create New Rule Enable Rules Enable or disable the port forwarding rules Name Enter a name for the rule Service Number The rule number is displayed here Internal IP Enter the IP address of the computer on your local network that you want to allow the incoming service...

Page 56: ...ng continued Schedule Usethedrop downmenutoselectthetimeschedulethattherulewill be enabled on The schedule may be set to Always or you can create your own schedules in the Schedules section Refer to Schedule on page 62 for more information Click Apply when you are done ...

Page 57: ...ks If you use DMZ take measures such as client based virus protection to protect the remaining client PCs on your LAN from possible contamination through DMZ The deviceds currently placed in the DMZ are displayed in the table You may place up to 8 devices in the DMZ If you wish to remove a DMZ rule click on its trash can icon in the Delete column If you wish to edit a DMZ rule click on its pencil ...

Page 58: ...the top of the page You may choose from the following options Disable IP Filters Only allow computers with IP addresses listed below access to the network or Only deny computers with IP addresses listed below access to the network The currently defined IP filters are displayed in the table You may define up to 16 IP filtering rules If you wish to remove a rule click on its trash can icon in the De...

Page 59: ... Select Any IP address Single IP or Specify IP Address Range If you selected Single IP or Specify IP Address Range enter the IP address into the From and To fields If you selected PTM or WAN as the Destination IP Address select the Service Number Service Number Select the Service Number from the drop down menu If you selected UDP or TCP as the Protocol above you may filter Any Port a Single Port o...

Page 60: ...Only deny computers with addresses listed below access to the network The currently defined MAC filters are displayed in the table You may define up to 32 MAC filtering rules If you wish to remove a rule click on its trash can icon in the Delete column If you wish to edit a rule click on its pencil icon in the Edit column If you wish to create a new rule click the Add Rule button If you enable MAC...

Page 61: ...its pencil icon in the Edit column If you wish to create a new rule click the Add Rules button Click Save when you are done If you edit or create a rule the following options will appear Create New Rule Destination Address Enter the destination IP address of packets that will take this route Destination Subnet Mask Enter the destination for this route Gateway IP Address Enter your next hop gateway...

Page 62: ...To access this page click Dynamic DNS from the Features menu on the bar on the top of the page Enable Dynamic DNS Enabling dynamic DNS will reveal further configuration options DDNS Server Enter the address of your dynamic DNS server or select one from the drop down menu Username Enter your dynamic DNS username Password Enter your dynamic DNS password Confirm Password Enter your dynamic DNS passwo...

Page 63: ...bles ADSL Proxy Check the box to enable the ADSL proxy The currently configured interface is displayed below IGMP Version Select the IGMP version to use either V1 V2 or V3 Click Save when you are done The Internet Group Management Protocol IGMP Transmission allows for the transmission of identical content such as multimedia from a source to a number of recipients ...

Page 64: ...mputers access to ONLY these sites from the drop down menu All other sites will be blocked You may specify a maximum of 15 web sites To add a new site to the list click Add New Rule If you wish to remove a rule click on its trashcan icon in the Delete column If you wish to edit a rule simply replace the URL or domain If you enable Web Filtering click Add Rule to create a new Web Filtering rule Cre...

Page 65: ...e and time of the router Synchronize time with Select either NTP Server automatically or Manually If you selected NTP Server automatically the following options are available Time Zone Select your time zone from the drop down menu Daylight Saving Enable or disable daylight saving time NTP Server Address Enter the NTP server address The default is ntp1 dlink com If you selected Manually the followi...

Page 66: ...to edit a rule click on its pencil icon in the Edit column If you wish to create a new rule click the Add Rules button Click Apply when you are done If you edit or create a rule the following options will appear First enter the name of your schedule in the Name field Each box represents one hour with the time at the top of each column To add a time period to the schedule simply click on the start ...

Page 67: ...uter keeps a running log of events To access this page click Log Info from the Management menu on the bar on the top of the page System logging must be enabled in order for this feature to work Refer to System Log on page 64 for information on how to enable the system log ...

Page 68: ...log file to local Hard Drive Click this button to save the log file to your local hard drive Clear the Log info Click this button to clear the system log LogType System Activity Activate or deactivate the logging of System Activity Debug Information Activate or deactivate the logging of Debug Information Attacks Activate or deactivate the logging of Attacks Notice Activate or deactivate the loggin...

Page 69: ...Save and Reboot The Device Click to reboot the router Restore To Factory Default Settings Thisoptionwillrestoreallconfigurationsettingsbacktothesettingsthat were in effect at the time the router was shipped from the factory Any settings that have not been saved will be lost including any rules that you have created If you want to save the current router configuration settings use the Save Settings...

Page 70: ...ge select System from the Management menu on the bar on the top of the page and click Admin To return to the System page click System Administrator Settings Password Enteranewpasswordfortheadminaccount Youwillneedtoenterthis password whenever you configure the router using a web browser Confirm Password Confirm the administrator account password Click Save when you are done ...

Page 71: ...levant file from http support dlink com Firmware Information Current Firmware Version The current firmware s version is displayed Firmware Date The current firmware s date is displayed Upgrade Manually Upgrade Firmware Ifyouwishtoupgrademanually firstdownloadthefirmwarefileyouwish to upgrade to Next click the Select File button and browse to the file to install the new firmware Then press Upgrade ...

Page 72: ...the statistics of the Internet LAN Wi Fi 2 4 GHz or Wi Fi 5 GHz interfaces by clicking on their respective tabs at the top of the graph The graph will update every few seconds The table at the bottom of the page displays the total number of packets and data sent and received since the DSL 3782 was booted The current amount of traffic being sent and received measured in KByte sec is displayed along...

Page 73: ...o the Internet To access this page click Diagnostics from the Management menu on the bar on the top of the page Enter either an IP address or web address select either Ping or Tracert test and click RunTest The results of the test will be displayed in the dialog box You may copy the results by pressing the Copy button ...

Page 74: ...nology This allows you to quickly and easily share a USB storage device with multiple computers on your network Connect and Share a USB Storage Device The DSL 3782 will share a FAT32 or NTFS formatted USB storage device using the Samba file sharing protocol Once connected you can copy move delete and edit files over the network like you would with any ordinary drive attached to your computer Conne...

Page 75: ...71 D Link DSL 3782 User Manual Section 5 Connect and Share a USB Device Connecting from a Windows Based PC Step 1 Click the Start menu and select Computer ...

Page 76: ...72 D Link DSL 3782 User Manual Section 5 Connect and Share a USB Device Step 2 Click Map network drive ...

Page 77: ...s IP address and the name of the USB volume you wish to share For example 192 168 1 1 usb Check the boxes Reconnect at logon and Connect using different credentials Click Finish If you have multiple USB storage devices attached via a USB hub click USB Device from the Home section of the DSL 3782 s Web Configuration utility for a list of available volume names ...

Page 78: ...74 D Link DSL 3782 User Manual Section 5 Connect and Share a USB Device Step 4 Enter admin and the password to your router and click Ok admin ...

Page 79: ...75 D Link DSL 3782 User Manual Section 5 Connect and Share a USB Device Congratulations Your files are now shared Repeat this process from each Windows PC you wish to share your USB drive with ...

Page 80: ...76 D Link DSL 3782 User Manual Section 5 Connect and Share a USB Device Connecting from a Mac Step 1 While in Finder click Go menu and select Connect to Server ...

Page 81: ...SL 3782 s IP address and the name of the USB volume you wish to share For example smb 192 168 1 1 usb1_1 Click Connect If you have multiple USB storage devices attached via a USB Hub consult the HOME USB sectionof the DSL 3782 s Web Configuration utility for a list of available volume names ...

Page 82: ...ual Section 5 Connect and Share a USB Device Step 4 Enter admin and the password to your router and click Connect If you wish to have your computer remember your password check the Remember this password in my keychain box admin ...

Page 83: ...79 D Link DSL 3782 User Manual Section 5 Connect and Share a USB Device Congratulations Your files are now shared Repeat this process from each Mac you wish to share your USB drive with ...

Page 84: ...a players Blu ray DVD players wireless printers and cameras will have a WPS button or a software utility with WPS that you can press to connect to the DSL 3782 router Please refer to your user manual for the wireless device you want to connect to make sure you understand how to enable WPS Once you know follow the steps below Step 1 Press the WPS button on the DSL 3782 for about 5 seconds The WPS L...

Page 85: ...u can find the default network name and Wi Fi password here Otherwise refer to the product label for the default Wi Fi network SSID and password or enter the Wi Fi credentials set during the product configuration To join an existing network locate the wireless network icon in the taskbar next to the time display and click on it Wireless Icon Clicking on this icon will display a list of wireless ne...

Page 86: ... check box You will then be prompted to enter the Wi Fi password network security key for the wireless network Enter the password into the box and click Next to connect to the network Your computer will now automatically connect to this wireless network when it is detected You can also use Wi Fi Protected Setup WPS to connect to the router Press the WPS button on your D Link device and you will be...

Page 87: ...our wireless adapter If you are joining an existing network you will need to know the security key Wi Fi password being used To join an existing network locate the wireless network icon in the taskbar next to the time display Wireless Icon Clicking on this icon will display a list of wireless networks that are within connecting proximity of your computer Select the desired network by clicking on t...

Page 88: ... Enter the password into the box and click Next If you wish to use Wi Fi Protected Setup WPS to connect to the router you can also press the WPS button on your router during this step to enable the WPS function When you have established a successful connection to a wireless network the word Connected will appear next to the name of the network to which you are connected to ...

Page 89: ...on your wireless router or access point before configuring your wireless adapter If you are joining an existing network you will need to know the security key or passphrase being used 1 Click on the wireless icon in your system tray lower right corner 2 The utility will display any available wireless networks in your area Wireless Icon WPA WPA2 ...

Page 90: ...SSID you would like to connect to and click the Connect button If you get a good signal but cannot access the Internet check your TCP IP settings for your wireless adapter Refer to the Networking Basics section in this manual for more information 4 The following window appears while your computer tries to connect to the router ...

Page 91: ...ireless Network WPS The WPS feature of the DSL 3782 can be configured using Windows 7 Carry out the following steps to use Windows 7 to configure the WPS feature 1 Click the Start button and select Computer from the Start menu 2 Click Network on the left side ...

Page 92: ... 3782 User Manual Section 6 Connecting to a Wireless Network 3 Double click the DSL 3782 4 Input the WPS PIN number on the router label in the Setup Wireless Setup menu in the Router s Web UI and click Next DSL 3782 ...

Page 93: ...89 D Link DSL 3782 User Manual Section 6 Connecting to a Wireless Network 5 Type a name to identify the network 6 To configure advanced settings click the icon Click Next to continue ...

Page 94: ... is being configured Wait for the configuration to complete 8 The following window informs you that WPS on the DSL 3782 has been set up successfully Make a note of the security key as you may need to provide this security key if adding an older wireless device to the network in the future 9 Click Close to complete WPS setup ...

Page 95: ...tility as seen below Right click on the wireless computer icon in your system tray lower right corner next to the time Select Connect to a network If you receive the Wireless Networks Detected bubble click on the center of the bubble to access the utility or The utility will display any available wireless networks in your area Click on a network displayed using the SSID and click the Connect butto...

Page 96: ...fore configuring your wireless adapter If you are joining an existing network you will need to know the security key or passphrase being used 2 Highlight the Wi Fi name SSID you would like to connect to and click Connect 1 Open the Windows Vista Wireless Utility by right clicking on the wireless computer icon in your system tray lower right corner of screen Select Connect to a network ...

Page 97: ...rity key or passphrase Wi Fi password that is on your router and click Connect It may take 20 30 seconds to connect to the wireless network If the connection fails please verify that the security settings are correct The key or passphrase must be exactly the same as the one on the wireless router ...

Page 98: ... the device itself Your computer must be on the same IP subnet to connect to the web based utility Make sure you have an updated Java enabled web browser We recommend the following Internet Explorer 8 or higher EDGE Browser 20 or higher Firefox 20 or higher Safari 4 or higher Chrome 17 or higher Verify physical connectivity by checking for solid link lights on the device If you do not get a solid ...

Page 99: ...address bar This should open the login page for your web management If you still cannot access the configuration unplug the power to the router for 10 seconds and plug back in Wait about 30 seconds and try accessing the configuration If you have multiple computers try connecting using a different computer 2 What can I do if I forgot my password If you forgot your password you must reset your route...

Page 100: ...ering the MTU in increments of ten Ex 1492 1482 1472 etc To find the proper MTU Size you ll have to do a special ping of the destination you re trying to go to A destination could be another computer or a URL Click on Start and then click Run Windows 95 98 and Me users type in command Windows NT 2000 XP Vista and 7 users type in cmd and press Enter or click OK Once the window opens you ll need to ...

Page 101: ... you find your MTU you can now configure your router with the proper MTU size To change the MTU rate on your router follow the steps below Open your browser enter the IP address of your router 192 168 1 1 and click OK Enter your username admin and password default device password is on the device label Click OK to enter the web configuration page for the device Click on Settings and then Internet ...

Page 102: ...ireless LANs are used increasingly in both home and office environments and public areas such as airports coffee shops and universities Innovative ways to utilize WLAN technology are helping people work and communicate more efficiently Increased mobility and the absence of cabling and other fixed infrastructure have proven to be beneficial for many users Wireless users can use the same application...

Page 103: ...t transmit data from one point A to point B But wireless technology has restrictions as to how you can access the network You must be within the wireless network range area to be able to connect your computer There are two different types of wireless networks Wireless Local Area Network WLAN and Wireless Personal Area Network WPAN Wireless Local Area Network WLAN In a wireless local area network a...

Page 104: ... speakers and other devices that operate on batteries Who uses wireless Wireless technology as become so popular in recent years that almost everyone is using it whether it s for home office business D Link has a wireless solution for it Home Uses Benefits Gives everyone at home broadband access Surf the web check email instant message etc Gets rid of the cables around the house Simple and easy to...

Page 105: ... not knowing where to start That s why we ve put together a few setup steps and tips to help you through the process of setting up a wireless network Tips Here are a few things to keep in mind when you install a wireless network Centralize your router or access point Make sure you place the router access point in a centralized location within your network for the best performance Try to place the ...

Page 106: ...wireless clients will connect to an access point or wireless router Ad hoc Directly connecting to another computer for peer to peer communication using wireless network adapters on each computer such as two or more DSL 3782 wireless network USB adapters An Infrastructure network contains an access point or wireless router All the wireless devices or clients will connect to the wireless router or a...

Page 107: ...our IP address please follow the steps below Click on Start Run In the run box type cmd and click OK Windows 7 Vista users type cmd in the Start Search box At the prompt type ipconfig and press Enter This will display the IP address subnet mask and the default gateway of your adapter If the address is 0 0 0 0 check your adapter installation security settings and the settings on your router Some fi...

Page 108: ...click on the Local Area Connection which represents your network adapter and select Properties Step 3 Highlight Internet Protocol TCP IP and click Properties Step 4 Click Use the following IP address and enter an IP address that is on the same subnet as your network or the LAN IP address on your router Example If the router s LAN IP address is 192 168 1 1 make your IP address 192 168 1 X where X i...

Page 109: ...n 802 11i and uses Advanced Encryption Standard AES instead of TKIP User authentication which is generally missing in WEP through the extensible authentication protocol EAP WEP regulates access to a wireless network based on a computer s hardware specific MAC address which is relatively simple to be sniffed out and stolen EAP is built on a more secure public key encryption system to ensure that on...

Page 110: ... PIN PBC Power Input 100 to 240 V AC 50 60 Hz Output 12 V DC 1 5 A Operating Temperature 0 to 45 C 32 to 113 F Storage Temperature 20 to 70 C 4 to 158 F Operating Humidity 10 to 95 maximum non condensing Certifications CE DLNA Wi Fi Certified LVD BT OpenReach SIN498 Dimensions 210 mm 8 27 inches 150 mm 5 91 inches 30 75 mm 1 21 inches Weight 113 05 grams 3 98 ounces Note 1 Maximum wireless signal ...

Page 111: ...quence bande s Bandas de Frecuencia Frequenza e Frequentie s Max Output Power EIRP Max Output Power Consommation d énergie max Potencia máxima de Salida Potenza max Output Max Output Power 5 G 5 15 5 25 GHz 200 mW 5 25 5 35 GHz 200 mW 5 47 5 725 GHz 1 W 2 4 G 2 4 2 4835 GHz 100 mW Regulatory Statements ...

Page 112: ...duct accessories and software are in compliance with directive 2014 53 EU The full text of the EU Declaration of Conformity and product firmware are available for download from the product page at www dlink com Español Spanish Por la presente D Link Corporation declara que este producto accesorios y software cumplen con las directivas 2014 53 UE El texto completo de la declaración de conformidad d...

Page 113: ...re a termék oldaláról tölthető le a www dlink com címen Polski Polish D Link Corporation niniejszym oświadcza że ten produkt akcesoria oraz oprogramowanie są zgodne z dyrektywami 2014 53 EU Pełen tekst deklaracji zgodności UE oraz oprogramowanie sprzętowe do produktu można pobrać na stronie produktu w witrynie www dlink com Português Portuguese Desta forma a D Link Corporation declara que este pro...

Page 114: ...singuna í heild sinni og fastbúnað vörunnar af vefsíðu vörunnar á www dlink com Norsk Norwegian Herved erklærer D Link Corporation at dette produktet tilbehøret og programvaren er i samsvar med direktivet 2014 53 EU Den fullstendige teksten i EU erklæring om samsvar og produktets fastvare er tilgjengelig for nedlasting fra produktsiden på www dlink com Warning Statement The power outlet should be ...

Page 115: ...her your product uses 2 4 GHz and or 5 GHz wireless HINWEIS ZUR VERWENDUNG VON DRAHTLOS NETZWERK WLAN IN DER EUROPÄISCHEN GEMEINSCHAFT NUR FÜR EIN DRAHTLOSES PRODUKT Der Betrieb dieses Geräts in der Europäischen Gemeinschaft bei Nutzung von Kanälen im 5 15 5 35 GHz Frequenzband ist ausschließlich auf Innenräume beschränkt um das Interferenzpotential zu reduzieren Bei diesem Gerät handelt es sich u...

Page 116: ... de 5 GHz au sein de l UE Merci de vous référer au guide d utilisation ou de la fiche technique afin de vérifier si votre produit utilise 2 4 GHz et ou 5 GHz sans fil AVISO DE USO DE LA LAN DE RADIO INALÁMBRICA EN LA COMUNIDAD EUROPEA SOLO PARA EL PRODUCTO INALÁMBRICO El uso de este dispositivo está restringido a interiores cuando funciona en la Comunidad Europea utilizando canales en la banda de ...

Page 117: ...trol richieste per operare a 5 GHz nell Unione europea Ti invitiamo a fare riferimento al manuale del prodotto o alla scheda tecnica per verificare se il tuo prodotto utilizza le frequenze 2 4 GHz e o 5 GHz KENNISGEVING VAN DRAADLOOS RADIO LAN GEBRUIK IN DE EUROPESE GEMEENSCHAP ALLEEN VOOR DRAADLOOS PRODUCT Dit toestel is beperkt tot gebruik binnenshuis wanneer het wordt gebruikt in de Europese Ge...

Page 118: ...en Sicherheitsvorschriften dienen als Hilfe zur Gewährleistung Ihrer eigenen Sicherheit und zum Schutz Ihres Produkts Weitere Details finden Sie in den Benutzeranleitungen zum Produkt Statische Elektrizität kann elektronischen Komponenten schaden Um Schäden durch statische Aufladung zu vermeiden leiten Sie elektrostatische Ladungen von Ihrem Körper ab z B durch Berühren eines geerdeten blanken Met...

Page 119: ...r Débranchez toujours le produit de l alimentation avant de le nettoyer et utilisez uniquement un chiffon sec non pelucheux INSTRUCCIONES DE SEGURIDAD Las siguientes directrices de seguridad general se facilitan para ayudarle a garantizar su propia seguridad personal y para proteger el producto frente a posibles daños No olvide consultar las instrucciones del usuario del producto para obtener más ...

Page 120: ...legare sempre il prodotto dalla presa elettrica prima di pulirlo e usare solo un panno asciutto che non lasci filacce VEILIGHEIDSINFORMATIE De volgende algemene veiligheidsinformatie werd verstrekt om uw eigen persoonlijke veiligheid te waarborgen en uw product te beschermen tegen mogelijke schade Denk eraan om de gebruikersinstructies van het product te raadplegen voor meer informatie Statische e...

Page 121: ...ses Symbol auf dem Produkt oder der Verpackung weist darauf hin dass dieses Produkt gemäß bestehender örtlicher Gesetze undVorschriftennichtüberdennormalenHausmüllentsorgtwerdensollte sonderneinerWiederverwertungzuzuführenist Bringen Sie es bitte zu einer von Ihrer Kommunalbehörde entsprechend amtlich ausgewiesenen Sammelstelle sobald das Produkt das Ende seiner Nutzungsdauer erreicht hat Für die ...

Page 122: ...ur en savoir plus sur les produits et emballages respectueux de l environnement veuillez consulter le www dlinkgreen com ESPAÑOL ES Este símbolo en el producto o el embalaje significa que de acuerdo con la legislación y la normativa local este producto no se debe desechar en la basura doméstica sino que se debe reciclar Llévelo a un punto de recogida designado por las autoridades locales una vez q...

Page 123: ...re energia e a ridurre le emissioni di anidride carbonica Per ulteriori informazioni sui prodotti e sugli imballaggi D Link a ridotto impatto ambientale visitate il sito all indirizzo www dlinkgreen com NEDERLANDS NL Ditsymboolophetproductofdeverpakkingbetekentdatditproductvolgensdeplaatselijkewetgevingnietmagwordenweggegooid met het huishoudelijk afval maar voor recyclage moeten worden ingeleverd...

Page 124: ...ypadku samych produktów jak i opakowań Firma D Link zaleca aby Państwo zawsze prawidłowo wyłączali z użytku swoje produkty D Link gdy nie są one wykorzystywane Postępując w ten sposób pozwalają Państwo oszczędzać energię i zmniejszać emisje CO2 Aby dowiedzieć się więcej na temat produktów i opakowań mających wpływ na środowisko prosimy zapoznać się ze stroną Internetową www dlinkgreen com ČESKY CZ...

Page 125: ...akarításában és a széndioxid kibocsátásának csökkentésében Környezetbarát termékeinkről és csomagolásainkról további információkat a www dlinkgreen com weboldalon tudhat meg NORSK NO Dette symbolet på produktet eller forpakningen betyr at dette produktet ifølge lokale lover og forskrifter ikke skal kastes sammen med husholdningsavfall men leveres inn til gjenvinning Vennligst ta det til et innsaml...

Page 126: ... udledningerne Du kan finde flere oplysninger om vores miljømæssigt ansvarlige produkter og emballage på www dlinkgreen com SUOMI FI Tämä symboli tuotteen pakkauksessa tarkoittaa että paikallisten lakien ja säännösten mukaisesti tätä tuotetta ei pidä hävittää yleisen kotitalousjätteen seassa vaan se tulee toimittaa kierrätettäväksi Kun tuote on elinkaarensa päässä toimita se lähimpään viranomaiste...

Page 127: ...xid För mer information om våra miljöansvariga produkter och förpackningar www dlinkgreen com PORTUGUÊS PT Este símbolo no produto ou embalagem significa que de acordo com as leis e regulamentações locais este produto não deverá ser eliminado juntamente com o lixo doméstico mas enviado para a reciclagem Transporte o para um ponto de recolha designado pelas suas autoridades locais quando este tiver...

Reviews: