background image

Configuring the Router cont…


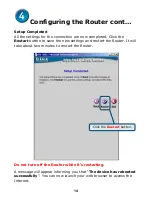
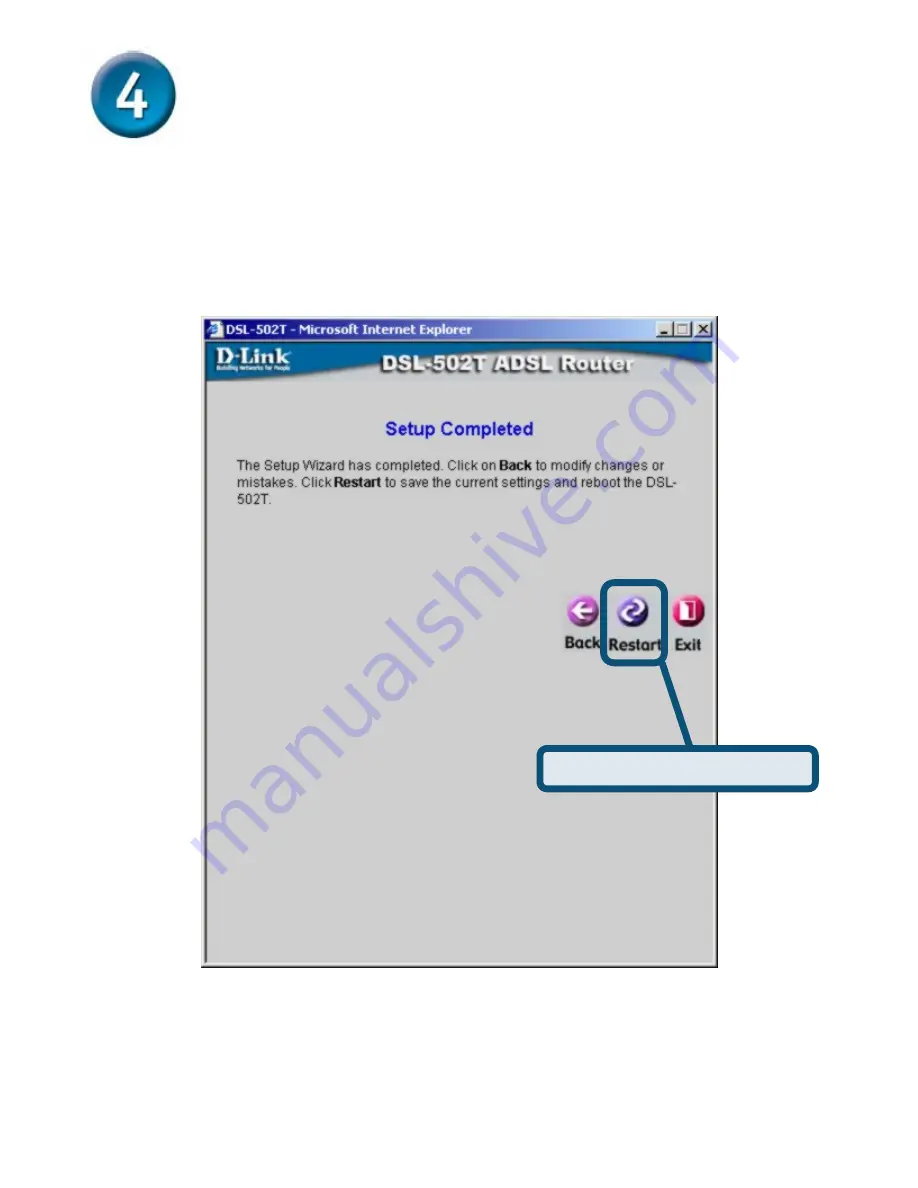
Setup Completed 
All the settings for the connection are now completed. Click the 
Restart button to save the new settings and restart the Router. It will 
take about two minutes to restart the Router. 


Click the 

Restart 

button. 

Do not turn off the Router while it’s restarting.


A message will appear informing you that “The device has rebooted 
successfully
”. You can now launch your web browser to access the 
Internet. 

14 

Summary of Contents for DSL-502T

Page 1: ...IP address information on your network See at the Quick Installation Guide or the Manual on the CD ROM for setting each network adapter to automatically obtain an IP address Check Your Package Conten...

Page 2: ...er end of the cable to an Ethernet Adapter or available Ethernet port on your computer 3 Insert the telephone cable included with the Router into the ADSL port and then connect the cable to your telep...

Page 3: ...ou should see the dialog box shown below If you do not see the auto run dialog box shown below explore the CD ROM and double click the setup application file autorun exe The auto run USB driver setup...

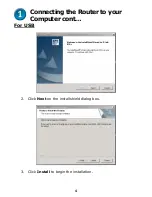
Page 4: ...Connecting the Router to your Computer cont For USB 2 Click Next on the installshield dialog box 3 Click Install to begin the installation 4...

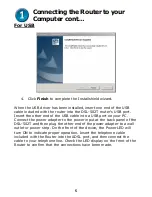
Page 5: ...USB port on your PC Connect the power adapter to the power input at the back panel of the DSL 502T and then plug the other end of the power adapter to a wall outlet or power strip On the front of the...

Page 6: ...how to configure the network adapter to obtain an IP address automatically for the DSL 502T ADSL Router For Microsoft Windows XP Double click on Network Connections Go to Start select Settings click...

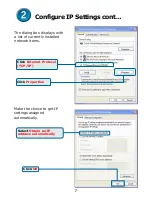
Page 7: ...e dialog box displays with a list of currently installed network items 7 Click Properties Click Internet Protocol TCP IP Make the choice to get IP settings assigned automatically Select Obtain an IP a...

Page 8: ...CP Client If you are using Windows XP and do not know how to change your network settings refer to Step 2 You may also read the User Manual for instructions on changing IP settings for computers runni...

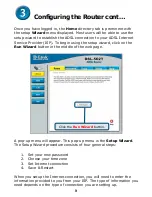
Page 9: ...on the Run Wizard button in the middle of the web page Click the Run Wizard button A pop up menu will appear This pop up menu is the Setup Wizard The Setup Wizard procedure consists of four general s...

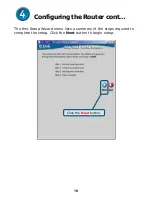
Page 10: ...Configuring the Router cont The first Setup Wizard menu lists a summary of the steps required to complete the setup Click the Next button to begin setup Click the Next button 10...

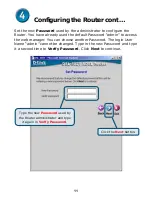
Page 11: ...lt Password admin to access the web manager You can choose another Password The login User Name admin cannot be changed Type in the new Password and type it a second time to Verify Password Click Next...

Page 12: ...e you are located and set the appropriate Daylight Savings Time On Off Next you will Set the Internet Connection Type for the WAN interface Your ISP should have given this information to you If you do...

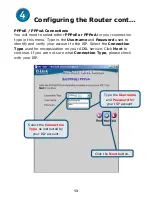
Page 13: ...Password used to identify and verify your account to the ISP Select the Connection Type used for encapsulation on your ADSL service Click Next to continue If you are not sure what Connection Type plea...

Page 14: ...ton to save the new settings and restart the Router It will take about two minutes to restart the Router Click the Restart button Do not turn off the Router while it s restarting A message will appear...

Page 15: ...cumentation on the D Link website D Link Australia 1 Giffnock Avenue North Ryde NSW 2113 Sydney Australia TEL 61 2 8899 1800 FAX 61 2 8899 1868 Australia 1300 766 868 New Zealand 0800 900 900 URL www...

Reviews: