xStack Storage User’s Guide
19
2.1.3.2
Drive and Tray Installation
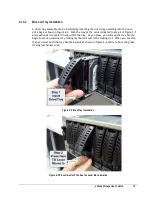
A drive/tray assembly can be installed by inserting the drive/tray assembly into the open
drive bay as shown in Figure 2-4. Push the tray at the point indicated in Step 2 of Figure 2-5
and push until it is seated firmly within the bay. As you press, you will see the tray handle
begin to move inwards as the locking mechanism enters the locking slot. When you see this,
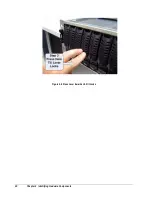
then you must push the tray handle inwards as shown in Figure 2-6 until you hear the green
locking mechanism click.
Figure 2-4 Drive/Tray Installation
Figure 2-5 Press Here Until You See the Lever Move Inwards
Summary of Contents for DSN-3400-10 - xStack Storage Area Network Array Hard...
Page 10: ...x Contents...
Page 20: ...20 Chapter 2 Identifying Hardware Components Figure 2 6 Press Lever Inwards Until it Locks...
Page 36: ......
Page 44: ...44 Chapter 4 Starting the xStack Storage Array for the First Time...
Page 103: ...xStack Storage User s Guide 103...
Page 117: ...xStack Storage User s Guide 117 Figure 6 12 Viewing SMART Attributes...
Page 160: ...160 Appendix D Replacing and Upgrading FRUs...
Page 164: ...164 Appendix F Hardware Enclosures...

