xStack Storage User’s Guide
29
3.4
Items Supplied by the User
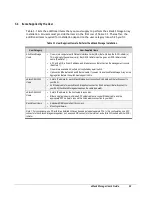
Table 3-1 lists the additional items that you must supply to perform the xStack Storage Array
installation. All users must provide the items in the first row of Table 3-1. Thereafter, the
additional items required for installation depend on the user category into which you fit.
Table 3-1 User-Supplied Items to Perform the xStack Storage Installation
User Category
User-Supplied Items
All xStack Storage
Users
One or more computers with Network Interface Cards (NICs) that will act as the iSCSI initiator(s).
This is typically the user’s server(s). Each iSCSI initiator must be given an iSCSI initiator node
name. (See Note 1)
A PC with a NIC, a fixed IP address, and Internet access that will act as the management console.
(See Note 1)
One or more available AC outlets not controlled by a wall switch.
Optional
: An Ethernet switch and Ethernet cable. If you want to use the xStack Storage Array’s Link
Aggregation feature, the switch must support LAGs.
xStack DSN-3200
Users
A static IP address for each xStack Storage host connection RJ-45 data port that will connect to
your SAN.
An Ethernet cable for each xStack Storage host connection RJ-45 data port that will connect to
your SAN (the xStack Storage auto-senses the cable type used).
xStack DSN-3400
Users
A static IP address for the host network connection.
Either a single mode or multimode XFP optical cable or a copper Ethernet cable, and the
appropriate XFP module to connect the host network connection to your SAN.
Rack-Mount Users
A standard NEMA-compliant 19-inch rack.
Mounting hardware.
Note 1: For convenience, one PC with three installed NICs can be used instead of separate PCs. In this configuration, one NIC
connects to the xStack Storage management port, a second NIC connects to the Internet, and a third NIC is used with the iSCSI
initiator.
Summary of Contents for DSN-3400-10 - xStack Storage Area Network Array Hard...
Page 10: ...x Contents...
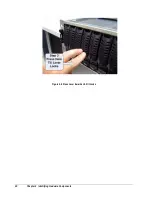
Page 20: ...20 Chapter 2 Identifying Hardware Components Figure 2 6 Press Lever Inwards Until it Locks...
Page 36: ......
Page 44: ...44 Chapter 4 Starting the xStack Storage Array for the First Time...
Page 103: ...xStack Storage User s Guide 103...
Page 117: ...xStack Storage User s Guide 117 Figure 6 12 Viewing SMART Attributes...
Page 160: ...160 Appendix D Replacing and Upgrading FRUs...
Page 164: ...164 Appendix F Hardware Enclosures...

