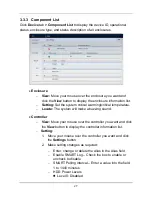


41
−
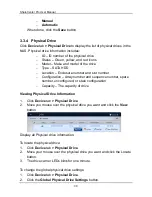
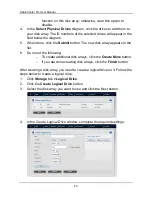
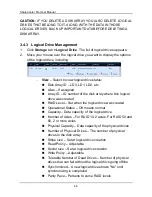
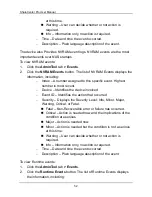
In the
Alias
field, enter an alias at a maximum of 32
characters (includes letters, numbers, space between
characters, and underline).
−
Set the
LDType
as
NAS
or
SAN/DAS
.
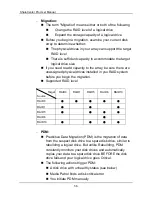
−
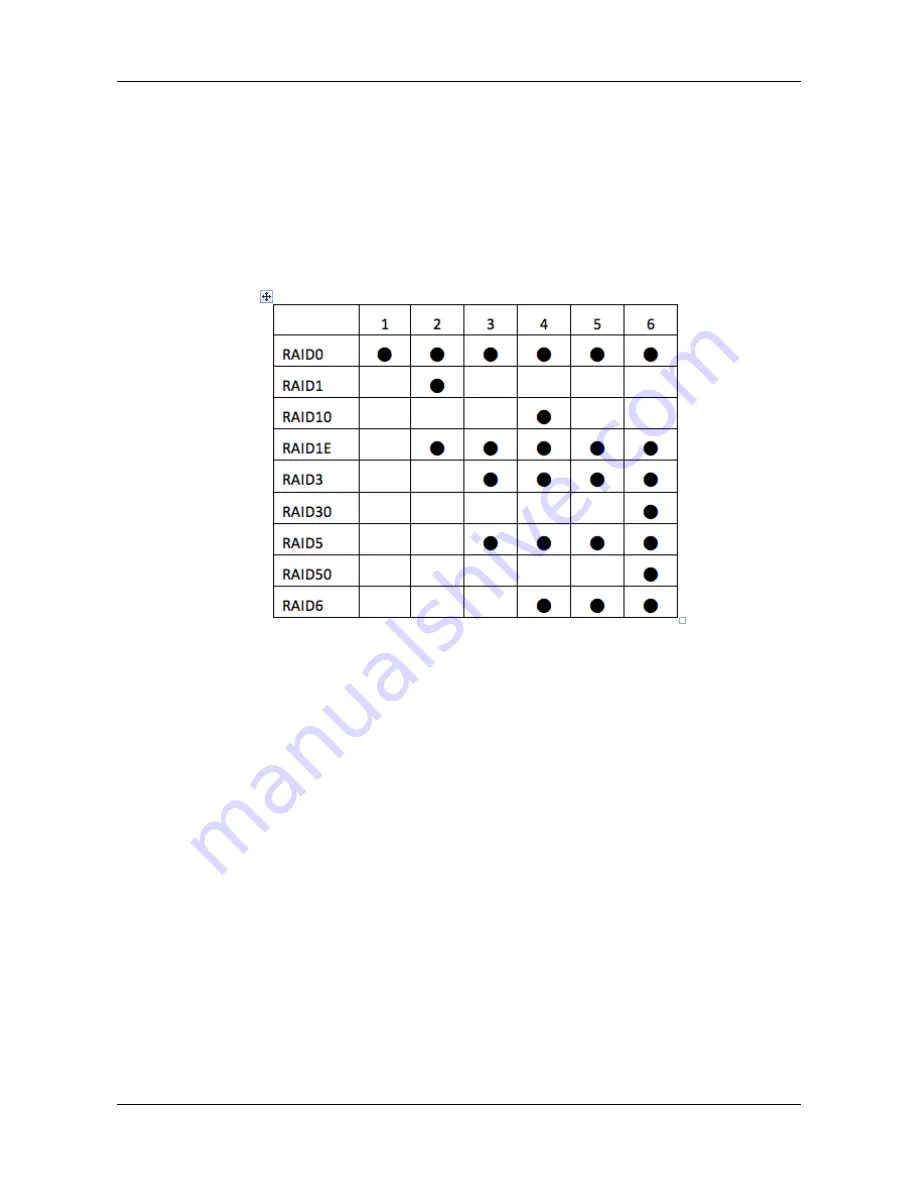
Select a
RAID Level
from the dropdown menu, depending on
the number of physical drives in the disk array.
Support RAID type with drive number
−
In the
Capacity
field, accept the default maximum capacity or
enter a lesser capacity (size in MB, GB or TB). Any remaining
capacity is available for an additional logical drive.
−
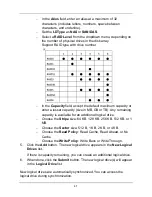
Choose the
Stripe
size: 64 KB, 128 KB, 256 KB, 512 KB, or 1
MB.
−
Choose the
Sector
size: 512 B, 1 KB, 2 KB, or 4 KB.
−
Choose the
Read Policy
: Read Cache, Read Ahead, or No
Cache
−
Choose the
Write Policy
: Write Back or Write Through.
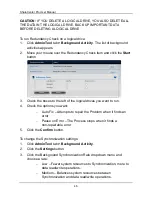
5.
Click the
Add
button. The new logical drive appears in the
New Logical
Drives
list.
If there is capacity remaining, you can create an additional logical drive.
6.
When done, click the
Submit
button. The new logical drive(s) will appear
in the
Logical Drive
list.
New logical drives are automatically synchronized. You can access the
logical drive during synchronization.
Summary of Contents for ShareCenter Pro DNS-1550-04
Page 1: ...1...
Page 68: ...ShareCenter Pro User Manual 68...
Page 142: ...ShareCenter Pro User Manual 142 6 The shutdown runs automatically...


