


9
D-Link DNS-345 Quick Install Guide
EN
G
LIS
H
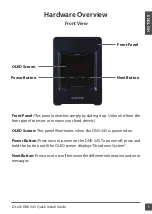
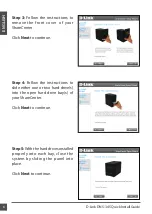
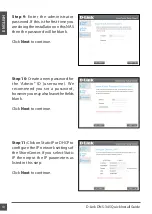
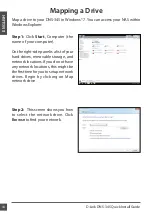
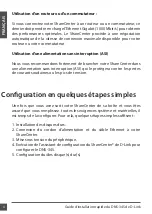
Step 6:
Connect a CAT5 Ethernet
cable to your ShareCenter and
connect the other end(s) to a switch
or router. To improve bandwidth,
connect a second CAT5 Ethernet
cable from the same switch or router
to the other Ethernet port on the
ShareCenter.
Click
Next
to continue.
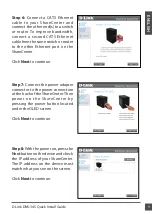
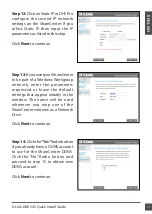
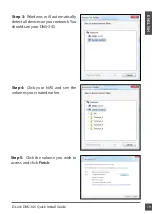
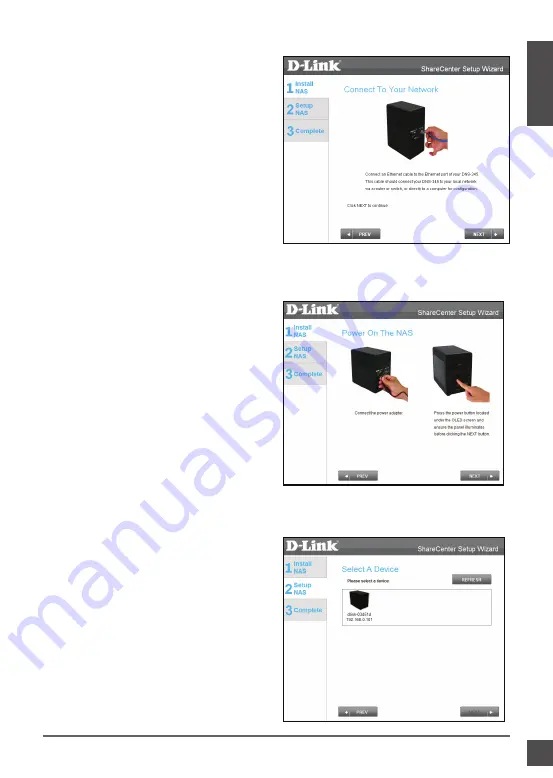
Step 7:
Connect the power adapter
connector to the power connection
at the back of the ShareCenter. Then
power on the ShareCenter by
pressing the power button located
under the OLED screen
Click
Next
to continue.
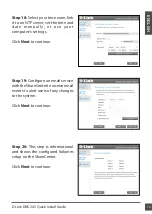
Step 8:
With the power on, press the
Next
button on the device and check
the IP address of your ShareCenter.
The IP address on the device must
match what you see on the screen.
Click
Next
to continue.


