background image

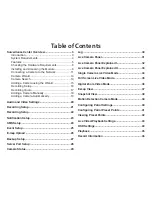
Summary of Contents for Storage

Page 1: ......

Page 2: ...o Settings 20 Recording Setup 21 Recording Setup 22 Notification Setup 23 SMS Setup 24 Event Setup 25 E map Upload 26 Backup Setup 27 Server Port Setup 28 Camera Status 29 Log 30 Live Camera Panel 31 Live Camera Panel Explained I 32 Live Camera Panel Explained II 33 Single Camera Live Video Mode 34 Full Screen Live Video Mode 35 Digital Zoom Video Mode 36 E map View 37 Snapshot View 38 Motion Dete...

Page 3: ...ility to monitor and record data from 4 cameras at any given moment retrieve playback video stored on the NAS and upload a map of the premises where the cameras are installed and plot the location of each camera on the map The Surveillance Center Addon is a complete home and office surveillance suite that works your NAS Introduction Surveillance Center Overview 1 Check with your reseller to see if...

Page 4: ...00MB available space CD ROM drive Windows 7 Vista or XP with latest service packs Internet Explorer 8 and above For Storage Internal 3 5 SATA Hard Drive s RAID 0 1 requires a minimum of two SATA drives Note For best performance ensure that you are running the latest service packs for the appropriate Windows operating systems Also make sure you have sufficient disk space to accommodate all video su...

Page 5: ...rding 4 Channel Live Video monitoring 4 Channel Playback Manual and Schedule Recording E Map integration Backup recorded video to NAS The ShareCenter Surveillance Center is an easy to install surveillance data storage add on module used for remote access cameras through a local network or from the Internet This ShareCenter supports a few simple features listed below ...

Page 6: ...r switch Select the compatible IP Camera s Selecting Hard Drives You can use hard drives from any manufacturer and with any capacity with your Surveillance Center The D Link ShareCenter supports standard 3 5 internal SATA drives If you are unsure ask your administrator or hard drive retailer manufacturer to verify that your hard drives meet this standard Warning Any pre existing data on the drives...

Page 7: ...enter Surveillance Center to a router or switch your router or switch needs to support Gigabit Ethernet 1000Mbit s for maximum performance The ShareCenter will auto negotiate the highest connection speed available to your router or switch If you are using Port Bonding use a managed switch Using an Uninterrupted Power Supply UPS We highly recommend that you use your ShareCenter Surveillance Center ...

Page 8: ...ddon Installing and Accessing the Module Step 1 Go to Management Application Management and click the Add Ons link on the left side panel Step 2 Click on Choose File and browse your computer to find the Surveillance Center software ...

Page 9: ...nter will inform you of a successful installation and you will see the module installed Step 4 Under the Surveillance Center click the green Play button to activate the Surveillance Center The green Surveillance Center button now turns red YoucantogglebetweenStartandStop to activate or deactivate the Surveillance Center ...

Page 10: ...his leads to the Surveillance Center details panel Here you can view the Installation Date the software version number and the Installation path Click Launch Interface to access the Surveillance Center interface Step 7 You are prompted to install an Addon for Internet Explorer at the botom of your screen Click Install to install the necessary plugin for Internet Explorer The Surveillance Center do...

Page 11: ...mera to the Network When you connect one of the above mentioned cameras to the network the Surveillance Center software detects the camera automatically The software is able to recognize the IP address model number and bit rate speed IP Address Bit Rate ...

Page 12: ...ce Center Addon Click on Setup Camera Setup to view your current cameras Two options are available Run the Wizard or see the Camera List Under the Camera List you will be able to view current camera s connected to the NAS ...

Page 13: ... Addon Camera Wizard To add a camera to the surveillance Center module click Setup and then Camera Setup Select RunWizard as shown below The welcome screen for the wizard is shown outlining the steps involved in setting up a camera ...

Page 14: ...14 D Link Surveillance Center Addon Camera Search Thewizarddetectsthecamera s availableonyournetwork Selectthecamera s youwanttoaddbycheckingitscorresponding radio button and click Next ...

Page 15: ...modifying the Name field Additionally you can set the video recording format The available formats are dependent on your camera You can use the button to have the wizard detect the video formats available for your camera as well as the port the camera is operating on Use the Test Camera button to grab an image from the camera to test the camera for image quality and deciding upon the positioning o...

Page 16: ...ect how you want to record If you select to record by schedule you will be able to set a schedule using the graph below Click on the color of the function you want to perform and then click in the box for the day and time that you want it to perform that function When you are done click Next ...

Page 17: ...t 7 days of recordings and automatically overwrite them Click the Estimate Required Space button to let the software calculate based on your settings how much space will be required each day This can assist you in making a decision about how much space to allocate to the recordings Click Finish when you have completed your settings ...

Page 18: ...ing radio button and click Add To A window pops up prompting you to select which slot you want to allocate this camera to Select which Camera number you would like this camera to be Thecameraappearsinthechosenslotinthesectionaboveandyouare able to adjust some settings You can modify the Name Address and Port if they are incorrect You can also use the Auto Detection button todetecttheportthecamerai...

Page 19: ... Camera Setup page configures the Surveillance Center to automatically install a new camera when you access the Live Video page Check the Enable Auto Install checkbox if you want new cameras to be automatically installed or uncheck it if you want to manually add them Click Save Settings to continue ...

Page 20: ...ze and quality characteristics Frame Rate This is the number of frames per second to be recorded A higher number of frames per second means smoother video and results in a larger file Resolution The resolution is the number of pixels that the video will include This is dependent on your camera A higher number of pixels will result in a larger file Quality Selecting Motion JPEG format will give you...

Page 21: ...utospecifyalead intimeinseconds to pre record and a lead out time to continue recording before and after a scheduled recording UsetheRecordModeradiobuttonstoselecthowyouwant to record If you select to record by schedule you will be able to set a schedule using the graph below Click on the color of the function you want to perform and then click in the box for the day and time that you want it to p...

Page 22: ... function you must first click the Go toWeb link and log in to the camera s web interface and enable the motion detection function on that camera Please refer to the manual of your camera for more information on enabling its motion detection function To the right is an example of a camera s motion detection configuration page ...

Page 23: ...menu and then select EventSetup If you have not already set up the Email Settings the following window will be displayed You can turn this off by checking No Longer Display at the bottom of the screen Enter the details of your mail server if you wish to use the mail notification service and click Save Settings to continue ...

Page 24: ...ations to enable this service From the drop down list select your Service Provider If your service provider is not on the list click Add to configure Next enter the SMS url where you will have the SMS s sent Replace or ignore the space character Enter the phone number Click Test SMS to test whether this function works and click Save Settings to authenticate your SMS configuration ...

Page 25: ...otified when certain events occur The web page column indicates that you will be notified on the Live Video screen in the top right corner when the connection to the camera is lost and when it is resumed Use the Advanced button to access the Email and SMS settings page Remember to click Save Settings when you have finished making your changes ...

Page 26: ...f each camera so you know where each camera is and where it is pointing Accepted image formats are jpg bmp gif and png Click and drag a camera from the camera list on the left to the image When you have placed the camera in the correct location double click the icon to change the orientation of the camera Click Save Settings when you have finished ...

Page 27: ...e and Stop Date Time fields to enter the time and date range that you want to create the backup for Next select the cameras you want to backup or restore by clicking the checkbox for the respective camera Archive When you have created a new backup it will appear in the Archive section From here you can check which archives to include in the playback list on the playback screen by adding or removin...

Page 28: ... page allows you to modify the ports that the Live Video Server Playback Server and Config Server operate on You may wish to do this if you have port restrictions on your local network To change the port numbers use the provided fields and click Save Settings ...

Page 29: ...ance Center Addon Camera Status To access the camera status page click Status and then Camera Status This page shows you a list of your network cameras and their connection status recording status frame rate and bit rate ...

Page 30: ...us and then Log The log page shows a history of all significant events of the Surveillance Center software You can filter the events shown in the log by checking the checkbox for Type Camera or Date You also have the option to backup the log to a text file and clear the log ...

Page 31: ...31 D Link Surveillance Center Addon Live Camera Panel ...

Page 32: ...eo Camera 2 Live Video Camera 3 Live Video Camera 4 Camera Status Camera View Mode E map Snapshot Button Mute Volume Slider Pan Tilt Zoom Mode Patrol Mode for PTZ Cameras Stop Start Camera Mode Manual Recording General Settings Tab Digital Zoom Mode Current Camera IP Address Name Status Bit Rate ...

Page 33: ...eturn to the user interface Use the E map button to toggle between the live camera view and the E map display The snapshot button can be used to take a snapshot of the current frame on the selected camera The mute button can be used to mute the sound from the camera and the slider bar to adjust the volume For cameras that support Pan Tilt Zoom control you can use these controls to direction of the...

Page 34: ...urveillance Center Addon Single Camera Live Video Mode Click this button to enter Single Camera Mode The viewing angle expands to cover all other camera real estate Click this button to return to Split Camera Mode ...

Page 35: ...ull Screen Live Video Mode Click this button to enter Full Screen Camera Mode The viewing angle expands to cover the entire screen Click this button to return to Split Camera Mode This can be done in Split Level Mode and Single Camera Mode ...

Page 36: ... you to zoom in and out on an area of the image You can place the mouse pointer in the bottom right corner of the image to click and drag the box around to view different parts of the video You can also click directly on the part of the main image you want to focus on Use the mouse wheel to control the level of zoom ...

Page 37: ... E map from the LiveVideo screen by clicking the button Note you must have installed e map JPEG files in order to use this feature Click the E map Upload button to upload images into the database When you click this button you are directed to the E map Upload window ...

Page 38: ...e Live Video screen by clicking the button This takes a snapshot of your current live screen You can copy this image to the clipboard by clicking the Copy to Clipboard button or you can save the image to disk by clicking the Save Image button Click the Close button to exit this mode ...

Page 39: ...ra is configured to record when motion is detected the camera icon on the E map will change to red when an alarm is sounded or motion is detected as shown below When motion is detected or an alarm is triggered click on the red camera icon on the e map to play the recorded event ...

Page 40: ... are dependable upon the camera you are using The Surveillance Center works with the following D Link PTZ cameras DCS 5230 5230L and DCS 5222L 5211L Patrol Once Click the Patrol icon to configure the Patrol settings Scroll down and click Set Patrol The Patrol Setup window pops up ...

Page 41: ...nt icon A drop down list appears Select Clear All to clear the list or select Add Preset Point to create a new Preset Point This brings up the PTZ Preset Point box Enter a Preset Name and click OK To edit the Presets click the Preset Point icon and select whichever preset you wish to delete ...

Page 42: ...42 D Link Surveillance Center Addon Viewing Preset Points Click the Go to Preset Point icon This icon directs the camera to the designated points ...

Page 43: ... screen The Record Display options allow you to modify what is displayed when using the Open Recording button on the Playback screen a calendar month highlighting dates with recordings or a simple list of folders with recordings Capture Image This allows you to select where to save the snapshots taken using the snapshot button on the live video screen and the format they are stored in Click OK whe...

Page 44: ...he Foreground box There are also options to make the text bold and choosing the edge option will apply the selected color to the text In the background section you can select a color and the level of transparency The information box allows you to select the information to display Youmaydisplaythecameraname cameranumber the date and time There are several date and time formats to select on and this...

Page 45: ...turn to the user interface The Settings button takes you to the previously described Settings screen allowing you to adjust display and image capture settings The snapshot button can be used to take a snapshot of the current frame on the selected camera The mute button can be used to mute the sound from the camera and the slider bar to adjust the volume Enables digital zoom on the selected camera ...

Page 46: ...sshowscamerarecordingsbackedupbythe user The number of entries below this will depend on how many recordings you have backed up The Date Time Period section allows you to narrow down the time and date for which to show recordings The timeline at the bottom of the window plots the selected day and displays the different types of recordings and the times they were recorded The recordings are all col...

Reviews: