Configuration
D-Link Web Smart Switch User Manual
7
7
0
0
Auto
- If
Auto
is selected, it will enable 802.1X and cause the port to begin in the unauthorized state,
allowing only EAPOL frames to be sent and received through the port. The authentication process
begins when the link state of the port transitions from down to up, or when an EAPOL-start frame is
received. The Switch then requests the identity of the client and begins relaying authentication
messages between the client and the authentication server.
Force Unauthorized
- If
Force Unauthorized
is selected, the port will remain in the unauthorized
state ignoring all attempts by the client to authenticate. The Switch cannot provide authentication
services to the client through the interface.
On 802.1X security-enabled networks, there is a need for non-802.1X supported devices to gain limited
access to the network, due to lack of the proper 802.1X software or incompatible devices, such as computers
running Windows 98 or older operating systems, or the need for guests to gain access to the network without
full authorization or local authentication on the Switch. To supplement these circumstances, this switch now
implements 802.1X Guest VLANs. These VLANs should have limited access rights and features separate
from other VLANs on the network.
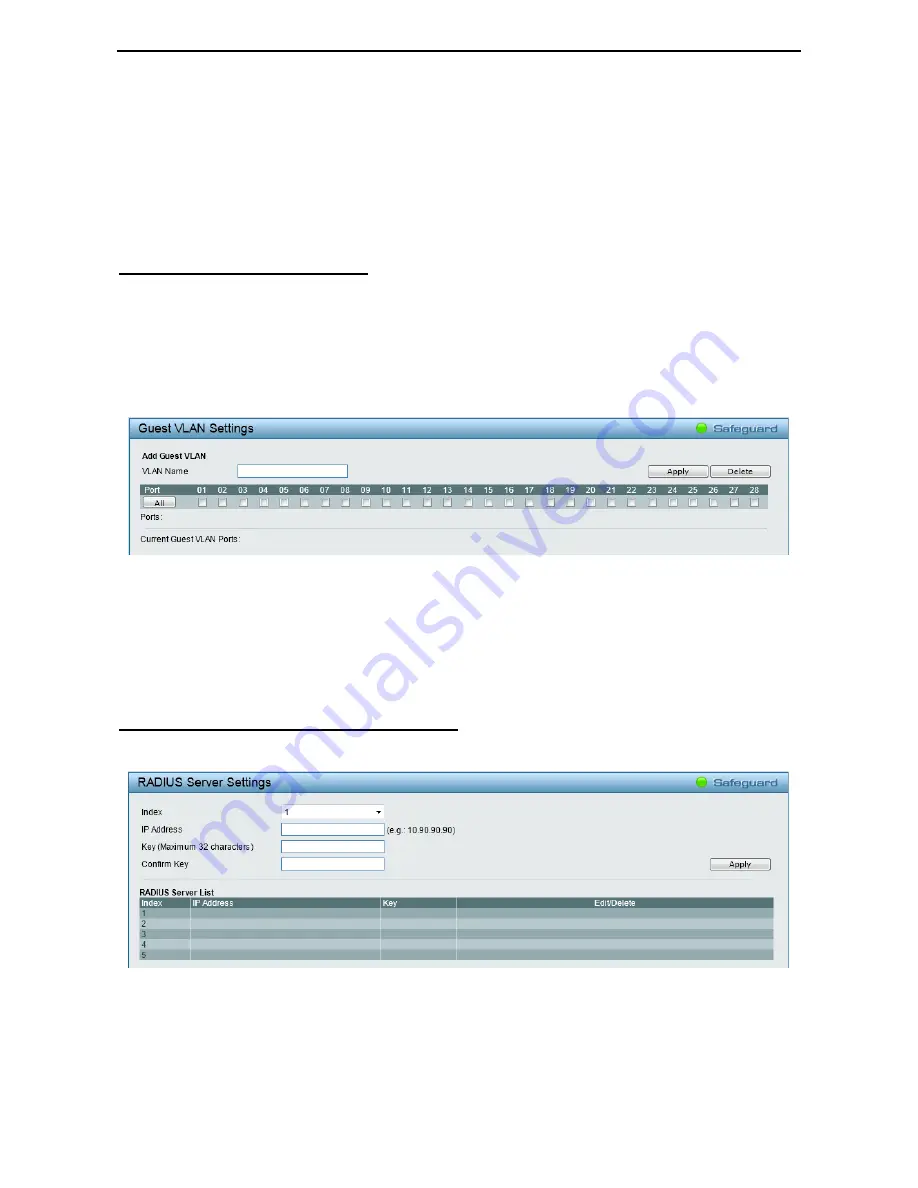
AAA > 802.1X > Guest VLAN Settings
To set an 802.1X guest VLAN, the user must first configure a normal VLAN, which can be enabled here for
guest VLAN status. Only one VLAN may be assigned as the 802.1X guest VLAN.
Figure 4.82 – AAA > 802.1X > Guest VLAN Settings
VLAN Name
: Enter the pre-configured VLAN name to create as an 802.1X guest VLAN.
Port:
Set the ports to be enabled for the 802.1X guest VLAN. Click
All
to select all the ports.
Click
Apply
to implement the changes made. Click
Delete
to remove the specific entry based on the
information entered.
The RADIUS feature of the Switch allows the user to facilitate centralized user administration as well as
providing protection against a sniffing, active hacker.
AAA > 802.1X > RADIUS > RADIUS Server Settings
Figure 4.83 – AAA > 802.1X > RADIUS > RADIUS Server Settings
Index:
Select the desired RADIUS server to configure.
IP Address:
Set the IP address of the RADIUS Server.
Key:
Set the key which is the same as that of the RADIUS server.
Confirm Key:
Re-type the key which is the same as that of the RADIUS server.


