background image

xStack DGS-3400 Series Fast Ethernet Switch 

LACP Port Setting 

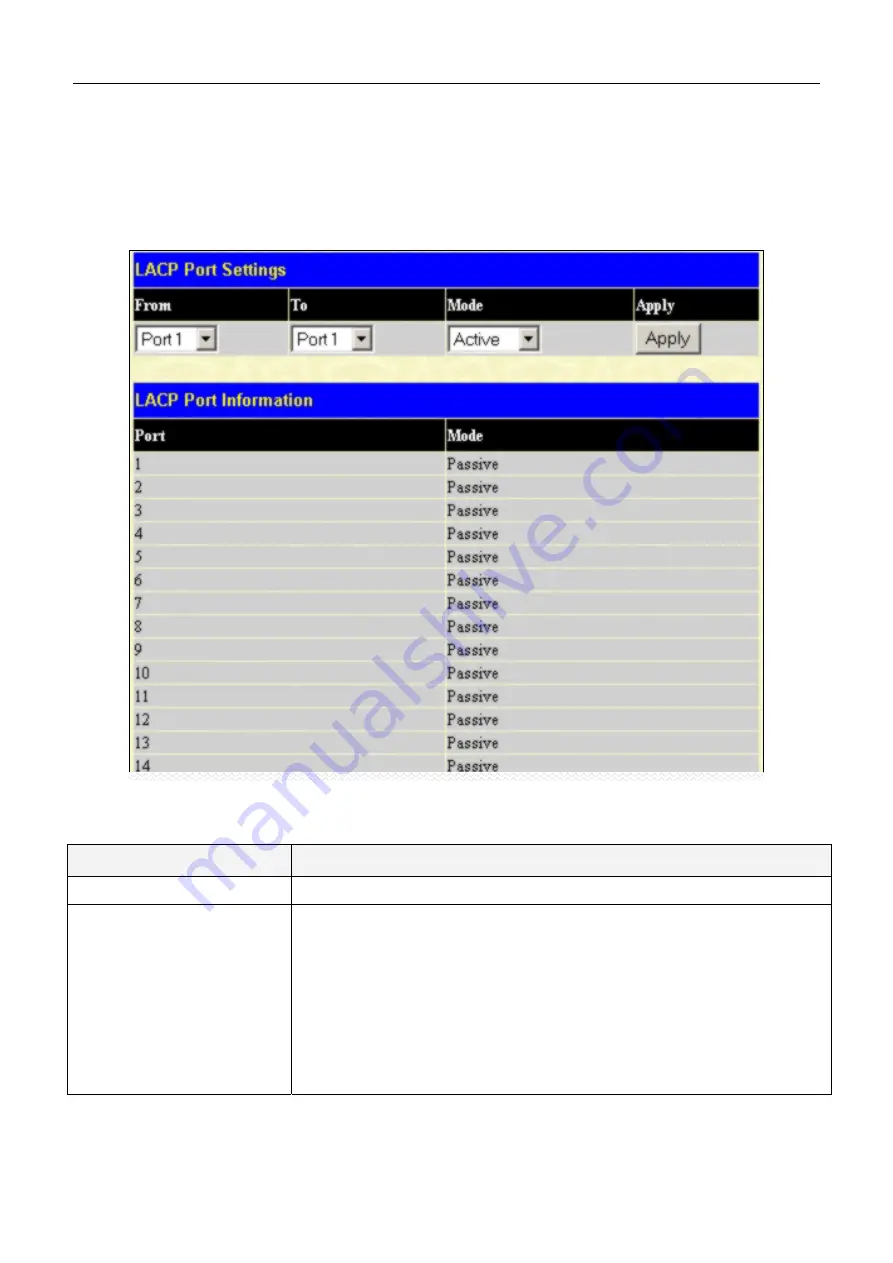
The 

LACP Port Setting 

window is used in conjunction with the 

Link Aggregation 

window to create port trunking groups 

on the Switch. Using the following window, the user may set which ports will be active and passive in processing and 
sending LACP control frames. 


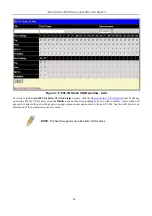
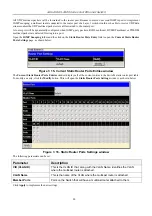
Figure 7- 12. LACP Port Settings window 

The user may set the following parameters: 

Parameter    

Description 

From/To 

A consecutive group of ports may be configured starting with the selected port. 

Mode 

Active

 - Active LACP ports are capable of processing and sending LACP 

control frames. This allows LACP compliant devices to negotiate the 
aggregated link so the group may be changed dynamically as needs require. 
In order to utilize the ability to change an aggregated port group, that is, to add 
or subtract ports from the group, at least one of the participating devices must 
designate LACP ports as active. Both devices must support LACP. 

Passive 

- LACP ports that are designated as passive cannot initially send 

LACP control frames. In order to allow the linked port group to negotiate 
adjustments and make changes dynamically, one end of the connection must 
have "active" LACP ports (see above). 

After setting the previous parameters, click

 Apply 

to allow your changes to be implemented. The LACP Port Table


shows 

which ports are active and/or passive. 


93 

Summary of Contents for xStack DGS-3427

Page 1: ...User Manual Product Model TM DGS 3400 Series Layer 2 Gigabit Managed Switch Release 1 Copyright 2005 All rights reserved...

Page 2: ...Corporation is strictly forbidden Trademarks used in this text D Link and the D LINK logo are trademarks of D Link Computer Corporation Microsoft and Windows are registered trademarks of Microsoft Cor...

Page 3: ...Installation Guidelines 9 Installing the Switch without the Rack 10 Installing the Switch in a Rack 10 Mounting the Switch in a Standard 19 Rack 11 Power On 11 Power Failure 11 Installing the SFP por...

Page 4: ...e Settings 42 Time Zone and DST 43 MAC Notification Settings 45 Global Settings 45 Port Settings 45 TFTP Services 46 Multiple Image Services 47 Firmware Information 47 Ping Test 48 Safeguard Engine 48...

Page 5: ...2 1Q VLANs 81 802 1Q VLAN Tags 82 Port VLAN ID 83 Tagging and Untagging 83 Ingress Filtering 84 Default VLANs 84 Port based VLANs 85 VLAN Segmentation 85 VLAN and Trunk Groups 85 Static VLAN Entry 85...

Page 6: ...nterface Filtering 131 CPU Interface Filtering State Settings 131 CPU Interface Filtering Table 132 Security 142 Traffic Control 143 Port Security 146 Port Lock Entries 147 Configure 802 1x Authentica...

Page 7: ...ransmitted TX 177 Packet Errors 177 Received RX 177 Transmitted TX 179 Packet Size 180 Browse Router Port 181 VLAN Status 181 MAC Address Table 182 Switch History Log 183 IGMP Snooping Group 184 Port...

Page 8: ...copy command Boldface Typewriter Font Indicates commands and responses to prompts that must be typed exactly as printed in the manual Initial capital letter Indicates a window name Names of keys on t...

Page 9: ...t environment If the system gets wet see the appropriate section in the troubleshooting guide or contact your trained service provider Do not push any objects into the openings of the system Doing so...

Page 10: ...that all casters and or stabilizers are firmly connected to the system Avoid sudden stops and uneven surfaces General Precautions for Rack Mountable Products Observe the following precautions for rac...

Page 11: ...d Completed power and safety ground wiring must be inspected by a qualified electrical inspector An energy hazard will exist if the safety ground cable is omitted or disconnected Protecting Against El...

Page 12: ...xcept for varying port counts Switch Description D Link s next generation xStack DGS 3400 series switches are high port density stackable switches that combine the ultimate performance with fault tole...

Page 13: ...ple Network Time Protocol support MAC Notification support System and Port Utilization support System Log Support High performance switching engine performs forwarding and filtering at full wire speed...

Page 14: ...ns as listed by device DGS 3426 Twenty four 10 100 1000BASE T Gigabit ports Four Combo SFP Ports Two slots open for single port 10GE XFP or 10GBASE CX4 modules One RS 232 DB 9 console port DGS 3427 Tw...

Page 15: ...and SFP port LEDs The front panel includes a seven segment LED indicating the Stack ID number A seperate table below describes LED indicators in more detail Note that Stacking in the DGS 3400 Series...

Page 16: ...ndicators The Switch supports LED indicators for Power Console RPS and Port LEDs including 10GE port LEDs for optional module inserts Figure 2 4 LED Indicators on DGS 3450 Figure 2 5 LED Indicators on...

Page 17: ...w the indicator in the lower row of ports A steady green light denotes a valid 1000Mbps link on the port while a blinking green light indicates activity on the port at 1000Mbps A steady orange light d...

Page 18: ...r two empty slots for optional module inserts a redundant power supply connector a RS 232 DCE console port for Switch management and a system fan vent Figure 2 9 Rear panel view of DGS 3450 The AC pow...

Page 19: ...lock these openings Leave at least 6 inches of space at the rear and sides of the Switch for proper ventilation Be reminded that without proper heat dissipation and air circulation system components m...

Page 20: ...e follow these guidelines for setting up the Switch Install the Switch on a sturdy level surface that can support at least 6 6 lb 3 kg of weight Do not place heavy objects on the Switch The power outl...

Page 21: ...ion space between the Switch and any other objects in the vicinity Figure 2 12 Prepare Switch for installation on a desktop or shelf Installing the Switch in a Rack The Switch can be mounted in a stan...

Page 22: ...ord into the power connector of the Switch and the other end into the local power source outlet 2 After powering on the Switch the LED indicators will momentarily blink This blinking of the LED indica...

Page 23: ...r to uplink various other networking devices for a gigabit link that may span great distances These SFP ports support full duplex transmissions have auto negotiation and can be used with DEM 310GT 100...

Page 24: ...with the IEEE802 3ak standard this module uses a 4 laned copper connector for data transfer in full duplex mode To install these modules in the DGS 3400 Series Switch follow the simple steps listed b...

Page 25: ...ck as shown in the following figure Gently but firmly push in on the module to secure it to the Switch The module should fit snugly into the corresponding receptors Figure 2 18 Inserting the optional...

Page 26: ...witch supports an external redundant power system The diagrams below illustrate a proper RPS power connection to the Switch Please consult the documentation for information on power cabling and connec...

Page 27: ...ernet Switch Figure 2 21 The DGS 3450 with the DPS 500 Redundant External Power Supply NOTE See the DPS 500 documentation for more information CAUTION Do not use the Switch with any redundant power sy...

Page 28: ...tch to the Switch via a twisted pair Category 3 4 or 5 UTP STP cable Connect a 100BASE TX hub or switch to the Switch via a twisted pair Category 5 UTP STP cable Connect 1000BASE T switch to the Switc...

Page 29: ...the Switch monitor the LED panel and display statistics graphically using a web browser such as Netscape Navigator version 6 2 and higher or Microsoft Internet Explorer version 5 0 2 SNMP Based Manag...

Page 30: ...Pack 2 or later is installed Windows 2000 Service Pack 2 allows use of arrow keys in HyperTerminal s VT100 emulation See www microsoft com for information on Windows 2000 service packs After you have...

Page 31: ...oot up display in console screen DGS 3427 Managing the Switch for the First Time The Switch supports user based security that can allow prevention of unauthorized users from accessing the Switch or ch...

Page 32: ...ess will be given to enter commands after the command prompt DGS 3426 4 DGS 3427 4 or DGS 3450 4 as shown below There is no initial username or password Leave the Username and Password fields blank Fi...

Page 33: ...d used for the administrator account being created and press the Enter key 3 Once entered the Switch will again ask the user to enter the same password again to verify it Type the same password and pr...

Page 34: ...n process that is separated into two parts The first part is to maintain a list of users and their attributes that are allowed to act as SNMP managers The second part describes what each user on that...

Page 35: ...eforeusing the Web based manager The Switch IP address can be automatically set using BOOTP or DHCP protocols in which case the actual address assigned to the Switch must be known The IP address may b...

Page 36: ...In the above example the Switch was assigned an IP address of 10 34 27 100 with a subnet mask of 255 0 0 0 The system message Success indicates that the command was executed successfully The Switch ca...

Page 37: ...an be managed configured and monitored via the embedded web based HTML interface Manage the Switch from remote stations anywhere on the network through a standard browser The browser acts as a univers...

Page 38: ...mbers 123 represent the IP address of the Switch NOTE There is no factory default IP address In the page that opens click on the Login hyperlink Figure 5 1 Click on Login hyperlink This opens the mana...

Page 39: ...Main Web Manager Screen Area Function Area 1 Select the menu or window to display Open folders and click the hyperlinked menu buttons and subfolders contained within them to display menus Click the D...

Page 40: ...directories Bandwidth Control QoS Output Scheduling 802 1p Default Priority and 802 1p Uer Priority ACL Contains the following menu pages and sub directories Access Profile Table and CPU Interface Fil...

Page 41: ...ther windows click the DGS 3400 Web Management Tool folder The Device Information window shows the Switch s MAC Address assigned by the factory and unchangeable the Boot PROM Firmware Version and Hard...

Page 42: ...xStack DGS 3400 Series Fast Ethernet Switch Figure 6 1 Device Information and general settings 31...

Page 43: ...rotocol is 23 Web Status Web based management is Enabled by default If you choose to disable this by selecting Disabled you will lose the ability to configure the system through the web interface as s...

Page 44: ...ress and Subnet Mask 3 If accessing the Switch from a different subnet from the one it is installed on enter the IP address of the Default Gateway If managing the Switch from the subnet on which it is...

Page 45: ...on VLANs other than the one entered here will not be able to manage the Switch in band unless their IP addresses are entered in the Security IP Management menu If VLANs have not yet been configured f...

Page 46: ...n to use those settings The other options are Auto 10M Half 10M Full 100M Half 100M Full and 1000 full There is no automatic adjustment of port settings with any option other than Auto Flow Control Di...

Page 47: ...h To assign names to various ports click Administration Port Configuration Port Description to view the following window Figure 6 4 Port Description Setting window Use the From and To pull down menu t...

Page 48: ...the Modify button for that user Figure 6 6 User Accounts Add Add a new user by typing in a User Name and New Password and retype the same password in the Confirm New Password Choose the level of privi...

Page 49: ...ror port 1 Select the Source Port from where you want to copy frames and the Target Port which receives the copies from the source port 2 Select the Source Direction Ingress Egress or Both and change...

Page 50: ...stem Log Server In the Administration folder click System Log Setting to view the window shown below Figure 6 9 System Log Host list The parameters configured for adding and editing System Log Server...

Page 51: ...9 10 11 12 13 14 15 16 17 18 19 20 21 22 23 kernel messages user level messages mail system system daemons security authorization messages messages generated internally by syslog line printer subsyst...

Page 52: ...Click Apply to implement the new System Severity Settings Parameter Description System Severity Choose how the alerts are used from the drop down menu Select log to send the alert of the Severity Type...

Page 53: ...system Current Time SNTP Settings SNTP State Use this pull down menu to Enabled or Disabled SNTP SNTP Primary Server This is the IP address of the primary server the SNTP information will be taken fro...

Page 54: ...wing are windows used to configure time zones and Daylight Savings time settings for SNTP Open the Administration folder then the SNTP Settings folder and click on the Time Zone and DST link revealing...

Page 55: ...ST will start From Day of Week Enter the day of the week that DST will start on From Month Enter the month DST will start on From time in HH MM Enter the time of day that DST will start on To Which Da...

Page 56: ...er Description State Enable or disable MAC notification globally on the Switch Interval sec The time in seconds between notifications History size The maximum number of entries listed in the history l...

Page 57: ...art to record the IP address of the TFTP server and to initiate the file transfer Upload Configuration Enter the IP address of the TFTP server and the path and filename for the switch settings on the...

Page 58: ...re in the Switch s memory The Switch can store 2 firmware images for use Image ID 1 will be the default boot up firmware for the Switch unless otherwise configured by the user Version States the firmw...

Page 59: ...cess or b exerts too much memory it will enter an Exhausted mode When in this mode the Switch will perform the following tasks to mimimize the CPU usage 1 It will limit bandwidth of receiving ARP pack...

Page 60: ...normal packet flow NOTICE When Safeguard Engine is enabled the Switch will allot bandwidth to various traffic flows ARP IP using the FFP Fast Filter Processor metering table to control the CPU utiliza...

Page 61: ...onfigure the acceptable level of CPU utilization as a percentage where the Switch leaves the Safeguard Engine state and returns to normal mode Trap Log Use the pull down menu to enable or disable the...

Page 62: ...Settings link Figure 6 22 Static ARP Settings window To add a new entry click the Add button revealing the following screen to configure Figure 6 23 Static ARP Settings Add window To modify a current...

Page 63: ...e Delete button for the entry being removed To completely clear the Static IPv6 ARP Settings click the Clear All button To add a new entry click the Add button revealing the following screen to config...

Page 64: ...e Settings window This window shows the following values Parameter Description IP Address The IP address of the Static Default Route Subnet Mask The corresponding Subnet Mask of the IP address entered...

Page 65: ...s Routing Table Subnet Mask Allows the entry of a subnet mask corresponding to the IP address above Gateway Allows the entry of an IP address of a gateway for the IP address above Metric 1 65535 Allow...

Page 66: ...Description IPv6 Address Netmask The IPv6 address and corresponding Subnet Mask of the IPv6 static route entry Gateway The corresponding IPv6 address for the next hop Gateway address in IPv6 format M...

Page 67: ...anges made DHCP Auto Configuration Settings This window is used to enable the DHCP Autoconfiguration feature on the Switch When enabled the Switch is instructed to receive a configuration file from a...

Page 68: ...d to view read only information or receive traps using SNMPv1 while assigning a higher level of security to another group granting read write privileges using SNMPv3 Using SNMPv3 individual users or g...

Page 69: ...low Figure 6 33 SNMP User Table Display The following parameters are displayed Parameter Description User Name An alphanumeric string of up to 32 characters This is used to identify the SNMP users Gro...

Page 70: ...the SNMP User Table click the Show All SNMP User Table Entries link SNMP View Table The SNMP View Table is used to assign views to community strings that define which MIB objects can be accessed by a...

Page 71: ...View Type Select Included to include this object in the list of objects that an SNMP manager can access Select Excluded to exclude this object from the list of objects that an SNMP manager can access...

Page 72: ...the entry under the Group Name Figure 6 38 SNMP Group Table Configuration window To add a new entry to the Switch s SNMP Group Table click the Add button in the upper left hand corner of the SNMP Grou...

Page 73: ...authorization and no encryption of packets sent between the Switch and a remote SNMP manager AuthNoPriv Specifies that authorization will be required but there will be no encryption of packets sent b...

Page 74: ...acters that is used to identify the group of MIB objects that a remote SNMP manager is allowed to access on the Switch The view name must exist in the SNMP View Table Access Right Read Only Specifies...

Page 75: ...Table Configuration window as shown below Figure 6 42 SNMP Host Table Configuration window The following parameters can set Parameter Description Host IP Address Type the IP address of the remote mana...

Page 76: ...NMP engine on the Switch To display the Switch s SNMP Engine ID open the SNMP Manger folder located in the Administration folder and click on the SNMP Engine ID link This will open the SNMP Engine ID...

Page 77: ...asis IP MAC binding is useful for preventing IP spoofing and other abuses IP MAC Binding per Port The IP MAC Ports Settings menu is used to enable IP MAC binding on a per port basis Ports that are ena...

Page 78: ...make the desired changes in the appropriate field and Click Modify To find an IP MAC binding entry enter the IP and MAC addresses and click Find To delete an entry click Delete To clear all the entri...

Page 79: ...uding the Commander Switch numbered 0 There is no limit to the number of SIM groups in the same IP subnet broadcast domain however a single switch can only belong to one group If multiple VLANs are co...

Page 80: ...dress will become the path to all MS s of the group and the CS s Administrator s password and or authentication will control access to all MS s of the SIM group With SIM enabled the applications in th...

Page 81: ...connected to a Commander Switch This is the default setting for the SIM role of the DGS 3400 Series Commander Choosing this parameter will make the Switch a Commander Switch CS The user may join other...

Page 82: ...the Device Name of the switches in the SIM group configured by the user If no device is configured by the name it will be given the name default and tagged with the last six digits of the MAC Address...

Page 83: ...6 50 Topology view This screen will display how the devices within the Single IP Management Group connect to other groups and devices Possible icons in this screen are as follows Icon Description Gro...

Page 84: ...specific device in the topology window tool tip will display the same information about a specific device as the Tree view does See the window below for an example Figure 6 51 Device Information Util...

Page 85: ...h in the SIM group and the icon associated with it Group Icon Figure 6 53 Right Clicking a Group Icon The following options may appear for the user to configure Collapse to collapse the group that wil...

Page 86: ...the user to configure Collapse to collapse the group that will be represented by a single icon Expand to expand the SIM group in detail Property to pop up a window to display the group information Fig...

Page 87: ...Right Clicking a Candidate icon The following options may appear for the user to configure Collapse to collapse the group that will be represented by a single icon Expand to expand the SIM group in d...

Page 88: ...right clicked MAC Address Displays the MAC Address of the corresponding Switch Remote Port No Displays the number of the physical port on the MS or CaS that the CS is connected to The CS will have no...

Page 89: ...pecific device View Refresh update the views with the latest status Topology display the Topology view Help About Will display the SIM information including the current SIM version Single IP Managemen...

Page 90: ...ding To update the configuration file enter the Server IP Address where the file resides and enter the Path Filename of the configuration file Click Download to initiate the file transfer from a TFTP...

Page 91: ...transmissions warrant special consideration The Switch allows you to further tailor how priority tagged data packets are handled on your network Using queues to manage priority tagged data allows you...

Page 92: ...t be made IEEE 802 1Q tagged VLANs are implemented on the Switch 802 1Q VLANs require tagging which enables them to span the entire network assuming all switches on the network are IEEE 802 1Q complia...

Page 93: ...ained in the following two octets and consists of 3 bits of user priority 1 bit of Canonical Format Identifier CFI used for encapsulating Token Ring packets so they can be carried across Ethernet back...

Page 94: ...also assigned a PVID for use within the Switch If no VLANs are defined on the Switch all ports are then assigned to a default VLAN with a PVID equal to 1 Untagged packets are assigned the PVID of the...

Page 95: ...nation port transmits it to its attached network segment If the packet is not tagged with VLAN information the ingress port will tag the packet with its own PVID as a VID if the port is a tagging port...

Page 96: ...d servers however can be shared across VLANs This is achieved by setting up overlapping VLANs That is ports can belong to more than one VLAN group For example setting VLAN 1 members to ports 1 2 3 and...

Page 97: ...ic VLAN Entries link To change an existing 802 1Q VLAN entry click the Modify button of the corresponding entry you wish to modify A new menu will appear to configure the port settings and to assign a...

Page 98: ...ow the Switch to send out GVRP packets to outside sources notifying that they may join the existing VLAN Port Settings Allows an individual port to be specified as member of a VLAN Tag Specifies the p...

Page 99: ...N configuration information with other GARP VLAN Registration Protocol GVRP enabled switches In addition Ingress Checking can be used to limit traffic by filtering incoming packets whose PVID does not...

Page 100: ...eceiving device will use the PVID to make VLAN forwarding decisions If the port receives a packet and Ingress filtering is enabled the port will compare the VID of the incoming packet to its PVID If t...

Page 101: ...le link This gives a bandwidth that is a multiple of a single link s bandwidth Link aggregation is most commonly used to link a bandwidth intensive network device or devices such as a server to the ba...

Page 102: ...configured on the Switch STP will block one entire group in the same way STP will block a single port that has a redundant link Link Aggregation To configure port trunking click on the Link Aggregatio...

Page 103: ...Port Choose the Master Port for the trunk group using the pull down menu Member Ports Choose the members of a trunked group Up to eight ports per group can be assigned to a group Flooding Port A trunk...

Page 104: ...LACP control frames This allows LACP compliant devices to negotiate the aggregated link so the group may be changed dynamically as needs require In order to utilize the ability to change an aggregate...

Page 105: ...ministration folder When enabled for IGMP snooping the Switch can open or close a port to a specific multicast group member based on IGMP messages sent from the device to the IGMP host or vice versa T...

Page 106: ...a host membership report Default 260 Route Timeout This is the maximum amount of time in seconds a route is kept in the forwarding table without receiving a membership report Default 260 Leave Timer...

Page 107: ...link to open the Current Static Router Ports Settings page as shown below Figure 7 15 Current Static Router Ports Entries window The Current Static Router Ports Entries window displays all of the curr...

Page 108: ...e field 2 A configuration revision number named here as a Revision Level and found in the STP Bridge Global Settings window and 3 A 4096 element table defined here as a VID List in the MST Configurati...

Page 109: ...tioning to a forwarding state In order to allow this rapid transition the protocol introduces two new variables the edge port and the point to point P2P port Edge Port The edge port is a configurable...

Page 110: ...folder in the Layer 2 Features menu and click the STP Bridge Global Settings link Use the STP Status pull down selector to enable or disable STP globally and choose the STP method used with the STP Ve...

Page 111: ...below for descriptions of the STP versions and corresponding setting options NOTE The Hello Time cannot be longer than the Max Age Otherwise a configuration error will occur Observe the following for...

Page 112: ...e If it turns out that your switch has the lowest Bridge Identifier it will become the Root Bridge The user may choose a time between 6 and 40 seconds The default value is 20 Forward Delay 4 30 sec 15...

Page 113: ...contains the following information Parameter Description Configuration Name A previously configured name set on the Switch to uniquely identify the MSTI Multiple Spanning Tree Instance If a configurat...

Page 114: ...ation Identification window which will reveal the following window to configure Figure 7 22 Instance ID Settings window CIST modify The user may configure the following parameters to configure the CIS...

Page 115: ...s the user to choose a desired method for altering the MSTI settings The user has four choices Add Select this parameter to add VIDs to the MSTI ID in conjunction with the VID List parameter Remove Se...

Page 116: ...ngs for a particular MSTI Instance click on its hyperlinked MSTI ID which will reveal the following window Figure 7 25 MSTI Settings Parameter Description Instance ID Displays the MSTI ID of the insta...

Page 117: ...atus Displays the current status of the corresponding MSTI ID Instance Priority Displays the priority of the corresponding MSTI ID The lowest priority will be the root bridge Click Apply to implement...

Page 118: ...e switch level parameters entered above with the addition of Port Priority and Port Cost An STP Group spanning tree works in the same way as the switch level spanning tree but the root bridge concept...

Page 119: ...esignates the port as an edge port Edge ports cannot create loops however an edge port can lose edge port status if a topology change creates a potential for a loop An edge port normally should not re...

Page 120: ...rt Allows the selection of the port number on which the MAC address entered above resides Click Add to implement the changes made To delete an entry in the Static Unicast Forwarding Table click the co...

Page 121: ...n the multicast group dynamically using GMRP The options are None No restrictions on the port dynamically joining the multicast group When None is chosen the port will not be a member of the Static Mu...

Page 122: ...the specified VLAN Forward All Groups This will instruct the Switch to forward a multicast packet to all multicast groups residing within the range of ports specified above Forward Unregistered Group...

Page 123: ...QoS Mapping on the Switch The picture above shows the default priority setting for the Switch Class 6 has the highest priority of the seven priority classes of service on the Switch In order to imple...

Page 124: ...ets sent from each priority queue depends upon the assigned weight For a configuration of 8 CoS queues A H with their respective weight value 8 1 the packets are sent in the following sequence A1 B1 C...

Page 125: ...ed port Type This drop down menu allows a selection between RX receive TX transmit and Both This setting will determine whether the bandwidth ceiling is applied to receiving transmitting or both recei...

Page 126: ...ew the screen shown below Figure 7 35 QoS Scheduling Mechanism menu and table The Scheduling Mechanism has the following parameters Parameter Description Strict The highest class of service is the fir...

Page 127: ...t suitable In the Configuration folder open the QoS folder and click QoS Output Scheduling to view the screen shown below Figure 7 36 QoS Output Scheduling Configuration window The following values ma...

Page 128: ...field this class of service will automatically begin forwarding packets until it is empty Once a priority class of service with a 0 in its Max Packet field is empty the remaining priority classes of s...

Page 129: ...the screen shown below Figure 7 38 802 1p Default Priority window This page allows the user to assign a default 802 1p priority to any given port on the Switch The priority tags are numbered from 0 th...

Page 130: ...the 802 1p priorities In the Configuration folder open the QoS folder and click 802 1p User Priority to view the screen shown below Figure 7 39 802 1p User Priority window Once a priority has been as...

Page 131: ...ntire process is described below in two parts To display the currently configured Access Profiles on the Switch open the Configuration folder and click on the Access Profile Table link This will open...

Page 132: ...o examine the IPv6 address in each frame s header VLAN Selecting this option instructs the Switch to examine the VLAN identifier of each packet header and use this as the full or partial criterion for...

Page 133: ...hat the access profile will apply an ICMP code value Select IGMP to instruct the Switch to examine the Internet Group Management Protocol IGMP field in each frame s header Select Type to further speci...

Page 134: ...to examine the IPv6 address in each frame s header Class Checking this field will instruct the Switch to examine the class field of the IPv6 header This class field is a part of the packet header that...

Page 135: ...ink opening the Access Profile Table Under the heading Access Rule clicking Modify will open the following window Figure 7 44 Access Rule Table window IP To create a new rule set for an access profile...

Page 136: ...he corresponding box if you want to re write the 802 1p default priority of a packet to the value entered in the Priority field which meets the criteria specified previously in this command before for...

Page 137: ...ollowing screen Figure 7 46 Access Rule Display window IP To configure the Access Rule for Ethernet open the Access Profile Table and click Modify for an Ethernet entry This will open the following sc...

Page 138: ...xStack DGS 3400 Series Fast Ethernet Switch Figure 7 48 Access Rule Configuration window Ethernet 127...

Page 139: ...pecified previously by the user replace priority Click the corresponding box if you want to re write the 802 1p default priority of a packet to the value entered in the Priority field which meets the...

Page 140: ...ing screen Figure 7 49 Access Rule Display window Ethernet To configure the Access Rule for IPv6 open the Access Profile Table and click Modify for an IPv6 entry This will open the following screen Fi...

Page 141: ...ce priority with Click the corresponding box to re write the 802 1p default priority of a packet to the value entered in the Priority field which meets the criteria specified previously in this comman...

Page 142: ...U Filtering the xStack DGS 3400 Series switch allows the CPU filtering mechanism to be enabled or disabled globally permitting the user to create various lists of rules without immediately enabling th...

Page 143: ...ble click the Add button This will open the CPU Interface Filtering Configuration page as shown below There are three Access Profile Configuration pages one for Ethernet or MAC address based profile c...

Page 144: ...Packet Content Mask to specify a mask to hide the content of the packet header VLAN Selecting this option instructs the Switch to examine the VLAN identifier of each packet header and use this as the...

Page 145: ...or specify Code to further specify that the access profile will apply an ICMP code value Select IGMP to instruct the Switch to examine the Internet Group Management Protocol IGMP field in each frame...

Page 146: ...of profile Select Ethernet to instruct the Switch to examine the layer 2 part of each packet header Select IP to instruct the Switch to examine the IP address in each frame s header Select Packet Cont...

Page 147: ...y add a rule to a previously created CPU access profile by clicking the corresponding Modify button of the entry to configure Ethernet IP or Packet Content Each entry will open a new and unique window...

Page 148: ...thernet instructs the Switch to examine the layer 2 part of each packet header IP instructs the Switch to examine the IP address in each frame s header Packet Content Mask instructs the Switch to exam...

Page 149: ...ay Ethernet The following window is the CPU Interface Filtering Rule Table for IP Figure 7 62 CPU Interface Filtering Rule Table IP To create a new rule set for an access profile click the Add button...

Page 150: ...d on Ethernet MAC Address IP address or Packet Content Ethernet instructs the Switch to examine the layer 2 part of each packet header IP instructs the Switch to examine the IP address in each frame s...

Page 151: ...iltering Rule Table for Packet Content Figure 7 65 CPU Interface Filtering Rule Table Packet Content To remove a previously created rule select it and click the button To add a new Access Rule click t...

Page 152: ...s the Switch to examine the IP address in each frame s header Packet Content Mask instructs the Switch to examine the packet header Offset This field will instruct the Switch to mask the packet header...

Page 153: ...xStack DGS 3400 Series Fast Ethernet Switch Section 8 Security Traffic Control Port Security Port Lock Entities 802 1x Access Authentication Control Traffic Segmentation SSL SSH 142...

Page 154: ...y viable for Broadcast and Multicast storms because the chip only has counters for these two types of packets Once a storm has been detected that is once the packet threshold set below has been exceed...

Page 155: ...ll incoming traffic to the port except STP BPDU packets which are essential in keeping the Spanning Tree operational on the Switch If the Countdown timer has expired and yet the Packet Storm continues...

Page 156: ...runking NOTE Ports that are in the Shutdown forever mode will be seen as Discarding in Spanning Tree windows and implementations though these ports will still be forwarding BDPUs to the Switch s CPU N...

Page 157: ...s and Table The following parameters can be set Parameter Description From To A consecutive group of ports may be configured starting with the selected port Admin State This pull down menu allows the...

Page 158: ...ck the Next corres button to view the next page of entries listed in this table Figure 8 3 Port Lock Entries Table This window displays the following information Parameter Description VID The VLAN ID...

Page 159: ...or Parameter window To view the 802 1X authenticator settings on a different switch in the switch STACK use the UNIT pull down menu to select that switch by its ID number in the switch STACK To config...

Page 160: ...requests the identity of the client and begins relaying authentication messages between the client and the authentication server The default setting is Auto TxPeriod This sets the TxPeriod of time for...

Page 161: ...er and Current RADIUS Server Settings Table window This window displays the following information Parameter Description Succession Choose the desired RADIUS server to configure First Second or Third R...

Page 162: ...ess or addresses If you enable this feature be sure to first enter the IP address of the station you are currently using Figure 8 7 Security IP menu for Trusted Host configuration To configure secure...

Page 163: ...server will not accept the username and password and the user is denied access to the Switch The server doesn t respond to the verification query At this point the Switch receives the timeout from the...

Page 164: ...g is 30 seconds User Attempts 1 255 This command will configure the maximum number of times the Switch will accept authentication attempts Users failing to be authenticated after the set amount of att...

Page 165: ...low users to set up Authentication Server Groups on the Switch A server group is a technique used to group TACACS XTACACS TACACS RADIUS server hosts into user defined categories for authentication usi...

Page 166: ...parate entities and are not compatible with each other Authentication Server Host This window will set user defined Authentication Server Hosts for the TACACS XTACACS TACACS RADIUS security protocols...

Page 167: ...an authentication request when the TACACS server does not respond Key Authentication key to be shared with a configured TACACS or RADIUS servers only Specify an alphanumeric string up to 254 characte...

Page 168: ...ity Management Access Authentication Control Login Method Lists Figure 8 15 Login Method List Settings window The Switch contains one Method List that is set and cannot be removed yet can be modified...

Page 169: ...he Switch he or she must be authenticated by a method on the Switch to gain administrator privileges on the Switch which is defined by the Administrator A maximum of eight 8 Enable Method Lists can be...

Page 170: ...enable password must be set by the user in the next section entitled Local Enable Password none Adding this parameter will require no authentication to access the Switch radius Adding this parameter...

Page 171: ...ed field will result in a fail message Click Apply to implement changes made Enable Admin The Enable Admin window is for users who have logged on to the Switch on the normal user level and wish to be...

Page 172: ...iew the screen shown below Figure 8 23 Current Traffic Segmentation Table Click on the Setup button to open the Setup Forwarding ports menu as shown below Figure 8 24 Setup Forwarding Ports Configurin...

Page 173: ...rd DES to create the encrypted text 3 Hash Algorithm This part of the ciphersuite allows the user to choose a message digest function which will determine a Message Authentication Code This Message Au...

Page 174: ...SSL Configuration This screen will allow the user to enable SSL on the Switch and implement any one or combination of listed ciphersuites on the Switch A ciphersuite is a security string that determin...

Page 175: ...ersuite This field is Enabled by default RSA with 3DES EDE CBC SHA This ciphersuite combines the RSA key exchange CBC Block Cipher 3DES_EDE encryption and the SHA Hash Algorithm Use the pull down menu...

Page 176: ...User Account on the Switch including specifying a password This password is used to logon to the Switch once a secure communication path has been established using the SSH protocol 2 Configure the Use...

Page 177: ...isconnected and the user must reconnect to the Switch to attempt another login The number of maximum attempts may be set between 2 and 20 The default setting is 2 Session Rekeying This field is used t...

Page 178: ...rd AES128 encryption algorithm with Cipher Block Chaining The default is Enabled AES192 CBC Use the pull down to enable or disable the Advanced Encryption Standard AES192 encryption algorithm with Cip...

Page 179: ...tor may choose one of the following to set the authorization for users attempting to access the Switch Host Based This parameter should be chosen if the administrator wishes to use a remote SSH server...

Page 180: ...g the switch To retain any configuration changes permanently click on the Save button in the Save Changes menu The save optionas allow one alternative configuration image to be stored Figure 9 1 Save...

Page 181: ...will return the Switch s configuration to the state it was when it left the factory Figure 9 2 Reset options Reboot System The following menu is used to restart the Switch Figure 9 3 Reboot System Cl...

Page 182: ...itoring Device Status Module Information CPU Utilization Port Utilization Packets Errors Packet Size Browse Router Port VLAN Status Port Access Control MAC Address Table Switch Log IGMP Snooping Group...

Page 183: ...l power supply is powering the system External Power RPS Displays Active if the RPS is powering the system Side Fan Indicates fan status Back Fan Indicates fan status Module Information The Module Inf...

Page 184: ...e CPU utilization by port use the real time graphic of the Switch and or switch stack at the top of the web page by simply clicking on a port Click Apply to implement the configured settings The windo...

Page 185: ...ine card slot in the chassis switch by using the Unit pull down menu and then select the port by using the Port pull down menu The user may also use the real time graphic of the Switch and or switch s...

Page 186: ...X link in the Packets folder of the Monitoring menu to view the following graph of packets received on the Switch Select the port by using the Port pull down menu The user may also use the real time g...

Page 187: ...se statistics for first select the Switch in the switch stack by using the Unit pull down menu and then select the port by using the Port pull down menu The user may also use the real time graphic of...

Page 188: ...sis window line graph for Bytes and Packets To view the Transmitted TX Table click the link View Table Packet Errors The Web Manager allows port error statistics compiled by the Switch s management ag...

Page 189: ...xStack DGS 3400 Series Fast Ethernet Switch Figure 10 7 Rx Error Analysis window line graph To view the Received Error Packets Table click the link View Table which will show the following table 178...

Page 190: ...atistics for first select the Switch in the switch stack by using the Unit pull down menu and then select the port by using the Port pull down menu The user may also use the real time graphic of the S...

Page 191: ...iew these statistics for first select the Switch in the switch stack by using the Unit pull down menu and then select the port by using the Port pull down menu The user may also use the real time grap...

Page 192: ...ports A router port configured by a user using the console or Web based management interfaces is displayed as a static router port designated by S A router port that is dynamically configured by the...

Page 193: ...nter a MAC address for the forwarding table to be browsed by Find Allows the user to move to a sector of the database corresponding to a user defined port VLAN or MAC address VID The VLAN ID of the VL...

Page 194: ...p receiving stations and to the PC connected to the console manager Click Next to go to the next page of the Switch History Log Clicking Clear will allow the user to clear the Switch History Log The i...

Page 195: ...IGMP Snooping Group Table The user may search the IGMP Snooping Group Table by VID by entering it in the top left hand corner and clicking Search The following field can be viewed Parameter Descripti...

Page 196: ...ount Client This window shows managed objects used for managing RADIUS accounting clients and the current statistics associated with them To view the RADIUS Accounting click Monitoring Port Access Con...

Page 197: ...ccounting port from this server ClientMalformedResponses The number of malformed RADIUS Accounting Response packets received from this server Malformed packets include packets with an invalid length B...

Page 198: ...tion protocol To view the RADIUS Authentication click Monitoring Port Access Control RADIUS Auth Client Figure 10 16 RADIUS Authentication information The user may also select the desired time interva...

Page 199: ...or invalid received from this server AccessChallenges The number of RADIUS Access Challenge packets valid or invalid received from this server AccessResponses The number of malformed RADIUS Access Res...

Page 200: ...e found in the Monitoring menu in the Layer 3 Feature folder This window will show current ARP entries on the Switch To search a specific ARP entry enter an interface name into the Interface Name or a...

Page 201: ...EEE 802 3ad Link Aggregation Control IEEE 802 3x Full duplex Flow Control IEEE 802 3 Nway auto negotiation IEEE 802 3af Power over Ethernet Protocols CSMA CD Data Transfer Rates Ethernet Fast Ethernet...

Page 202: ...condensing Dimensions 441mm x 389mm x 44mm Weight DGS 3400 Series Switch DGS 3426 5 42 kg DGS 3427 5 51 kg DGS 3450 5 74 kg Module Inserts DEM 410CX 0 16 kg DEM 410X 0 18 kg EMI CE class A FCC Class...

Page 203: ...llowing diagrams and tables show the standard RJ 45 receptacle connector and their pin assignments Appendix 1 1 The standard RJ 45 port and connector RJ 45 Pin Assignments Contact MDI X Port MDI II Po...

Page 204: ...Maximum Distance Mini GBIC 1000BASE LX Single mode fiber module 1000BASE SX Multi mode fiber module 1000BASE LHX Single mode fiber module 1000BASE ZX Single mode fiber module 10km 550m 40km 80km 1000B...

Page 205: ...ved Bridges form a single logical network centralizing network administration broadcast A message sent to all destination devices on the network broadcast storm Multiple simultaneous broadcasts that t...

Page 206: ...tocol which allows IP to run over a serial line connection SNMP Simple Network Management Protocol A protocol originally designed to be used in managing TCP IP internets SNMP is presently implemented...

Page 207: ...tical to repair or replace the defective Hardware the price paid by the original purchaser for the defective Hardware will be refunded by D Link upon return to D Link of the defective Hardware All Har...

Page 208: ...lty installation lack of reasonable care repair or service in any way that is not contemplated in the documentation for the product or if the model or serial number has been altered tampered with defa...

Page 209: ...n may be reproduced in any form or by any means or used to make any derivative such as translation transformation or adaptation without permission from D Link Corporation D Link Systems Inc as stipula...

Page 210: ...dation sale or other sales in which D Link the sellers or the liquidators expressly disclaim their warranty obligation pertaining to the product and in that case the product is being sold As Is withou...

Page 211: ...vary from state to state Trademarks D Link is a registered trademark of D Link Systems Inc Other trademarks or registered trademarks are the property of their respective owners Copyright Statement No...

Page 212: ...Registration Register online your D Link product at http support dlink com register Product registration is entirely voluntary and failure to complete or return this form will not diminish your warra...

Page 213: ...202...

Page 214: ...ry rights as a consumer The following are special terms applicable to your Limited Lifetime hardware warranty Warranty beneficiary The warranty beneficiary is the original end user The original end us...

Page 215: ...er use or improper maintenance c has been subjected to abnormal physical or electrical stress misuse negligence or accident d is licensed for beta evaluation testing or demonstration purposes for whic...

Page 216: ...are not restricted by this warranty Nothing in this Limited Lifetime Warranty affects your statutory rights as a consumer DES 6500 series is excluded from the Limited Lifetime Warranty offering and wi...

Page 217: ...cal Support over the Telephone 1300 766 868 Monday to Friday 8 00am to 8 00pm EST Saturday 9 00am to 1 00pm EST http www dlink com au email support dlink com au Tech Support for customers within New Z...

Page 218: ...ebsite Tech Support for customers within South Eastern Asia and Korea D Link South Eastern Asia and Korea Technical Support over the Telephone 65 6895 5355 Monday to Friday 9 00am to 12 30pm 2 00pm 6...

Page 219: ...ink website Tech Support for customers within India D Link Technical Support over the Telephone 91 22 26526741 91 22 26526696 ext 161 to 167 Monday to Friday 9 30AM to 7 00PM D Link Technical Support...

Page 220: ...free technical support for customers for the duration of the warranty period on this product Customers can contact D Link technical support through our web site or by phone Tech Support for customers...

Page 221: ...tomers within Israel D Link Technical Support over the Telephone 972 971 5701 Sunday to Thursday 9 00am to 5 00pm D Link Technical Support over the Internet http www dlink co il forum e mail support d...

Page 222: ...ustomers within South Africa and Sub Sahara Region D Link South Africa and Sub Sahara Technical Support over the Telephone 27 12 665 2165 08600 DLINK For South Africa only Monday to Friday 8 30am to 9...

Page 223: ...nday to Friday 07 00am to 20 00pm Ecuador 1800 777 711 Monday to Friday 07 00am to 20 00pm El Salvador 800 6137 Monday to Friday 06 00am to 19 00pm Guatemala 1800 300 0017 Monday to Friday 06 00am to...

Page 224: ...213 D Link D Link D Link D Link 095 744 00 99 http www dlink ru email support dlink ru...

Page 225: ...cnico Help Desk Chile Tel fono 800 214422 Lunes a Viernes 08 00 am a 21 00 pm Soporte T cnico Help Desk Colombia Tel fono 01800 7001588 Lunes a Viernes 07 00 am a 20 00 pm Soporte T cnico Help Desk E...

Page 226: ...nkbrasil com br A D Link fornece suporte t cnico gratuito para clientes no Brasil durante o per odo de vig ncia da garantia deste produto Suporte T cnico para clientes no Brasil Telefone S o Paulo 11...

Page 227: ...216...

Page 228: ...ntact D Link technical support through our website or by phone Tech Support for customers within the United States D Link Technical Support over the Telephone 888 843 6100 Hours of Operation 8 00AM to...

Page 229: ...Kingdom Ireland D Link UK Ireland Technical Support over the Telephone 08456 12 0003 United Kingdom 44 8456 12 0003 Ireland Lines Open 8 00am 10 00pm Mon Fri 10 00am 7 00pm Sat Sun D Link UK Ireland...

Page 230: ...ng ber unsere Website per E Mail oder telefonisch anfordern Web http www dlink de E Mail support dlink de Telefon 49 1805 2787 0 12 Min aus dem Festnetz der Deutschen Telekom Telefonische technische U...

Page 231: ...Support technique destin aux clients tablis en France Assistance technique D Link par t l phone 0 820 0803 03 Assistance technique D Link sur internet http www dlink fr e mail support dlink fr Support...

Page 232: ...rante el periodo de garant a del producto Los clientes espa oles pueden ponerse en contacto con la asistencia t cnica de D Link a trav s de nuestro sitio web o por tel fono Asistencia T cnica de D Lin...

Page 233: ...sito D Link Supporto tecnico per i clienti residenti in Italia D Link Mediterraneo S r L Via N Bonnet 6 B 20154 Milano Supporto Tecnico dal luned al venerd dalle ore 9 00 alle ore 19 00 con orario co...

Page 234: ...rlands D Link Technical Support over the Telephone 0900 501 2007 Monday to Friday 8 00 am to 10 00 pm D Link Technical Support over the Internet www dlink nl Tech Support for customers within Belgium...

Page 235: ...atn pomoc techniczn klientom w Polsce w okresie gwarancyjnym produktu Klienci z Polski mog si kontaktowa z dzia em pomocy technicznej firmy D Link za po rednictwem Internetu lub telefonicznie Telefoni...

Page 236: ...bov str nce firmy D Link D Link poskytuje sv m z kazn k m bezplatnou technickou podporu Z kazn ci mohou kontaktovat odd len technick podpory p es webov str nky mailem nebo telefonicky Web http www dli...

Page 237: ...get munkanapokon h tf t l cs t rt kig 9 00 16 00 r ig s p nteken 9 00 14 00 r ig k rhet a 1 461 3001 telefonsz mon vagy a support dlink hu emailc men Magyarorsz gi technikai t mogat s D Link Magyarors...

Page 238: ...sider D Link tilbyr sine kunder gratis teknisk support under produktets garantitid Kunder kan kontakte D Links teknisk support via v re hjemmesider eller p tlf Teknisk Support D Link Teknisk telefon...

Page 239: ...byder gratis teknisk support til kunder i Danmark i hele produktets garantiperiode Danske kunder kan kontakte D Link s tekniske support via vores hjemmeside eller telefonisk D Link teknisk support ove...

Page 240: ...ndarinformation D Link tillhandah ller teknisk support till kunder i Sverige under hela garantitiden f r denna produkt Teknisk Support f r kunder i Sverige D Link Teknisk Support via telefon 0770 33 0...

Page 241: ...oaa teknist tukea asiakkailleen Tuotteen takuun voimassaoloajan Tekninen tuki palvelee seuraavasti Arkisin klo 9 21 numerosta 0800 114 677 Internetin kautta Ajurit ja lis tietoja tuotteista http www d...

Page 242: ...h annan anv ndarinformation D Link tillhandah ller teknisk support till kunder i Sverige under hela garantitiden f r denna produkt Teknisk Support f r kunder i Sverige D Link Teknisk Support via telef...

Page 243: ...232 Ver 1 00...

Page 244: ...RL www dlinkiberia es Singapore 1 International Business Park 03 12 The Synergy Singapore 609917 TEL 65 6774 6233 URL www dlink intl com Australia North Ryde NSW 2113 Australia FAX 61 2 8899 1868 URL...

Page 245: ...et _________________________________________________________________________ Answers to the following questions help us to support your product 1 Where and how will the product primarily be used Home...

Page 246: ......

Reviews: