background image

                                                        www.securemme.it | E-mail: info@securemme

                                                         15  


D-SMART CONFIGURATION User 

38. Once added the first user enter in Key 

detail

N.B. Also the owner/administrator of the door must know the creden als to access with the 

smartphone, transponder and/or numeric keypad. 

39. In the menu Key Detail click on Change Access Method.  

40. 

Enable the user to the desired op ons: smartphone, transponder and/or numeric keypad. 


41. 

For the transponder, check the field on the applica on and put the transponder next to 
the external numeric kaypad. The device will give you a confirma on by authoma cally 

opening the latch of the lock. 


For the numeric keypad, set the code of at least 4 characters and confirm it. 


42.  Check the user’s creden als by clicking on 

Show Creden als

43. By clicking on Change Time Slot is possible to enable every single user to more than one 

me slot per day (from Monday to Sunday).


44. In Access List you can see the last 30 accesses of every single user: next to every authorized 

access a green  ck is present, while next to an anuthorized one there will be a red cross (

X

).    

45. Delete User: go back to the Key details menu and click on Delete Key

46. First user access with smartphone: go back to the homepage, click Open and only for the 

first  me the user’s creden al previously created should be filled in.


47. Fill in the personal creden als (Name and Password) then click on 

Save

48. In the case of faulty entry of Name and/or Password, go to the Lock Detail menu and click 
on Forget Stored Key 

(go back to point 46 and repeat the same opera on).


49. To Eliminate the lock previously connected to your device click on Disassociate Lock.


Summary of Contents for SECUREMME

Page 1: ...www securemme it E mail info securemme 1 EN...

Page 2: ...www securemme it E mail info securemme 2...

Page 3: ...e it E mail info securemme 3 INDEX Package content Descrip on Technical features Warnings Installa on Installer set Owner con gura on Power Grid Schedule Warranty condi ons Paper template 4 5 6 7 8 10...

Page 4: ...R8000KZA7038 2 SUPPORT BATTERY PLATE cod PK8000KxxCT 3 HANDLE cod 5000Xxx 4 KNOB FOR CYLINDER cod 5032Xxx 5 FIXING SCREW FOR SUPPORT BATTERY PLATE cod VT80M3XZB25XX 6 RECHARGEABLE BATTERY cod PP8000Kx...

Page 5: ...th Smartphone download the D SMART applica on from the Apple Android and Windows Phone stores to manage the access and to con gurate the door Numeric keypad customizable code for every user with me sl...

Page 6: ...1 A 50 60Hz Ba ery recharge me around 6 hours Opera ne temperature 10 C 45 C Es mated life me around 3 months theore cal calcula on on 10 openings per day Supported systems Ios 8 or later versions An...

Page 7: ...horized assistance center previously authorized by Securemme Securemme S r l reserves the right to make any changes to the product and to the user s manual it deems appropriate in order to improve the...

Page 8: ...the external panel prepare a 20 mm hole only if you have the external numeric keypad transponder reader insert the cable from the external side to the internal cut and connect the cable to the circuit...

Page 9: ...ng motor 6 Fix the housing motor by ghtening the screw with a 8mm hex wrench 7 Place the ba ery support plate on the panel 8 Install and thighten the handle and the knob on the cylinder 6 Fix on the p...

Page 10: ...Please note that an increase of the po wer corresponds to an increase of the ba ery drain 22 Closing mode Manual closing of the lock even with door opened without amgnet Se miautoma c closing of the l...

Page 11: ...www securemme it E mail info securemme 11 D SMART CONFIGURATION Installer 11 12 13 14 15 16 17 18 19 20 21 22...

Page 12: ...www securemme it E mail info securemme 12 D SMART CONFIGURATION Installer 23 24 25 Door Frame Adhesive magnet put it in the middle of the frame in line with the handle axis Door...

Page 13: ...lick on CHANGE MASTER CODE 34 A en on for the safety of the device change the factory ma ster password master with a new password that must be between 6 and 10 characters and must contain at least a l...

Page 14: ...www securemme it E mail info securemme 14 D SMART CONFIGURATION User 26 27 28 29 30 31 32 33 19 34 35 36 37...

Page 15: ...s by clicking on Show Creden als 43 By clicking on Change Time Slot is possible to enable every single user to more than one me slot per day from Monday to Sunday 44 In Access List you can see the las...

Page 16: ...www securemme it E mail info securemme 16 D SMART CONFIGURATION User 38 39 40 41 42 43 44 47 45 46 48 49...

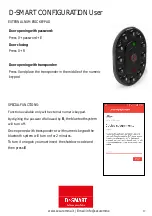
Page 17: ...nder Press 0 and place the transponder in the middle of the numeric keypad SPECIAL FUNCTIONS Func on available only with external numeric keypad By digi ng the password followed by R the bluetooth sys...

Page 18: ...uremme 18 SCHEDULE D SMART POWER GRID CLEAN CONTACT Intercom connec on Use a relay that turns the powered contact in clean contact Connect the green and white connector clean contact NOTE Use only the...

Page 19: ...to installa on not in accordance with the instruc ons given in this ma nual the use of the device not correspondant to the opera ne mode illustrated here aheste c parts electrical and electronic equi...

Page 20: ...www securemme it E mail info securemme 20 PRODUCT REVIEW If you are sa s ed of our product rate with 5 stars a er downloading the applica on...

Page 21: ...www securemme it E mail info securemme 21 D SMART PAPER TEMPLATE CUT THE INTERIOR SIDE...

Page 22: ...www securemme it E mail info securemme 22...

Reviews: