13
12
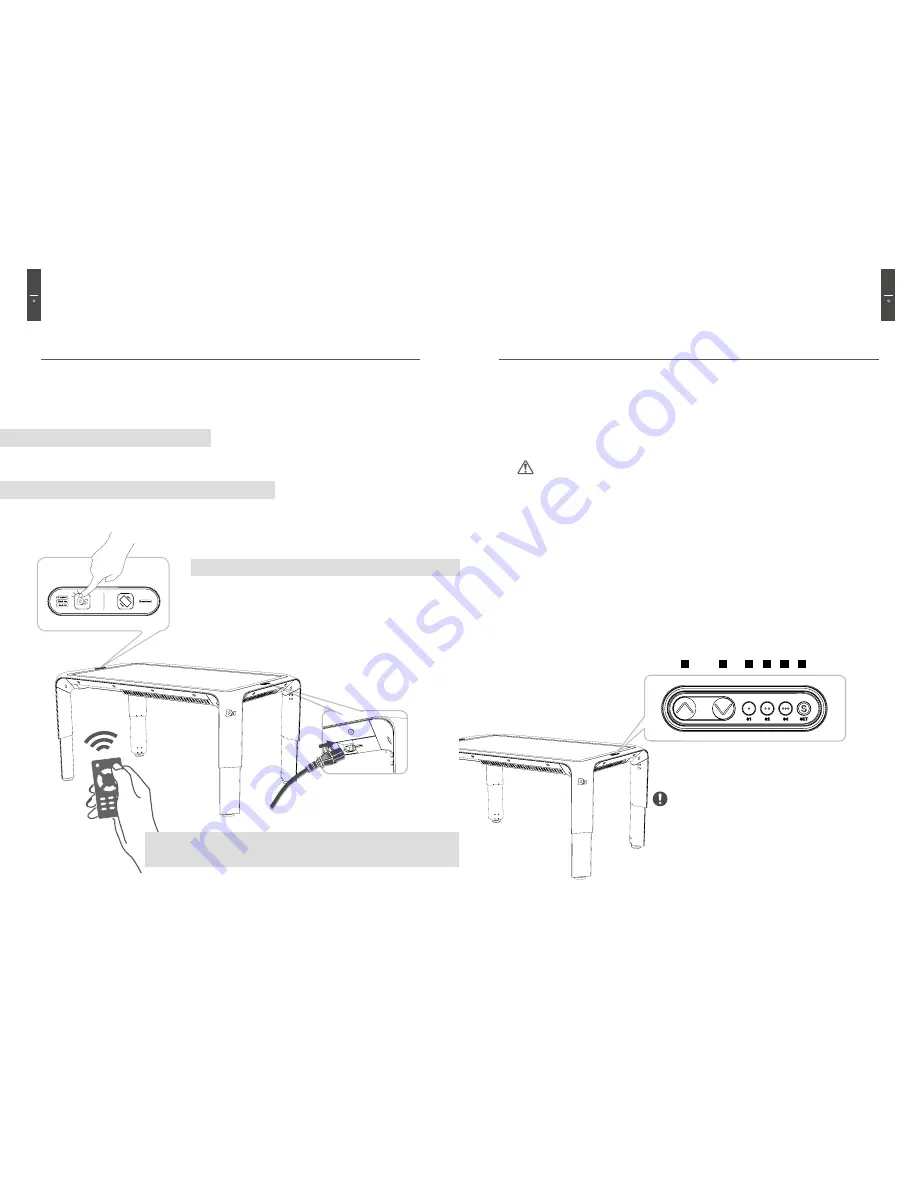
1. Increase Touch Table Height (Up Button)
2. Decrease Touch Table Height (Down Button)
3. Memory Button 1 (s1)
You can select and save up to three different preprogrammed height settings. Follow these instructions:
1) Choose your desired height.
2) Press the Set (Save) button.
3) Press the S1 (Or S2, S3) Memory button to save the desired height.
4) The selected Memory button is now preprogrammed.
Note:
When adjusting the height to a preprogrammed one, press and hold the desired Memory button (S1, S2, S3) until the
Touch Table has fully reached the required preprogrammed height. The Touch Table height will not adjust automatically
with a single press of the Memory button.
4. Memory Button 2 (s2)
See above.
5. Memory Button 3 (s3)
See above.
6. Set (Save) Button.
Touch Table Height Adjustments
1
2
3
4
5
6
Note : Zero Adjustment
Occasionally the legs may become misaligned.
If they require recalibration follow these steps.
1) Return the table to its lowest setting by pressing the Down button.
2) After it has reached it's minimum height, continue to press the
Down button. The table should automatically recalibrate.
Caution
When adjusting the height of the Touch Table, it is important to operate it safely. Do not leave things on the
surface of the Touch Table or underneath it when adjusting the height. Take a common sense approach to using
this Touch Table. Please consider the safety of those around you.
Getting Started
Operation
Button Configuration
Press once to power ON and press and hold for more than 3 seconds to power OFF.
Use this to rotate the screen 180 degrees.
2. Screen Rotation Function
1) Once powered ON, press the D3 button once to launch the Touch OSD.
2) When the Touch OSD menu appears, choose your desired options.
1-2. Mode Switching Functions
1
2
Click
3
3. The AC Power cable should be connected
to the AC Inlet here.
1. Power On / Off Function


