Before proceeding with the installation of the screen, please read the installation and operations instructions thoroughly!
CAUTION!
Do not cut wrapping paper or tape with knife or any sharp tool. Pull orange string.
1. Carefully unpack the screen and remove the outer wrapping.
2.
Always handle screen in upright position.
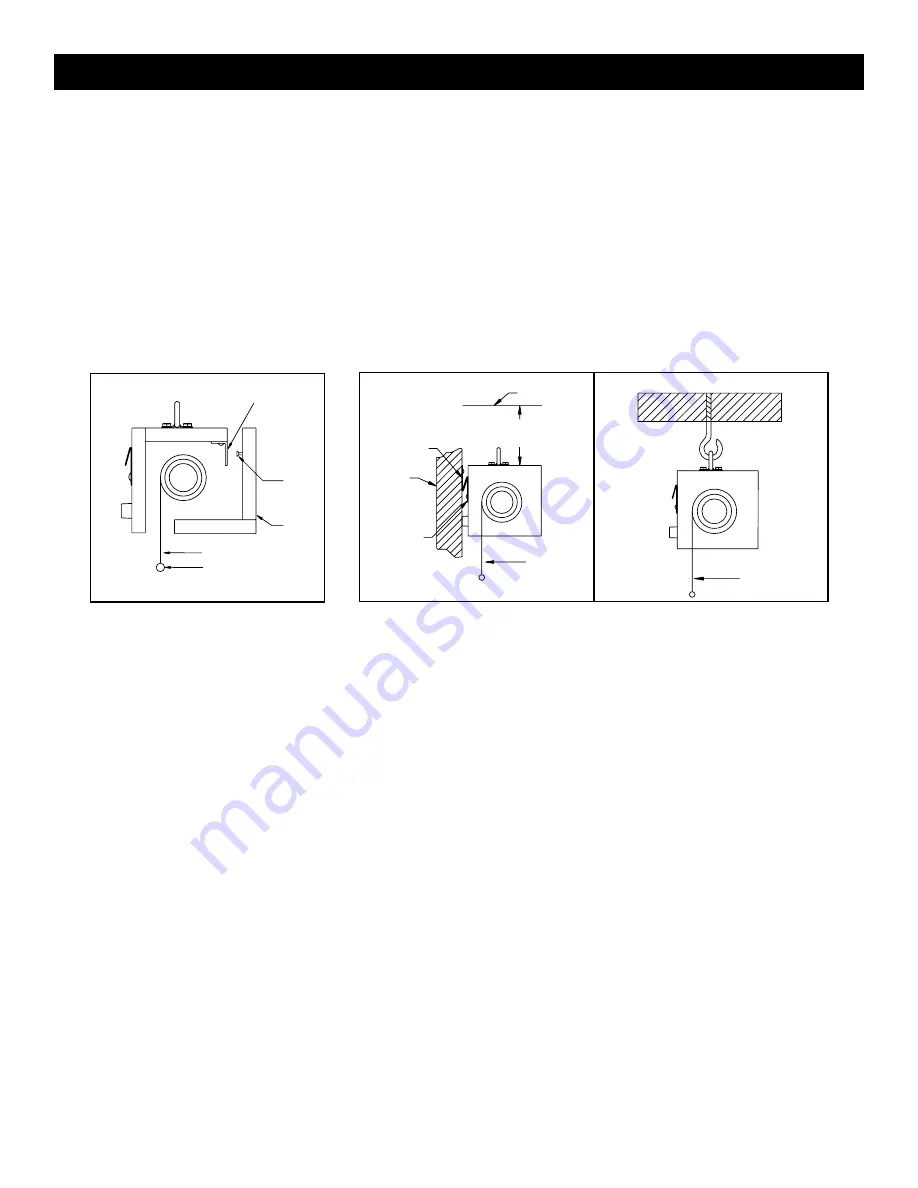
3. Remove the front cover of the screen from the back of the screen. Lift front cover up approximately 1/2" and pull
away from back of screen. See Figure 1.
4. There are two methods of mounting the screen: suspended from ceiling and wall mounted. See Figure 2.
NOTE:
Allow 1/2" above screen (when mounted) for front cover of screen installation and removal.
5. Picture surface is centered in case. Case extends 5-1/2" beyond surface on either end. Do not attach anything to
screen slat on the bottom of the screen.
PRE-INSTALLATION
s
!
HANGER BRACKET
HANGER
PIN
FRONT
COVER
BACK OF
SCREEN
PICTURE
SURFACE
PICTURE
SURFACE
PICTURE SURFACE
SLAT
CEILING
WALL MOUNTING
CEILING MOUNTING
PLACE “D”
RINGS OVER
HOOKS WELL
SECURED IN
CEILING.
FIGURE 1
FIGURE 2
“V” BAR mOUNTED
TO THE WALL
WALL
“V” BAR
mOUNTED TO
THE BACK OF
THE CASE AT
THE FACTORy
ALLOW A mINImUm OF
1-1/4" FROm CEILING
2
Summary of Contents for Designer Electrol
Page 7: ...6 ...


