


РУССКИЙ
91
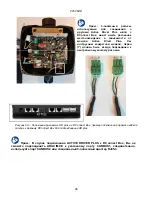
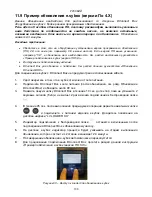
1.
Подсоедините
провод
и
c
ъемную
клеммную
колодку
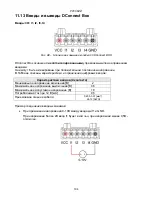
ModBus DConnect Box:
Подготовьте
входящую
в
комплект
DConnect Box
соответствующую
4-
полюсную
клемму
,
соблюдая
указанную
полюсность
.
Выводы
MODBUS
№
Вывода
DConnect Box
Описание
A 2
Неинвертированный
вывод
(+)
B 3
Инвертированный
вывод
(-)
Y 4
GND
(
заземление
)
Рисунок
4 C
ъемная
клеммная
колодка
ModBus DConnect Box
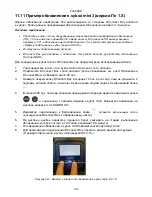
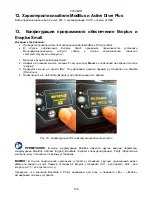
2.
Подсоедините
провод
и
c
ъемную
клеммную
колодку
Evoplus M/L:
Выводы
MODBUS
№
Вывода
EVOPLUS
Описание
A 2
Неинвертированный
вывод
(+)
B 1
Инвертированный
вывод
(-)
Y 3
GND
Рисунок
5:
Съемная
клеммная
колодка
Evoplus M/L
и
съемная
клеммная
колодка
DConnect Box
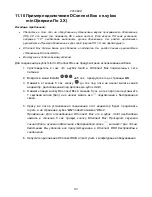
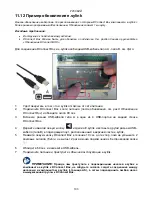
3.
Подключите
оборудование
к
сети
питания
.
4.
Запустите
приложение
DConnect DAB
и
приступите
к
конфигурации
оборудования
.
Summary of Contents for DCONNECT BOX
Page 1: ...GUIDA DCONNECT BOX DCONNECT BOX GUIDE DCONNECT BOX DCONNECT BOX DCONNECT BOX...
Page 2: ...ITALIANO Pag 1 ENGLISH Pag 37 C 73 109...
Page 28: ...ITALIANO 26 Figura 9B Aggiornamento Active Driver Plus Sw 1 X...
Page 64: ...ENGLISH 62 Figure 9B Updating Active Driver Plus Sw 1 X...
Page 84: ...82 8 DAB 1 DAB 2...
Page 85: ...83 3 4 DAB...
Page 88: ...86 10 1 2 3 10 1 1 2...
Page 89: ...87 3 10 2 1 2 3 4...
Page 90: ...88...
Page 100: ...98 9 Active Driver Plus 1...
Page 109: ...107 14 11...
Page 120: ...118 8 DAB 1 DAB 2...
Page 121: ...119 3 4 DAB...
Page 124: ...122 10 1 2 3 10 1 1 2...
Page 125: ...123 3 10 2 1 2 3 4...
Page 126: ...124...
Page 136: ...134 9 B Active Driver Plus Sw 1 X...
Page 145: ...143 14 11...
Page 147: ......


