Checking
weld joints
The check is based on test weldings. The test weldings have to
be repeated carried if the values are adjusted later on. For the
simplified shop test there are two possible procedures:
•
visual inspection
•
impact bending test
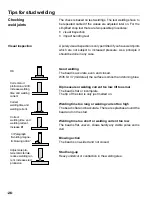
Visual inspection
A purely visual inspection is only permitted if you have weld joints
which are not subject to increased pressure. As a principle it
should be done in any case.
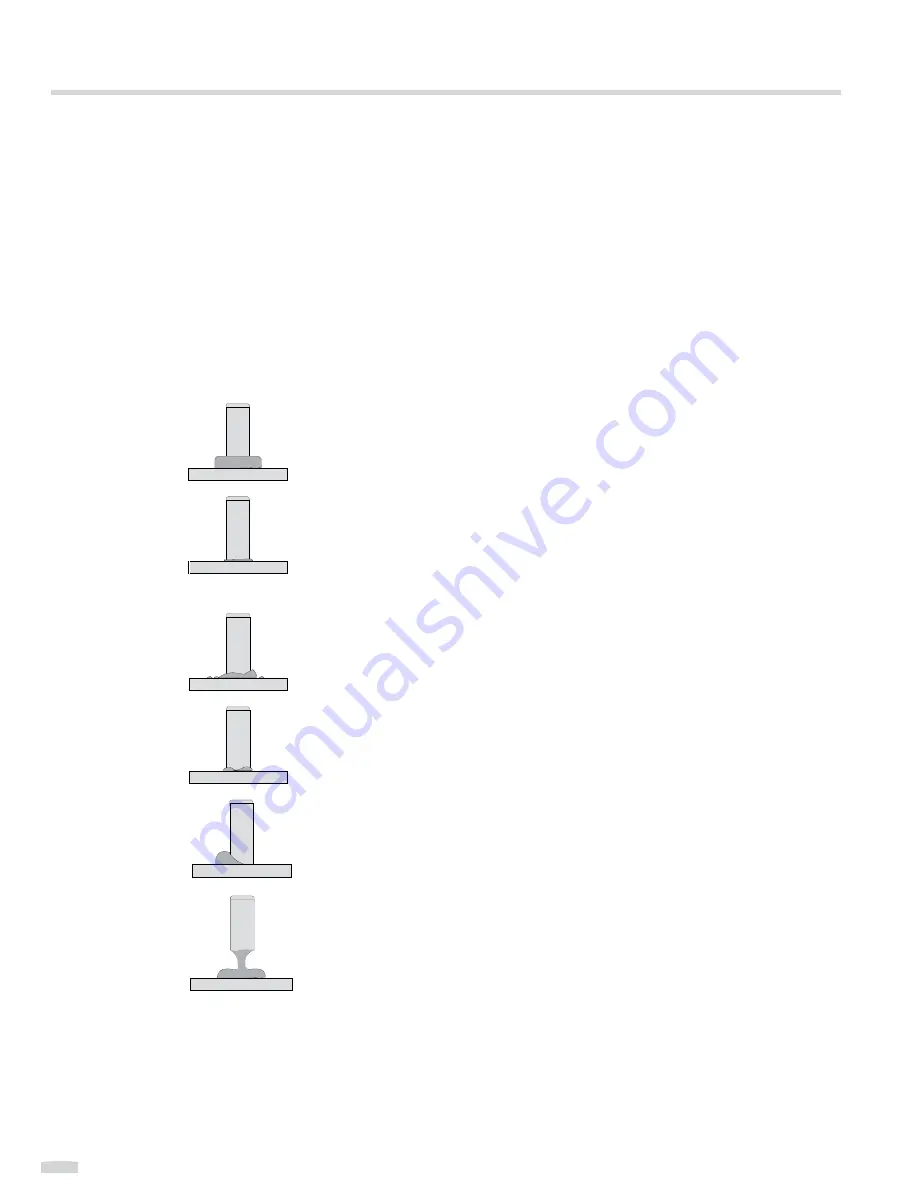
Good welding
The bead is accurate, even and closed.
With St 37 (mild steel) the surface is smooth and shining blue.
Dip measure or welding current too low, lift too smal
The bead is flat or incomplete.
The tip of the stud is only just melted on.
Welding time too long or welding current too high
The bead is flat and inaccurate. There are splashes around the
bead and on the stud.
Welding time too short or welding current too low
The bead is flat, uneven, shows hardly any visible pores and is
dull.
Blowing action
The bead is one-sided and not closed.
Stud hang-up
Heavy undercut or contraction in the welding area.
OK
Correct stud
protrusion and lift,
increase welding
time and welding
current
Correct
welding time and
welding current,
increase lift
→
Paragraph
“Avoiding magne-
tic blowing action”
Adjust sole pla-
te/ceramic ferrule,
reduce welding cur-
rent, increase stud
protrusion
Correct
welding time and
welding current
Tips for stud welding
26

