ENGLISH
14
Installing the single fan hood
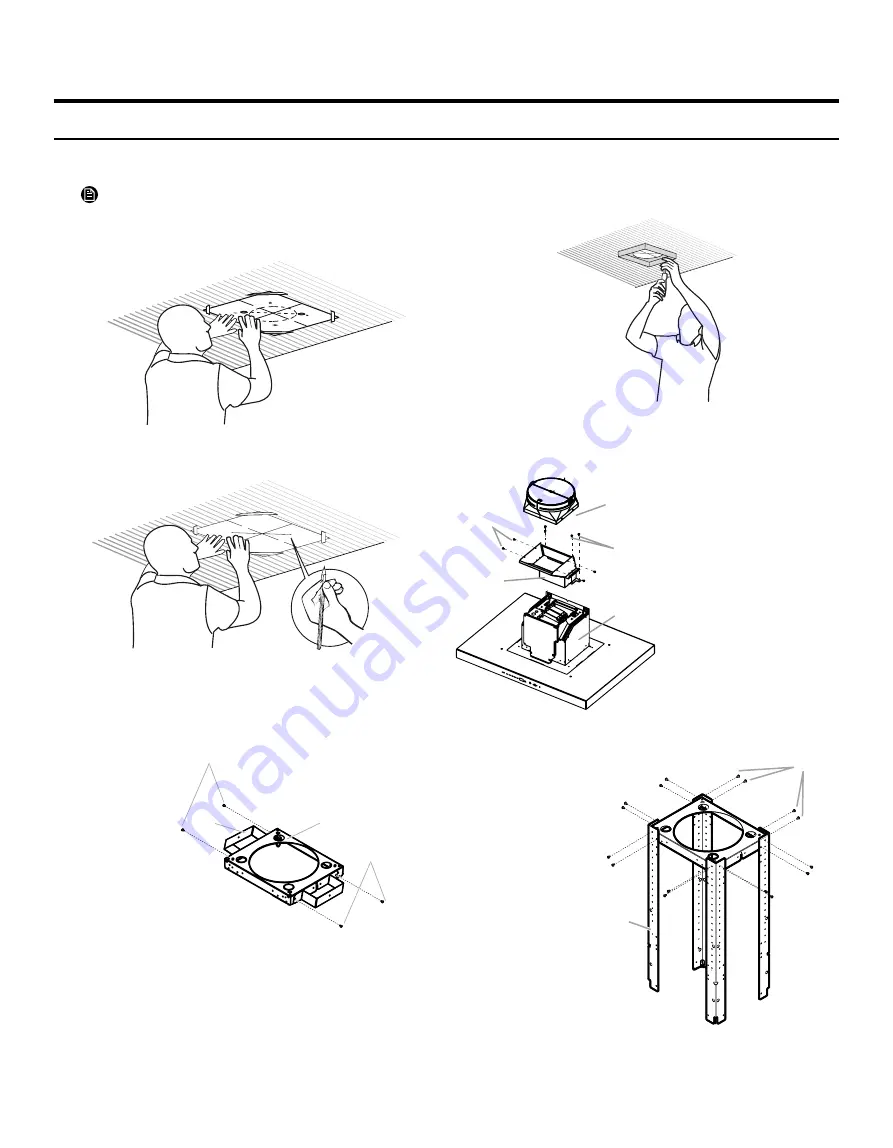
1. Place the template in the ceiling considering the
instructions for ceiling support structures.
NOTE
Always consider the front of hood when placing the
template on the ceiling. It will define the control’s
location.
2. Mark with a pencil the hole locations for screws and
duct in the ceiling. Remove the template.
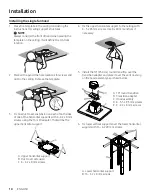
3. Fix one duct cover enxtension on each of both sides
of one of the horizontal supports with 4 - 4.2 x 8 mm
screws using the Torx 20 adapter. That will be the
upper horizontal support.
C
B
C
A
A. Upper horizontal support
B. Duct cover extension
C. 4 - 4.2 x 8 mm screws
4. Fix the upper horizontal support to the ceiling with
4 - 5 x 45 mm screws. Use 8 x 40 mm anchors if
necessary.
5. Install the 10” (25.4 cm) round transition over the
transition adapter and place it over the vent opening
on the hood assembly as pictured below.
A
D
C
E
B
A. 10" round transition
B. Transition adapter
C. Hood assembly
D. 4 - 3.5 x 9.5 mm screws
E. 4 - 4.2 x 8 mm screws
6. Fix lower vertical supports over the lower horizontal
support with 16 - 4.2 x 8 mm screws.
A
B
A. Lower horizontal support
B. 16 - 4.2 x 8 mm screws
Installation


