

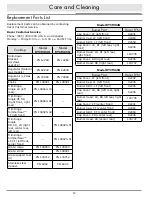
9
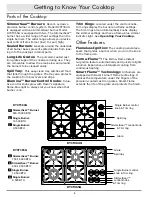
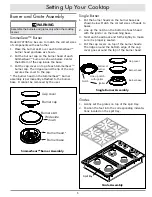
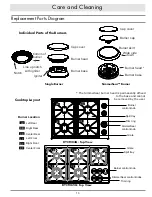
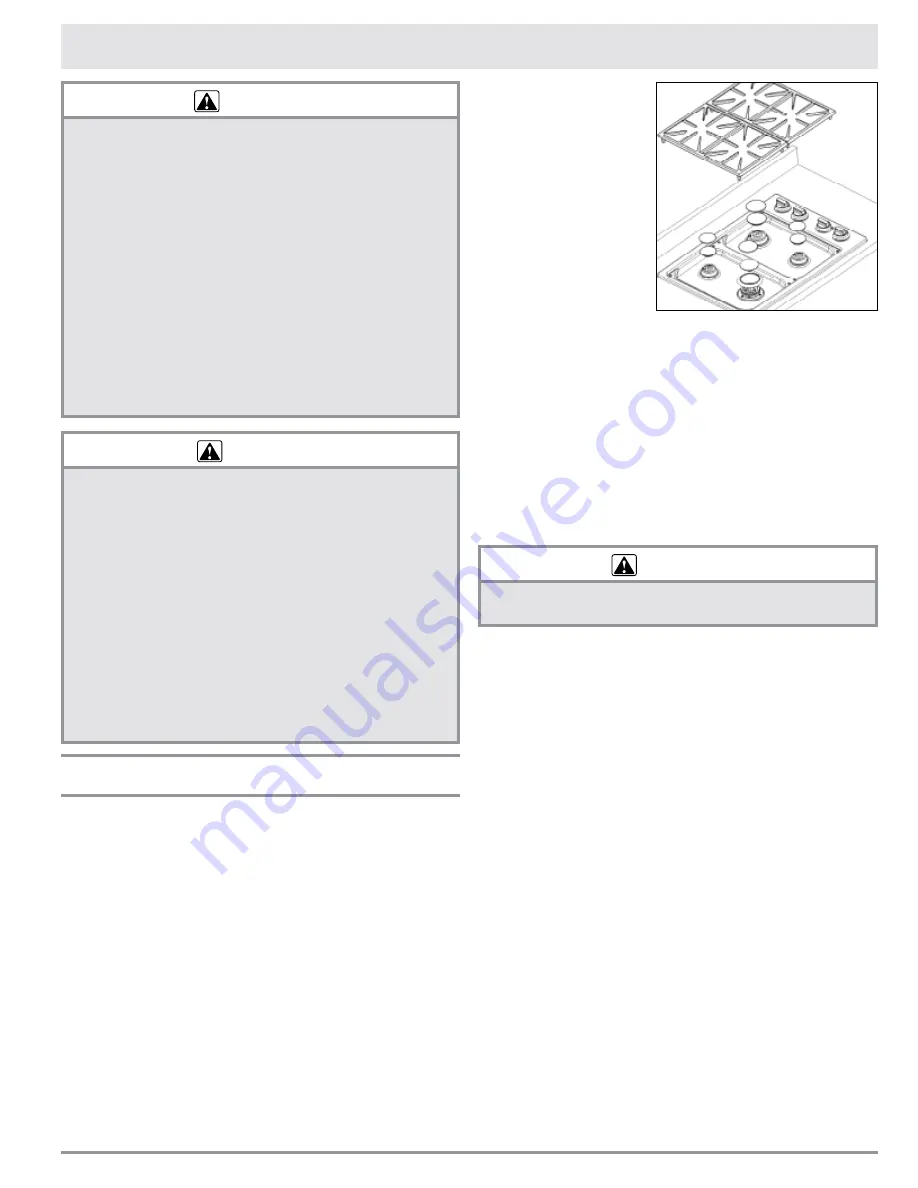
Disassembly
1. For safety, discon-
nect the cooktop
power cord from
the electrical outlet.
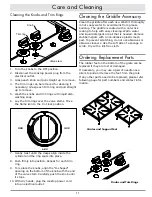
2. When the cooktop
is cool, remove the
grates from the top
of the cooktop.
3. Disassemble the
burners:
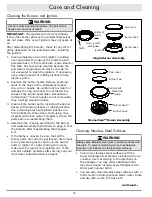
SimmerSear™ Burner
Disassembly
Lift the cap cover and burner cap off of the burner
head. However, the burner head on the
SimmerSear™ burner is not removable.
Single Burner Disassembly
Lift the cap cover and burner head off of the burner
base.
Cleaning the Grates, Spill Trays, and Wok
Ring
WARNING
Do not clean the cooktop grates, burner parts or Wok
ring in a dishwasher. They will be damaged.
IMPORTANT
:
DO NOT
use any of the cleaners listed
below to clean the burners and igniters. See the facing page
for burner and igniter cleaning instructions. Also,
if your
cooktop is equipped with stainless steel spill trays,
see the
Cleaning Stainless Steel Surfaces
section
for spill tray cleaning instructions.
The grates, the spill tray (on some models) and
optional Wok ring are coated with a porcelain finish.
• For everyday cleaning, use a soft cloth or non-
abrasive pad with warm soapy water to clean all
of the porcelain parts.
• If necessary, tough stains may be removed by
applying full-strength sprays such as Simple
Green™, Ajax™ All-Purpose Cleaner or Formula
409™. To minimize wear, use the mildest cleaner
needed to get the surface clean.
• For extremely stubborn stains, you may use a
mildly abrasive cleaner or applicator, such as
Soft Scrub™, Bon Ami™, S.O.S.
®
pads or other
soap-filled steel wool pads.
Use these cleaners
carefully and only occasionally.
Aggressive
or extensive use of these types of abrasives will
damage the finish.
Damage to the finish due
to the use of abrasives is not covered under
your warranty.
Care and Cleaning
WARNING
• Clean only the parts of the cooktop listed in this
manual. Clean them only in the manner specified.
• To avoid dangerous fumes or damage to your
cooktop’s surfaces and accessories, use only the
types of cleaning solutions specified in this manual.
• To avoid electrical shock or burns, turn off the burners
and make sure that all parts are cool before cleaning.
DO NOT turn the burners on during cleaning.
• Do not use a steam cleaner to clean the cooktop.
Steam could penetrate the electrical components
and cause a short circuit. After cleaning the burners,
reassemble all of the burner parts before attempting to
operate the cooktop.
• After cleaning the burners, always dry and reassemble
the cooktop parts completely before use. See page 5.
CAUTION
• Do not try to remove heavy spills with a sharp object
such as a knife or metal spatula. Sharp objects may
scratch your cooktop’s surfaces.
• To prevent damage, do not use abrasive or corrosive
cleaners or applicators such as steel wool or scouring
pads, on any part of the cooktop unless instructed to
do so. Use only a sponge, soft cloth, fibrous or plastic
brush, or nylon cleaning pad for cleaning the surfaces
of your cooktop.
• Take care when cleaning around the control valve
stems. If you get moisture inside the holes in the
chassis, damage to the cooktop can occur.
• Do not soak the knobs in water or put them in the
dishwasher.
Cleaning the Cooktop
To keep the cooktop looking and operating its best,
clean it after every use. Also, quickly wipe up spills
that occur while cooking. Be careful not to touch any
hot areas.
If you allow spills to sit on hot burner parts, they
will burn and be very difficult to clean. Certain types
of food, such as tomatoes, citrus juices, vinegar,
alcohol and milk can damage the finishes if you
allow them to stand for any length of time.
IMPORTANT
: The cooktop is exposed to extremely
high temperatures. The grates are under high stress
when hot cookware is placed on them. Also, the
cooktop parts are occasionally exposed to acidic
food spill-overs. These severe conditions cause the
porcelain enamel parts on your cooktop to undergo
a change in appearance over time. If you care for
and clean these parts carefully, you will slow down–
but not eliminate–the aging process.


