background image

32

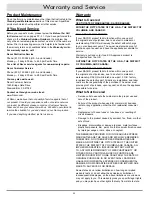
Warranty

What Is Covered

CERTIFICATE OF WARRANTIES: DACOR RANGES 
WITHIN THE FIFTY STATES OF THE U.S.A., THE DISTRICT OF 

COLUMBIA, AND CANADA*: 

FULL ONE-YEAR WARRANTY 
If your DACOR product fails to function within one year of 

the original date of purchase, due to a defect in material or 

workmanship, DACOR will remedy the defect without charge 

to you or subsequent users. The owner must provide proof of 

purchase upon request, and have the appliance accessible for 

service. 
Warranty is null and void if non-CSA approved product is 

transported from the U.S.

OUTSIDE THE FIFTY STATES OF THE U.S.A., THE DISTRICT 

OF COLUMBIA, AND CANADA:


LIMITED FIRST YEAR WARRANTY 
If your DACOR product fails to function within one year of 

the original date of purchase, due to a defect in material or 

workmanship, DACOR will furnish a new part, F.O.B. factory, 

to replace the defective part. All delivery, installation, and labor 

costs are the responsibility of the purchaser. The owner must 

provide proof of purchase, upon request, and have the appliance 

accessible for service.

What Is Not Covered

Service calls to educate the customer in the proper use and 

care of the product.
Failure of the product when used for commercial, business, 

rental or any application other than for residential consumer 

use. 
Replacement of house fuses or fuse boxes, or resetting of 

circuit breakers.
Damage to the product caused by accident, fire, flood, or other 

acts of God.
Breakage, discoloration or damage to glass, metal surfaces, 

plastic components, trim, paint, or other cosmetic finish, caused 

by improper usage or care, abuse, or neglect.

THE REMEDIES PROVIDED FOR IN THE ABOVE EXPRESS 

WARRANTIES ARE THE SOLE AND EXCLUSIVE REMEDIES. 

THEREFORE, NO OTHER EXPRESS WARRANTIES ARE 

MADE, AND OUTSIDE THE FIFTY STATES OF THE UNITED 

STATES, THE DISTRICT OF COLUMBIA, AND CANADA, ALL 

IMPLIED WARRANTIES, INCLUDING BUT NOT LIMITED 

TO, ANY IMPLIED WARRANTY OF MERCHANTABILITY OR 

FITNESS FOR A PARTICULAR USE OR PURPOSE, ARE 

LIMITED IN DURATION TO ONE YEAR FROM THE DATE OF 

ORIGINAL PURCHASE. IN NO EVENT SHALL DACOR BE 

LIABLE FOR INCIDENTAL EXPENSE OR CONSEQUENTIAL 

DAMAGES. NO WARRANTIES, EXPRESS OR IMPLIED, ARE 

MADE TO ANY BUYER FOR RESALE.
Some states do not allow limitations on how long an implied 

warranty lasts, or do not allow the exclusion or limitation of 

inconsequential damages, so the above limitations or exclusions 

may not apply to you. This warranty gives you specific legal rights, 

and you may also have other rights that vary from state to state.

Warranty and Service

Product Maintenance

Do not perform any maintenance other than that instructed in the 

Cleaning and Maintenance

 section of this manual. A qualified 

service technician should perform all other service.

If You Need Service

Before you request service, please review the 

Before You Call 

for Service

 section on pages 30 - 31. If you have performed the 

checks in the 

Problem Solution Guide

 and the problem has 

not yet been remedied, please contact us at one of the numbers 

below. Prior to requesting service, it is helpful to be familiar with 

the warranty terms and conditions listed in the 

Warranty

 section.

For warranty repairs, call:
Dacor Distinctive Service

Phone: (877) 337-3226 (U.S.A. and Canada)  

Monday — Friday 6:00 am to 4:00 pm Pacific Time

For a list of Dacor service agents for non-warranty repairs:
Dacor Customer Service

Phone: (800) 793-0093 (U.S.A. and Canada) 

Monday — Friday 6:00 am to 5:00 pm Pacific Time

You may also write us at:

Dacor Customer Service  

1440 Bridge Gate Drive 

Diamond Bar, CA 91765

Contact us through our web site at:

www.Dacor.com

At Dacor, we believe that our quality of service equals that of 

our product. Should your experience with our service network 

or product be different, please contact our Customer Service 

Team and share your encounter with us. We will do our utmost to 

resolve the situation for you and deliver on our Dacor promise.
If you need anything clarified, just let us know.

Summary of Contents for Epicure ER30DSCH

Page 1: ...Getting To Know Your Range 4 6 Setting Up Your Range 7 9 Operating the Cooktop 10 11 Operating the Oven 12 21 Cooking Tips 22 Cleaning and Maintenance 23 28 Replacement Parts and Accessories 29 Before...

Page 2: ...2007 Dacor all rights reserved...

Page 3: ...ce without updating these instructions CALIFORNIA PROPOSITION 65 WARNING The burning of gas cooking fuel generates some by products that are on the list of substances which are known by the State of C...

Page 4: ...failure Do not tamper with the controls To prevent the unit from tipping forward and to provide a stable installation the unit must be secured in place with the anti tip device See the separate instal...

Page 5: ...en may cause the cooktop and backguard to become hot Before using glazed cookware such as glass ceramic or earthenware check the manufacturer s temperature and usage rec ommendations Glazed cookware t...

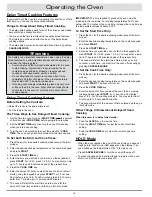
Page 6: ...meat probe insert the skewer into the meat and plug the other end into the connector See the Meat Probe section on pages 19 20 for proper operation OVEN LIGHTS There are two oven lights inside the ove...

Page 7: ...t then press the START key Also use the START key to start the timers CANCEL SECURE Use this key to turn off your oven This key sets all temperature settings back to zero and turns off any features ex...

Page 8: ...ts BURNER CONTROL KNOBS Use the knobs to turn on the burners and adjust the flame size The corresponding knob illuminates when a burner is on TRIM RINGS Located behind each knob They prevent liquids f...

Page 9: ...the tabs on the bottom of the ring to the slots on the burner head Twist each ring back and forth slightly to make sure it is properly seated Put the burner cap on top of the burner ring The ridge ar...

Page 10: ...into the corresponding dimples Installing the Burner Knobs There are two different types of knobs for the range The knobs for the right burners have the words MAX GRIDDLE on them Put the knobs with M...

Page 11: ...conds The control panel will go back to the regular clock display set to the new temperature scale 1 2 3 4 CONTROL PANEL SETTINGS Setting the Time IMPORTANT The clock cannot be set during delay timed...

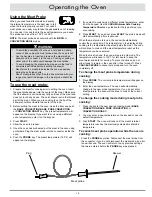
Page 12: ...ates To light a burner Push in on the knob and turn it counter clockwise to the HIGH position The igniter for the burner will spark repeatedly until it lights The spark makes a clicking sound The burn...

Page 13: ...ooking be careful with metal utensils on the surface because they can scratch the non stick coating Clean the griddle after each use See page 27 for instructions The right grate has burners of the sam...

Page 14: ...orts Push the rack all the way in with both hands 1 2 3 4 To Insert Your GlideRack Oven Rack Your oven comes with a Dacor GlideRack oven rack You can pull the GlideRack oven rack out further than the...

Page 15: ...ppear on the display see page 14 for more details Press START to cook at the preset temperature Or you may enter a different cooking temperature for example 3 5 0 on the number keypad then press START...

Page 16: ...ear on the display Only the CANCEL SECURE and the oven light keys remain functional To reactivate the control panel press and hold the CANCEL SECURE key for four seconds Operating the Oven 12 Hour Tim...

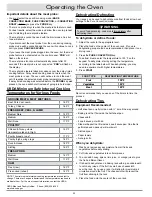
Page 17: ...MS WHEN USING THE BAKE MODE Problem may be caused by What to do Cookies burn on the bottom Oven door opened too often Set timer to shortest recommended cooking time and check food when timer beeps Use...

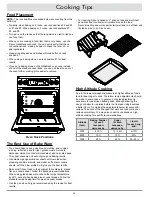
Page 18: ...roast mode uses a combination of the convection fan and heat sources above and below the food Best for rib roasts turkeys chickens etc Roasting Tips All baking modes can be used to successfully roast...

Page 19: ...op a timer before time runs out Press the TIMER 1 or TIMER 2 key twice The timer will stop and the display will read 0 00 1 2 Operating the Oven Your range offers two broil modes Broil Convection Broi...

Page 20: ...esent time Press the COOK TIME key Enter the amount of time you want the oven to be on after it starts using the keypad and press START For 1 hour and 35 minutes press 1 3 5 For 25 minutes press 2 5 Y...

Page 21: ...ered before the PROBE key was pressed 7 8 1 2 1 2 3 Using the Meat Probe When you cook foods like roasts and poultry the internal temperature is the best way to tell when the food is properly cooked Y...

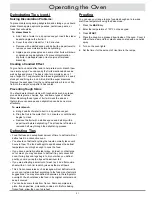
Page 22: ...changes in bacteria and the temperatures required to eradicate them For the most current information contact the USDA USDA Meat and Poultry Hotline Phone 800 535 4355 www fsis usda gov Dehydrating Def...

Page 23: ...ins to crack Remove the fruit with a slotted spoon and dab dry with a paper towel before dehydrating The pit can be left inside or removed half way through the dehydrating process Defrosting Tips Food...

Page 24: ...n some cases In general no recipe adjustment is necessary for yeast risen baked goods although allowing the dough or batter to rise twice before the final pan rising develops a better flavor Try makin...

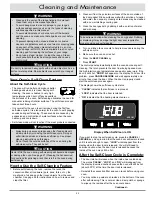
Page 25: ...nt damage do not use abrasive or corrosive cleaners or applicators such as steel wool or scouring pads on any part of the range unless instructed to do so Use only a sponge soft cloth fibrous or plast...

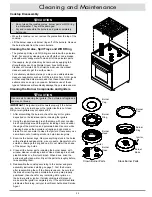
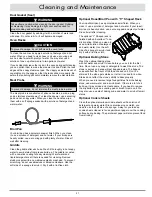
Page 26: ...eratures The grates are put under a lot of stress when hot utensils are placed on them In addition the cooktop parts are occasionally exposed to acidy food spill overs These severe operating condition...

Page 27: ...After dissembling the burners check for any dirt or grime deposited on the individual parts including the igniters Using the igniter cleaning brush that came with your cooktop brush completely around...

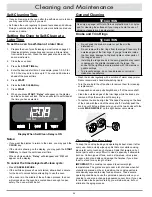
Page 28: ...he CANCEL SECURE key for six seconds The lock out feature disables the keys When the control panel is locked the word OFF appears on the display When you want to re activate the control panel press CA...

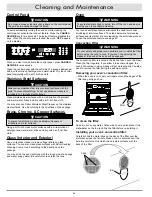
Page 29: ...ing the door gasket Rubbing or displacing it may damage the tight door seal required for proper cooking and self cleaning warning Take extreme caution when cleaning the door gasket Rubbing or displaci...

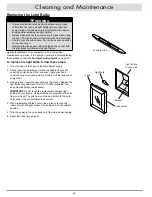
Page 30: ...oils from your hand The oils from your hand will stick to the bulb and cause it to burn out faster than normal When reinstalling the lens cover line up the cutout on the inside rim with the light soc...

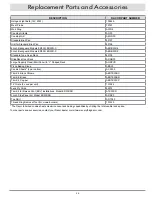
Page 31: ...oil Pan with V Shaped Rack AORPVR Pizza Baking Stone ABS20 Cookie Sheets 3 per carton ACS303 Trim Kit Black Chrome AERTK30BC Trim Kit Brass AERTK30BR Trim Kit Copper AERTK30CP 14 Grate 2 used per unit...

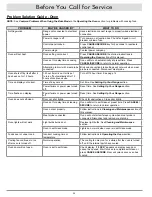
Page 32: ...e section Time flashes on display Power failure or power was turned off Reset time See Setting Up Your Range section Oven does not self clean Door not shut tightly Check for obstructions Close door ti...

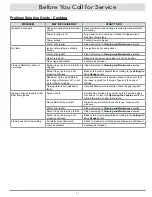
Page 33: ...ting Up Your Range section Range set up to use a different type of gas Natural or LP or set up for different altitude Have qualified service technician check to make sure that the range is set up for...

Page 34: ...LIMITED TO ANY IMPLIED WARRANTY OF MERCHANTABILITY OR FITNESS FOR A PARTICULAR USE OR PURPOSE ARE LIMITED IN DURATION TO ONE YEAR FROM THE DATE OF ORIGINAL PURCHASE IN NO EVENT SHALL DACOR BE LIABLE F...

Page 35: ...THE UNITED STATES DACOR INC ATTN WARRANTY PROCESSING DEPT 1440 BRIDGE GATE DR STE 200 PO BOX 6532 DIAMOND BAR CA 91765 9861 BUSINESS REPLY MAIL PERMIT NO 4507 POSTAGE WILL BE PAID BY ADDRESSEE FIRST C...

Page 36: ...ilder B Magazine G Architect Designer C Appliance Dealer Showroom H Another Dacor Owner D Kitchen Dealer Showroom I Model Home E Home Show J Other 2 Where did you buy your Dacor appliances A Appliance...

Reviews: