29
English
Installation Instructions
Making the Gas Connection
•
Before connecting the gas line, close the gas shut-off valve, and turn off power to the range at the circuit
breaker or fuse box.
•
Do not apply excessive pressure when tightening gas connections and fittings.
•
Do not use Teflon tape or plumber’s putty on gas flex-line connections.
•
(LP installation) The LP tank must have a high-pressure regulator (in addition to the range's regulator).
•
The gas-supply pressure to the regulator must never exceed 1/2 psi (pounds per square inch) or 3.5 kPa
(kilopascals).
•
The range and shut-off valve must be disconnected from the gas-supply piping during pressure tests ex
-
ceeding 1/2 psi (3.5 kPa).
• The range must be isolated from the gas-supply piping by closing the shut-off valve during any pressure
testing at or below 1/2 psi (3.5 kPa).
•
For safety’s sake, check all gas lines for leaks as instructed. Do not use a flame to check for leaks.
The range’s gas-pressure regulator is factory-set for a specific type of gas. To verify that the range is compati
-
ble with the home gas supply, check the rating label (see Pg. 3 for location). Ranges intended for LP gas have
“LP” in the model number. Consult your dealer if the range is incompatible with the home gas supply.
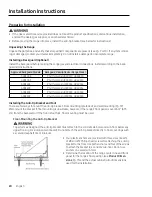
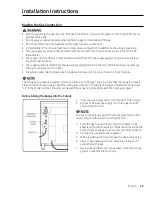
Before Sliding the Range Into the Cutout
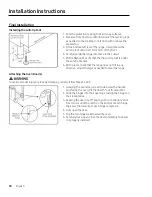
1. Close the gas-supply valve; turn off power to the range.
2. Connect a flexible gas-supply line to the gas shut-off
valve on the stub out.
The line must be long enough that the range can be pulled
out for service without disconnecting the line.)
3.
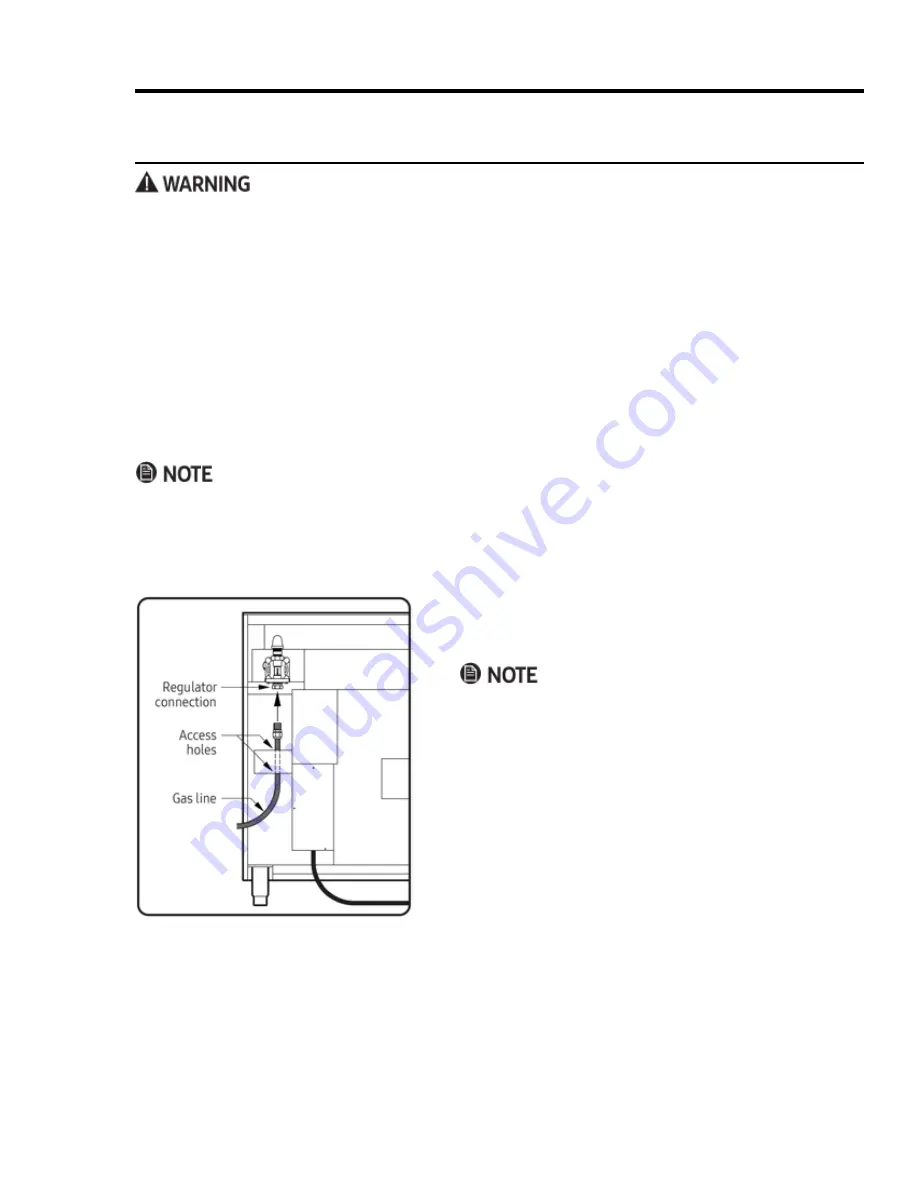
Slide the gas line up through the access holes in the
chassis and into the regulator. (Move the wires inside the
access holes so the gas line can pass smoothly upward.)
4. Connect the gas line to the regulator.
5. With all cooktop controls off, open the gas-supply valve.
6. Use a soap-and-water solution to check all lines and
connections for leaks.
7. Having verified there are no gas leaks, close the gas-sup
-
ply valve connected to the range.


