21
English
Installation Instructions
Floor-Mounting the Anti-Tip Bracket, cont.
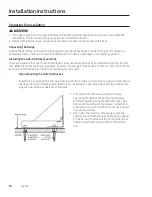
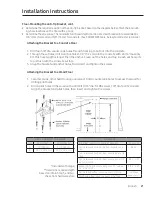
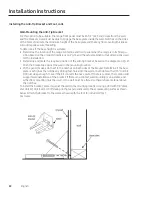
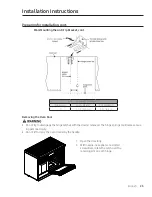
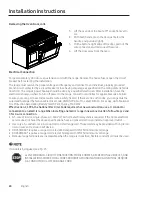
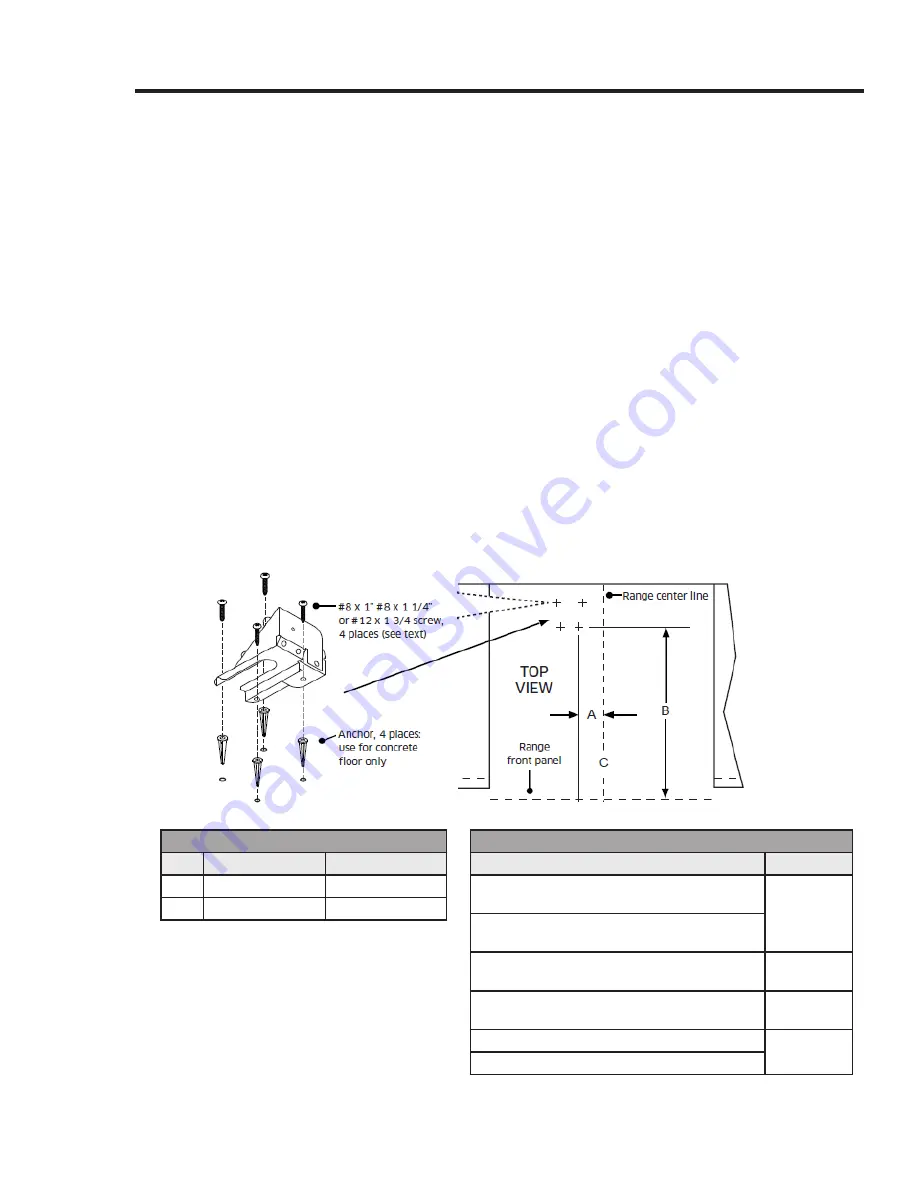
• Determine the required position of the anti-tip bracket, based on the diagram below. Mark the 4 mount-
ing-hole locations on the floor with a pencil.
• Determine the screw size. The minimum full thread depth (portion of screw threaded into wood/slab) is
3/8” (1 cm) for wood and 5/8” (1.6 cm) for concrete. (See SCREW SIZE table, below, for correct screw sizes.)
Attaching the Bracket to a Concrete Floor
1.
Drill four 3/8” dia. countersink holes through flooring to but not into the concrete.
2. Through these holes, drill 4 anchor holes 1-1/4” (3.2 cm) into the concrete with a 3/16” masonry
bit. This hole length is longer than the anchor. Clean out the holes, and tap in each anchor so its
top is flush with the concrete surface.
3. Align the bracket and anchor holes, then insert and tighten the screws.
Attaching the Bracket to a Wood Floor
1.
Ceramic, stone, other hard flooring over wood: Drill 4 countersink holes to access the wood for
drilling pilot holes.
2. Drill 4 pilot holes in the wood with a drill bit (1/16” dia. for #8 screws, 1/8” dia. for #12 screws).
Align the bracket and pilot holes, then insert and tighten the screws.
SCREW SIZE
Sub-Floor Type/Floor Covering Thickness
Screw Size
Concrete/wood subfloor, no floor covering over
top
#8 x 1*
Concrete/wood subfloor, floor covering up to 1/4”
thick
Concrete/wood subfloor, floor covering over 1/4”
up to 1/2” thick
#8 x 1 1/4*
Wood sub-floor, floor covering over 1/2” and up
to 1 3/16” thick
#12 x 1 3/4*
Concrete under floor covering over 1/2” thick
Purchase
separately**
Wood under floor covering over 1 3/16” thick
ANTI-TIP BRACKET PLACEMENT
Dim.
DOP36M86DL*
DOP48M86DL*
A
13” (33.0 cm)
3 1/2” (8.9 cm)
B
22 1/2” (57.2 cm)
22 1/2” (57.2 cm)
*Included with range;
**determine required depth
based on info in Step 3, and pur-
chase from hardware store.


