


5
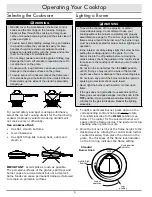
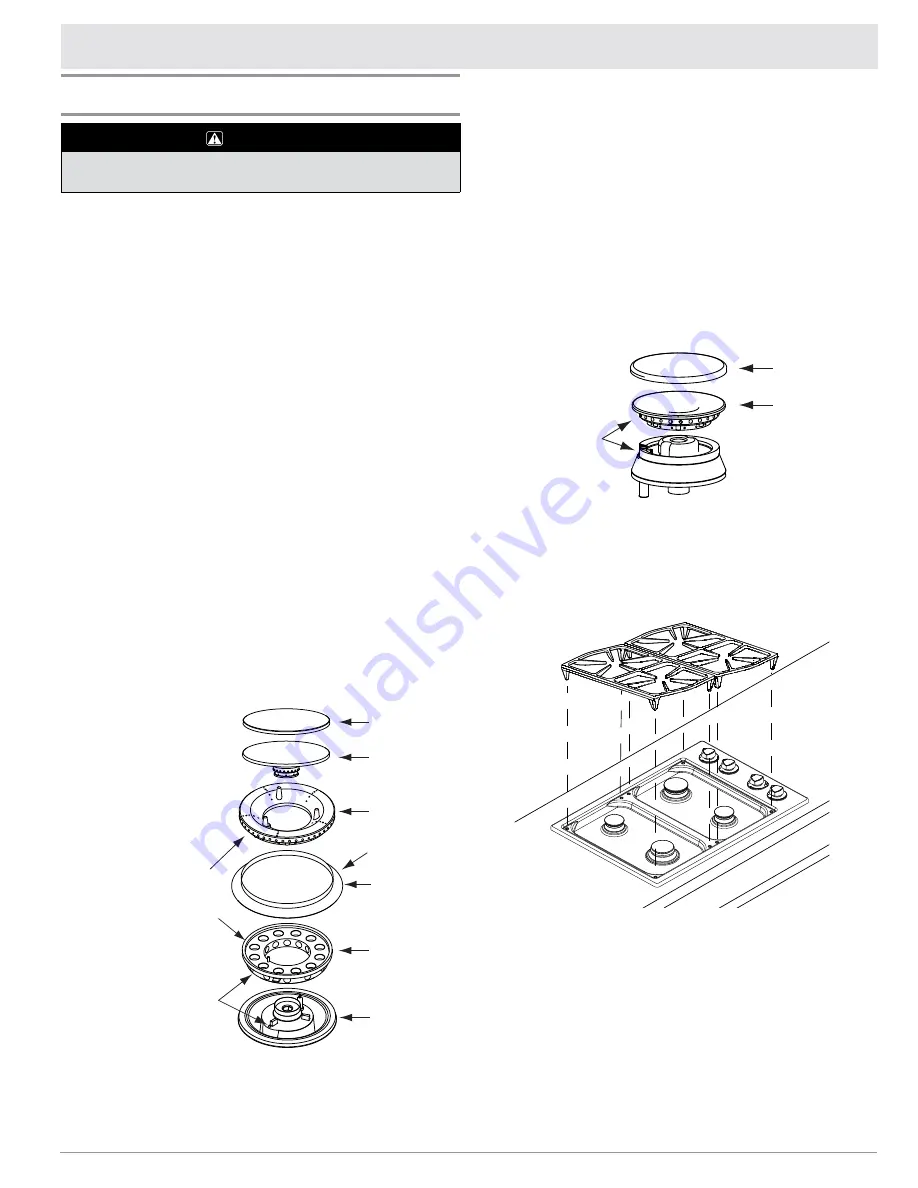
Standard Burners
Put the burner heads on the burner bases as
1.
shown below. Match the correct sizes. The
bottom of the correct size burner head fits on
top of the matching burner base. Line up the
notch on the bottom of each head with the
ignitor on the matching base.
Twist each head back and forth slightly to make
2.
sure it is properly seated.
Put the cap covers on top of the burner heads.
3.
The ridge around the bottom edge of the cap
cover goes around the top of the burner head.
Grates
Gently set the grates on top of the spill tray. Put the
legs of each grate into the corresponding dimples.
Setting Up Your Cooktop
Burner and Grate Assembly
WARNING
Assemble the burners and grates only when the cooktop
is cool.
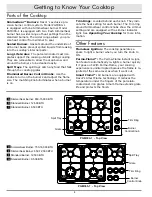
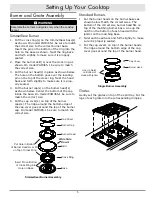
SimmerSear Burner
Put the cross ring(s) on the SimmerSear base(s)
1.
as shown. On model PGM365-1 be sure to match
the correct size to the correct burner base.
Insert the pin on the bottom of the ring into the
hole on the base as shown. Twist the ring back
and forth slightly to make sure it is properly
seated.
Place the burner skirt(s) over the cross ring as
2.
shown. On model PGM365-1 be sure to match
the correct size.
Put the burner head(s) in place as shown below.
3.
The hole on the bottom goes over the locating
pin on the top of the cross ring. Twist the head
back and forth slightly to make sure it is prop-
erly seated.
Put the burner cap(s) on the burner head(s)
4.
as shown below. Center the bottom of the cap
inside the base. On model PGM365-1 be sure to
match the correct size.
Put the cap cover(s) on top of the burner
5.
caps(s). The ridge around the bottom edge of
the cap cover goes around the top of the burner
cap. On model PGM365-1 be sure to match the
correct size.
SimmerSear Burner Assembly
Burner Cap
Burner Head
Base
Cross Ring
Skirt
Cap Cover
Wide Side
Down!
Insert Pin on Bottom
of Cross Ring into
Hole on Base
Put Hole in Bottom
of Burner Head Over Pin
on Top of Cross Ring
Single Burner Assembly
Burner Head
Cap Cover
Line Up Notch
on Bottom of
Head with Igniter
Summary of Contents for Preference PGM304-1
Page 2: ...2008 Dacor all rights reserved...
Page 14: ...12 Notes...


