10-6
CYLINDER/PISTON
·
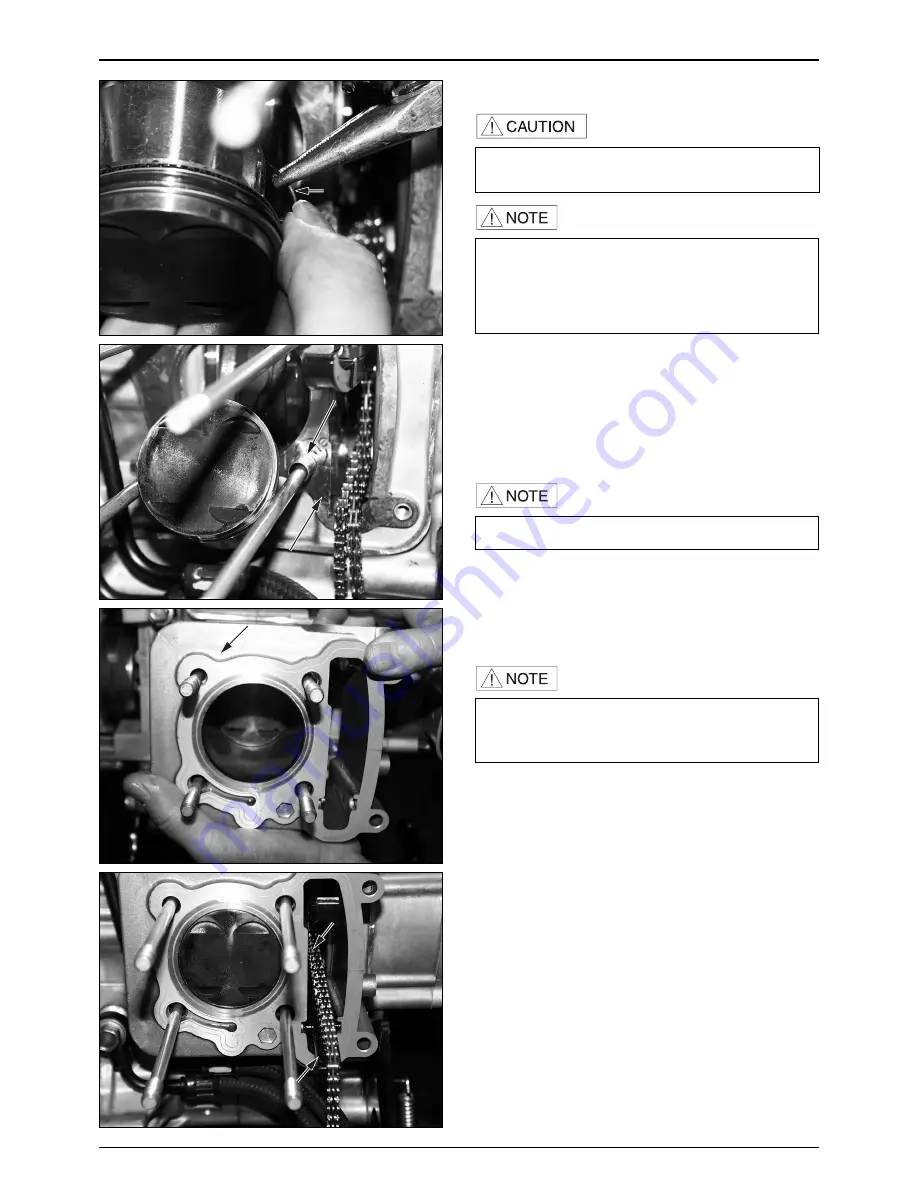
Take care not to drop the piston pin clip into the
crankcase.
·
Set the piston pin clip in the groove properly.
·
Do not align the clip’s end gap with the piston
cutout.
·
Take care not to damage the cylinder mating surface.
·
Be careful not to damage the piston rings.
·
Be careful not to drop the cam chain into the
crankcase.
●
Install new piston pin clips.
CYLINDER INSTALLATION
●
Make sure that the piston ring end gap is correct.
●
Carefully remove any adhering gasket material from
the cylinder / head mating surface. Do not scratch the
surface.
●
Install a new cylinder gasket and dowel pins.
●
Install the lower part of the cam chain guide to the
“ ”
part of the crankcase, and install the cam chain guide
by aligning the projection part with the
“ ”
part of
cylinder.
●
Install the cylinder head. (
⇨
9-11
)
●
Install the camshaft. (
⇨
9-13
)
●
Install the cylinder head cover.
●
Install the EX. pipe. (
⇨
3-8
)
●
Install the engine to the frame. (
⇨
6-2
)
●
Coat the cylinder wall with clean engine oil and
lubricate the piston rings and install the cylinder.
PISTON PIN CLIP
DOWEL PIN
GASKET
CYLINDER
CAM CHAIN GUIDE
CAM CHAIN
·
Always use new piston pin clips. Reinstalling used
piston pin clips may lead to serious engine damage.
Summary of Contents for S2 125
Page 1: ......
Page 3: ......
Page 21: ...MEMO...
Page 49: ...MEMO...
Page 59: ...MEMO...
Page 63: ...7 0 LH CRANKCASECOVER CONTINUOUSLYVARIABLE TRANSMISSION LH CRANKCASE COVER...
Page 77: ...8 0 A C GENERATOR STARTER CLUTCH FLYWHEEL STATOR COMP RH SHROUD COOLING FAN...
Page 86: ...MEMO...
Page 103: ...10 0 CYLINDER PISTON CYLINDER CYLINDER GASKET PISTON TOP RING SECOND RING OIL RING...
Page 110: ...MEMO...
Page 111: ...11 0 TRANSMISSION CRANKSHAFT CRANKCASE RH CRANKCASE LH CRANKCASE CRANKSHAFT...
Page 122: ...MEMO...
Page 144: ...MEMO...
Page 145: ...13 0 REAR WHEEL BRAKE SUSPENSION REAR SWING ARM...
Page 154: ...MEMO...
Page 168: ...MEMO...
Page 177: ...MEMO...
Page 183: ...SERVICEMANUAL 2004 11 PRINTED 2004 11 PUBLICATION NO COPY...


