Removing tires
a. Activated the parking brake and turn
the emergency warning lamp on.
b. Place a warning sign behind the
vehicle.
c. Fix the tire which is diagonally
located from the punctured tire with
a support.
d. Remove the wheel cover.
e. Loosen wheel nuts with a socket
ranch.
f. Use a jack to raise the vehicle until
the tire is slightly off the ground.
g. Remove wheel nuts completely with
a wheel nut ranch. Remove the tire.
Tire Installation
When installing the tire, if the bolting
area is dirty, it could affect proper
installation. Clean the area first and oil
the area, bolts and nuts before
assembling them.
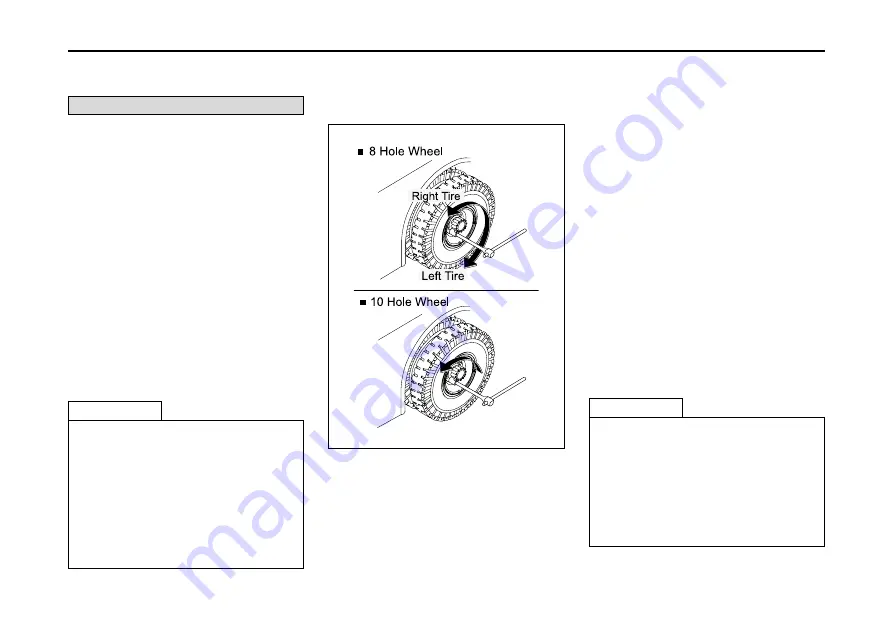
a. Put in the tire. Match the disc wheel
holes and bolts.
b. Tighten until the tire is firmly placed.
c. All nuts are to be tightened as the
diagram using a wheel nut ranch.
Refer to the standard torque.
Do not tighten them as the standard
torque at once. Tighten them in 2~3
stages.
5-6
EMERGENCY AID
How to Change Tires
REFERENCE
In case of 8 hole wheel, wheel nuts
of wheels on each side are
tightened in different directions.
The left tire nut is marked with
“
L
”
and the right hand side tire nut is
marked with
“
R
”
.
In case of 10 hole wheel, wheel
nuts spin on the same direction.
OM-B549
CAUTION
The torque of the wheel nuts must
be tightened as the standard.
(refer to 1-11p)
If you experience steering wheel
vibration, steering problem or such,
stop driving and contact a service
center.
·
·
·
·
Summary of Contents for BS Series
Page 1: ......
Page 13: ...DEALER IMPRINT...
Page 153: ...6 11 VEHICLE INSPECTION AND MAINTENANCE OM F115E TYPE B...
Page 260: ......


