-37-
SL-110P Service Data
7-4. Adjusting White Balance
1. More than 30 minutes, heat-run the set in full-white mode whit H/R button of SVC remote
controller.
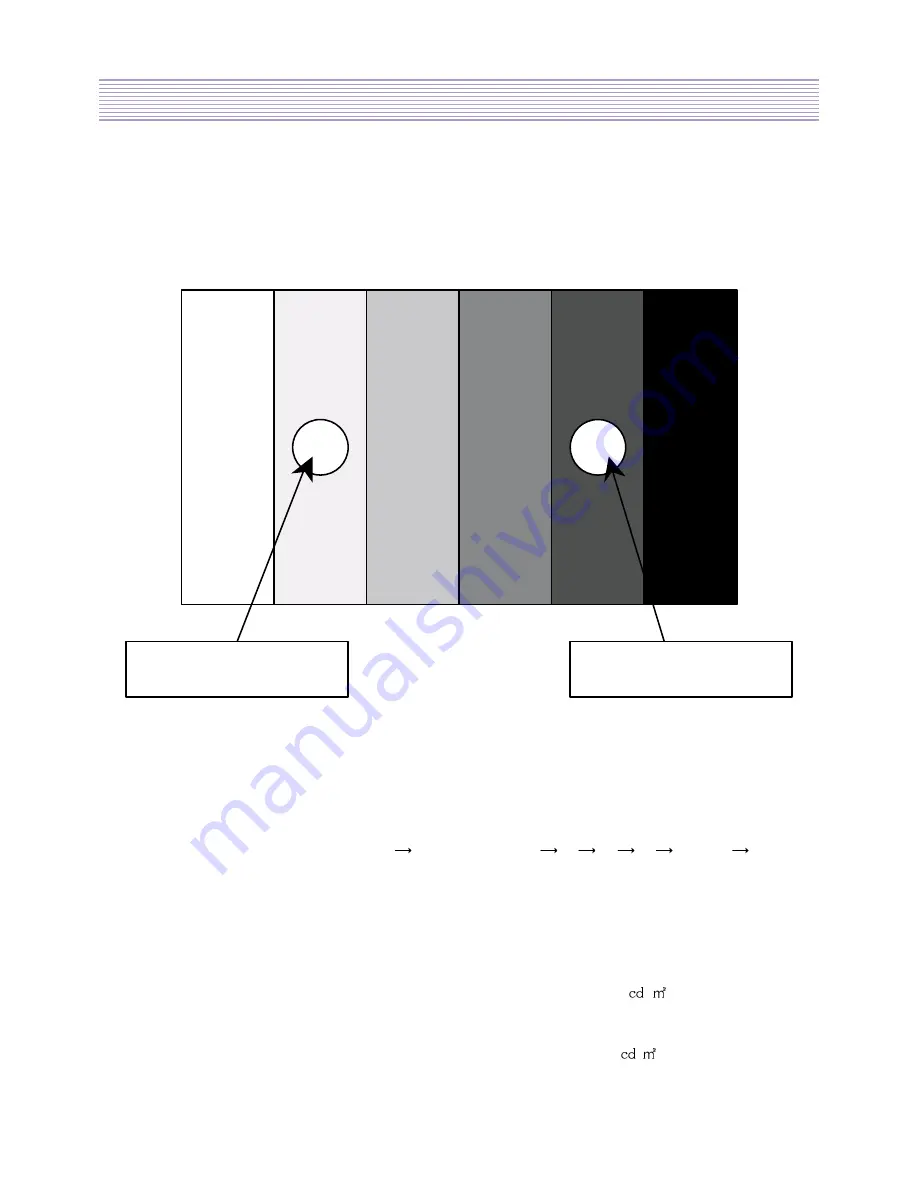
2. Apply HIGH/LOW PATTERN of WHITE BALANCE TESTER (NITSUKI 2849) to Video input
terminal (CROMA : OFF, Reference : G)
3. Adjust Picture mode, “Normal1”.
4. Check initial data of User Menu.
5. To enter Service Mode, Push PR91
SHARPNESS 0
R
G
Y
MENU
PC KEY
of User remote controller.
6. Check initial data of Service Mode.
7. Attach a sensor of White Balance Meter (CA-100) to 80% / 20% of white level on the screen.
8. Push SVC KEY of SVC Remote controller to enter SVC Mode.
9. Push SCREEN KEY of Remote controller in SVC Mode. (PANEL /TV MODE Convert)
10. Adjust White Balance by adjusting R DRV, B DRV
- Coordinate of Color is x=280 +/- 3, y=290 +/- 3 and the Y is 150 / .
11. Attach a sensor of White Balance Meter (CA-100) to 20% of white level on the screen
12. Adjust White Balance by adjusting R Bias , G Bias
- Coordinate of Color is x=280 +/- 3, y=290 +/- 3 and the Y is 10 /
.
13. Repeat No 7 to No 12 until getting that Coordinate of Color is x=280, y=290.
14. To exit from Service mode, press SVC button on the SVC remote controller.
100%
80%
60%
40%
20%
0%
High
Level
Low
Level
High/Low Pattern
Summary of Contents for DLP-15D3SHS
Page 7: ...7...
Page 8: ...8...
Page 20: ...20...
Page 21: ...21...
Page 22: ...22...
Page 23: ...23...
Page 24: ...24...
Page 25: ...25...
Page 26: ...26...
Page 27: ...27...
Page 28: ...28...
Page 29: ...29 DLP 15D3SHS DLP 17D3SHS TOP...
Page 30: ...30 DLP 15D3SHS DLP 17D3SHS BOTTOM...
Page 31: ...31 DLP 20D3SHS TOP...
Page 32: ...32 DLP 20D3SHS BOTTOM...
Page 64: ...64 DLP 15D3SHS...
Page 65: ...65 DLP 17D3SHS...
Page 66: ...66 DLP 20D3SHS...
Page 67: ...LCD Projection TV Service Training 13 13 SOFTWARE INSTALL SOFTWARE INSTALL...
Page 69: ...2 Copy FlashUpgrader exe in the PW113 folder to PC...
Page 72: ...2 Click the Setup_Visual_I2C_v3 2b18 file twice to execute...
Page 73: ...3 Progress the Install as shown below Select the YES Y button Select the Next button...
Page 74: ...Select the Next button After check I accept the agreement Choose the Next button...
Page 75: ...Select the Next button Select the Next button...
Page 76: ...Select the Next button Select the Install button...
Page 77: ...Installing Select the Finish button...
Page 79: ...5 Progress the Install as shown below Select the I Agree button Select the Next button...
Page 80: ...Select the Install button Select the Close button...
Page 81: ...6 Copy VCTI_D2 folder to PC in the CD...
Page 82: ...7 Restart the PC 8 Run the LptDrvTest in Micronas folder as shown below...
Page 85: ...LCD Projection TV Service Training 14 14 SOFT UPGRADE SOFT UPGRADE...
Page 87: ...Figure 2 Click twice the PwSDK inf Figure 1 Click the Choose button Figure1 Figure2...
Page 92: ...FIGURE 1 Click the TVT button FIGURE 2 Click the Bootloader button Figure1 Figure2...
Page 93: ...FIGURE 3 Normal condition Figure3 Figure4 FIGURE4 Error condition Repeat 2 progress...


