background image

Methods of exchanging main parts

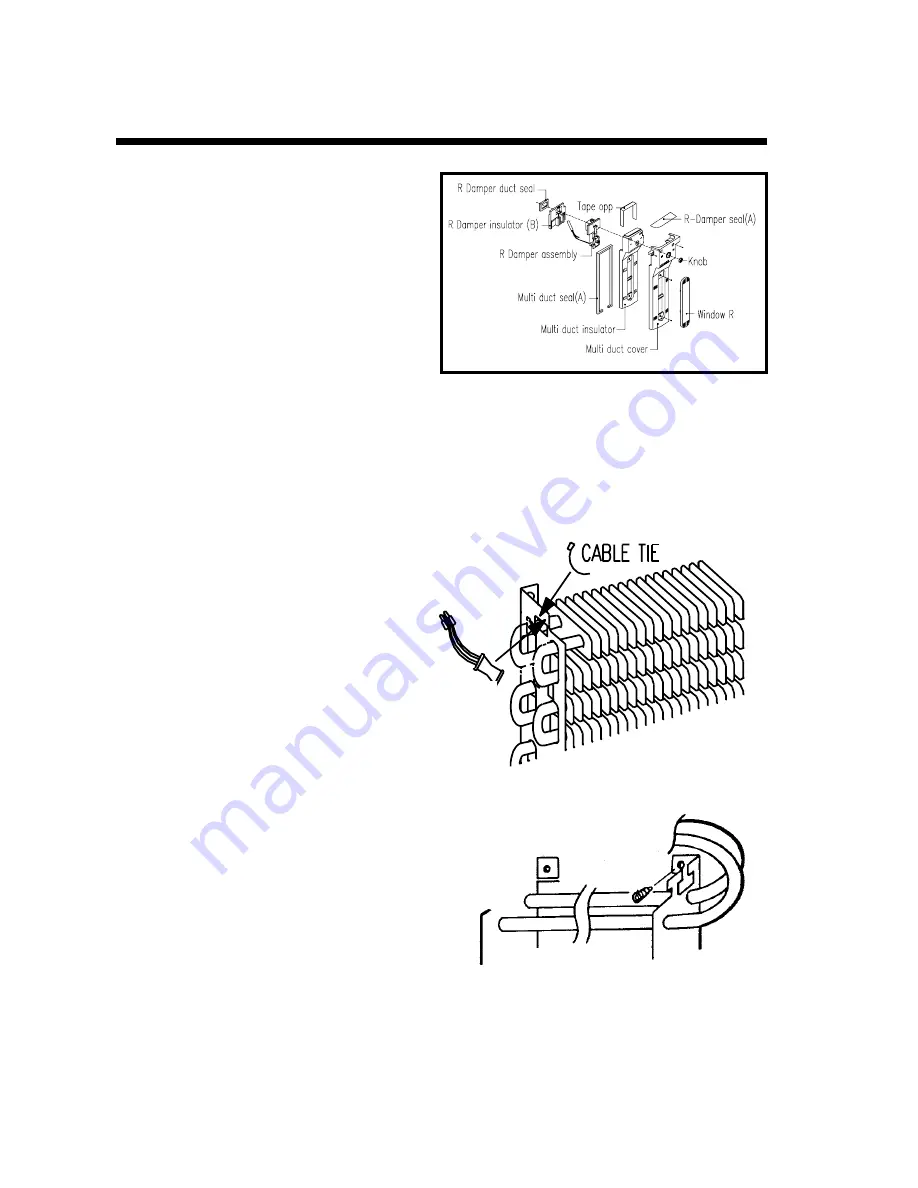
4) The specific part of the multi duct is 

   shown below.

   --- 

Check after repair ---

   1. Put all the parts into the right places 

       and attach the seal and tape to their 

       original positions.

   2. Check if the damper knob operates properly. 

   3. Be careful not to block the cool air duct when assembling.

   4. Make sure the parts to adhere to the interior surface when screwing.

      * Be careful not to damage the R-Window during assembly.

(3) Bimetal

1) Cut off the wire bind.

2) Take out the bimetal.

(4) Glass tube heater

1) Remove 2 screws that fasten the 

    evaporator.

-6-

Evaporator fastening screw

BIMETAL

Summary of Contents for FR-450

Page 1: ...svc dwe co kr Oct 2002 S M No FR45000000 Caution In this Manual some parts can be changed for improving their performance without notice in the parts list So if you need the latest parts information...

Page 2: ...6 Be careful not to let water to permeate the electric part in the machine room 7 with the door open during your working you might be damaged by that door 8 You should give a tilt to the refrigerator...

Page 3: ...System Fin evaporator Forced control Cold Control Adjustable Dial Refrigerant R 134a 105g freezer grade Four star Rating power consumption Electric Features of eletric motor W Rating power consumptio...

Page 4: ...3 NAME OF PARTS 2...

Page 5: ...4 REFRIGERANT CYCLE DIAGRAM 3...

Page 6: ...MP WASH 18 6 CASTER B 19 7 SHAFT CASTER 20 8 CASE VAPORI 21 9 PIPE WICON 22 10 ABSORBER WICON FIXTURE 23 11 HOSE DRAIN 24 12 MOTOR C AS 25 13 FAN C FIXTURE C MOTOR ABSORBER PIPE B ABSORBER C MOTOR SWI...

Page 7: ...le shape by hand 2 Multi Duct 1 Disassemble the R Window by inserting a finger in the lower part and pulling forward while pushing upward slightly When assembling fit the lower part of the R Window fi...

Page 8: ...sitions 2 Check if the damper knob operates properly 3 Be careful not to block the cool air duct when assembling 4 Make sure the parts to adhere to the interior surface when screwing Be careful not to...

Page 9: ...ator during the process 4 Cut the both ends of glass tube heater tube heater lead wires and insulate and seal lead tip remaining in refrigerator with tape etc 5 Pull out the glass tube heater from the...

Page 10: ...e lower one 7 Place the glass tube heater lead wire shown as below and fasten the shaded area with type 8 Fin insert the lead wire connection terminals Same colored lead wires 9 Set the evaporator on...

Page 11: ...7 EXPLODE VIEW AND PARTS LIST 1 Expoloded views AUSTRALIA NEC NEC FR 450 9...

Page 12: ...PECIAL WASHER SWRH 4 25 3018104122 SWITCH P RELAY AS 197NHBYY 52 S330 1 26 3816100110 RELAY BAND SUS304 T0 7 1 27 3016801122 DRYER AS HCFC 15G 1 28 3014426400 PIPE WICON AS TSW 1 29 3011118600 CASE VA...

Page 13: ...0 COVER V CASE AS 1 53 3010503720 CASE VEGTB GPPS 1 54 4010E99102 BOX ICE AS 1 55 3011441000 COVER CAB BRKT AS 1 56 ASSY F DOOR URT 1 57 3012605700 HANDLE F ABS CR 1 58 3011600800 DECO F HNDL FILM FIL...

Page 14: ...8 APPENDIX 1 Engineering Change Part Name EVAPORATOR FIN AS Effective From 2002 09 OLD Refrigerant 170g NEW Refrigerant 105g date 2002 9 ACCUMULATOR NONE...

Page 15: ...welding machine 3 Cutting a Suction Pipe about 155mm and a Capillary tube about 80mm 4 Constructing a new Evaporator and then welding 5 Fixing a Evaporator by screw 2EA 6 Insertion a CUSHION AUX T41X...

Reviews: