background image


IMPORTANT SAFEGUARDS


When using electrical appliances, basic safety precautions should always 
be followed. These instructions should be saved for future reference: 


Read and familiarise yourself with all operating instructions before 
using this DAB Radio.


Before plugging your unit into the mains, visually check that the unit is 
intact and has not suffered any transit damage.


Check that the voltage indicated on the data plate corresponds with 
that of the local network before connecting the appliance to the mains 
power supply. 


Always use this appliance on a solid, level, non-flammable surface. 


Ensure that there is clearance of at least 100mm (4 Inches) minimum 
around the Radio for sufficient ventilation. 


Ensure that the ventilation openings are not 

covered with items, such 

as newspapers, table-cloths, curtains, etc. 


No naked flame sources, such as lighted candles, should be placed on 
the Radio. 


Do not position the Radio close to sources of heat such as radiators, 
heaters, other electronic equipment, etc.  


The Radio shall not be exposed to dripping or splashing and that no 
objects filled with liquids, such as vases, shall be placed on the 
apparatus. 


Do not immerse this appliance or its supply in water or any other 
liquids. 


Do not leave the appliance unattended during use. 


Do not leave the appliance unattended whilst connected to the mains 
supply. 


Always remove the mains supply from the mains socket when the 
Radio is not in use, the mains supply must be accessible at all times.


Close supervision is required when using this appliance near children. 


Never leave this appliance within reach of children. 


This appliance can be used by children aged from 8 years and above 

Summary of Contents for AVS1399

Page 1: ...1 DAB FM Radio...

Page 2: ...openings are not covered with items such as newspapers table cloths curtains etc No naked flame sources such as lighted candles should be placed on the Radio Do not position the Radio close to source...

Page 3: ...ser at serious risk Do not operate this appliance with a damaged plug or cord after a malfunction or after being dropped or damaged in any way Regular periodic checks should be carried out on the main...

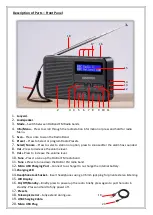
Page 4: ...Vol Press to increase the volume level 10 Tune Press to tune up the DAB or FM radio band 11 Tune Press to tune down the DAB or FM radio band 12 Micro USB Charging Port Connect to a charger to re charg...

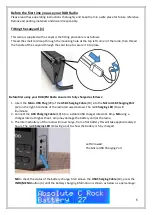
Page 5: ...rt the Micro USB Plug 20 of the USB Charging Cable 19 into the Micro USB Charging Port 12 on the right hand side of the radio arrowed below The red Charging LED 13 will illuminate 2 Connect the USB Ch...

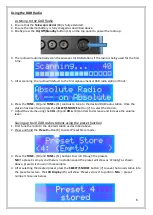
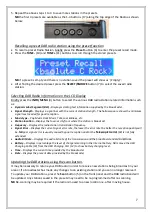
Page 6: ...een found press the SELECT SNOOZE button 7 to select the station 7 Adjust the volume using the VOL 8 and VOL 9 controls to decrease and increase the volume level Saving up to 10 DAB radio stations usi...

Page 7: ...town or city from where the station is broadcast Frequency Displays the radio station transmission frequency Signal Error Displays the current signal error rate the lower the error rate the better the...

Page 8: ...ct Sleep The sleep timer allows you to listen to music for a set time before the radio turns itself off automatically Use the TUNE 10 and TUNE 11 buttons to select from Sleep Off 15 30 45 60 90 minute...

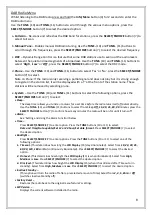
Page 9: ...resets are available as the 4 Preset buttons 17 along the top edge of the Radio Saving presets automatically using the Scan function Press and hold the SCAN button 5 for 2 seconds and the FM radio wil...

Page 10: ...E button 7 to confirm how many minutes the radio will be on for until it turns off Alarm See Setting and Using the Alarm Function below Time Press SELECT SNOOZE 7 to enter option Press the TUNE button...

Page 11: ...M radio press the SELECT SNOOZE button 7 to set the alarm source a If Buzzer is the wake up source selected press the TUNE buttons 10 11 to select when you require the alarm to sound Daily Once Weeken...

Page 12: ...d select Off at line f Operating Instructions Using the Headphone Output Insert the Headphones 3 5mm jack plug into the Headphone Jack Socket 14 on the right hand side of the radio Adjust the volume l...

Page 13: ...instructions contained in the User Manual The product must be used solely for domestic purposes The guarantee will berendered invalid if the product is re sold or has been damaged by inexpert repair...

Reviews: