background image

12 


ii.


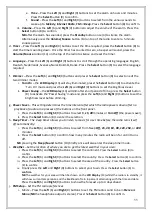
Threshold 


a.


Stereo Threshold


 Press the 

Left 

(6) and 

Right

 (9) buttons to set the level at which the 

audio switches into stereo select from 

weak

strong

 or 

default

. Press the 

Select 

button 

(8) to confirm.


b.


Seek Threshold


 Press the 

Left 

(6) and 

Right

 (9) buttons to set the level at which the 

strength of the stations are detected during an FM radio scan, select from 

weak

strong 

or 

default

. Press the 

Select 

button (8) to confirm.


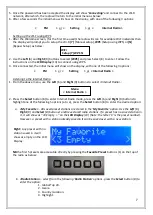
k.


Quality


 Press the 

Left 

(6) and 

Right

 (9) buttons to select either

 Low

 or 

High 

quality. Press the 

Select 

button (8) to confirm. 

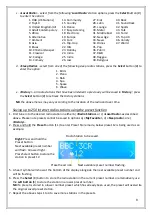
l.


Local Setup


 Press the 

Left 

(6) and 

Right

 (9) buttons to select 

Auto Detect

Setup Country

Setup State


(region) or 

Setup City

. Press the 

Select 

button (8) to confirm. 

m.


Equaliser 

- Press the 

Left 

(6) and 

Right

 (9) buttons to select 

Normal

Flat

Jazz

Rock

Soundtracks

Classical

Pop

News

 or 

My EQ

 select to enter your own EQ. Press the 

Select 

button (8) to confirm. 

n.


Device Update

 - Press the 

Select 

button (8) to check for an update for the 

radio’s

 software. 

o.


Information


 Press the 

Select 

button (8) for various information about the radio. 

p.


Factory Reset 


Restores the radio back to the original manufacturer’s settings. 

WARNING


 after a 

Factory Reset all saved stations and settings will be lost. 


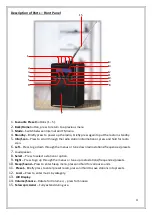
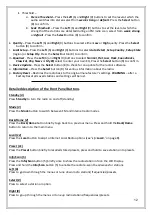
Detailed description of the Front Panel Buttons 


Standby (4) 

Press 

Standby

 to turn the radio on and off (standby) 


Mode (3) 

Press the 

Mode

 button to switch between FM and Internet radio modes. 


Back/Home (2) 

Press the 

Back/Home

 button briefly to go back to a previous menu. Press and hold the 

Back/Home


button to return to the main menu. 
 

Local (12) 

Press the 

Local


button to skip to Internet Local Radio options (see ‘

c) <Local>

’ on page 8)


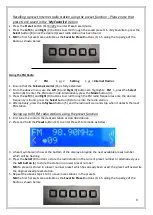
Preset (11) 


Press the 

Preset

 button briefly to recalled stored presets, press and hold to save stations into presets.


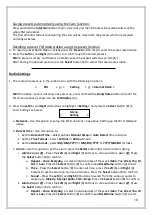
Info/Scan (5)


Press the 

Info/Scan

 button (5) briefly once to show the radio station info on the LCD Display.


Press and hold the 

Info/Scan

 button (5) to enable the radio re-scan the airwaves for stations.


Left (6)


Press to go down through the menus or tune down radio stations/frequencies/presets. 
 

Select (8) 

Press to select a station or option. 
 

Right (9)


Press to go up through the menus or tune up radio stations/frequencies/presets. 

Summary of Contents for AVS1400

Page 1: ...1 Internet FM Radio...

Page 2: ...tion openings are not covered with items such as newspapers table cloths curtains etc No naked flame sources such as lighted candles should be placed on the Radio Do not position the Radio close to so...

Page 3: ...ser at serious risk Do not operate this appliance with a damaged plug or cord after a malfunction or after being dropped or damaged in any way Regular periodic checks should be carried out on the main...

Page 4: ...down through the menus or tune down radio stations frequencies presets 7 Loudspeaker 8 Select Press to select a station or option 9 Right Press to go up through the menus or tune up radio stations fr...

Page 5: ...attery Compartment 16 by pushing the Battery Compartment Cover 18 down and remove arrowed below Insert four 1 5V AA Batteries not supplied into the battery compartment being careful to observe the pol...

Page 6: ...the Wi Fi Network 1 Ensure that the Telescopic Aerial 15 is fully extended upright 2 Either insert batteries or connect the Mains Adaptor 21 to power up the radio 3 The LCD Display 13 will illuminate...

Page 7: ...Internet Radio 2 Press the Select button 8 to enter Internet Radio mode press the Left 6 and Right 9 buttons to highlight one of the following 5 options a to e press the Select button 8 to enter the d...

Page 8: ...s the Select 8 button to store the radio station in the current preset number or alternatively use the Left button 6 to store the station in a lower preset number NB if a preset is stored in a lower n...

Page 9: ...y is found press the Select button 8 to tune into the radio station 4 Alternatively press the Info Scan button 5 and the radio will scan and stop when it detects the next FM station Saving up to 99 FM...

Page 10: ...e above Setting up the Wi Fi Network above b Date Time Use this option to i Set the Date and Time Select options Manual Setup or Auto Detect time and date ii Set the Time Format Select 12 Hour or 24 H...

Page 11: ...brightness level before dimming g Power Saver This setting determines the time interval after which the radio powers down after no playback of audio or no presses of the buttons on the front panel i P...

Page 12: ...rmation Press the Select button 8 for various information about the radio p Factory Reset Restores the radio back to the original manufacturer s settings WARNING after a Factory Reset all saved statio...

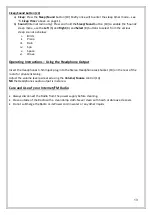
Page 13: ...v Space vi Wave Operating Instructions Using the Headphone Output Insert the Headphones 3 5mm jack plug into the Stereo Headphone Jack Socket 19 on the rear of the radio for private listening Adjust t...

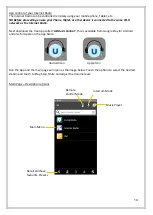
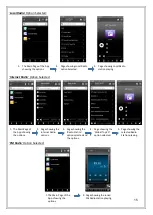
Page 14: ...Next download the free App called AirMusic Control this is available from Google Play for Android and also for Apple on the App Store Run the App and the main page will open as the image below Touch t...

Page 15: ...howing Local Radio station playing 1 The Main Page of the App showing the options 2 Page showing the Internet Radio options 3 Page showing the Radio Station option selected and the options 4 Page show...

Page 16: ...Volume Internet FM radio mode Back Home Favorites Display Dimmer Set Alarm Set Sleep Return to Previous Page Presets 1 Press the Intercom icon arrowed at the top of the Main Page of the App to enter...

Page 17: ...teries Dimensions Approx Approx 95 w x 105 d x 155 h mm Operating Temperature Range 0 C to 40 C No of Speaker Units 1 Audio Output Power 3W RMS FM Frequency Range 87 5 108MHz WLAN radio frequency 2 40...

Page 18: ...instructions contained in the User Manual The product must be used solely for domestic purposes The guarantee will berendered invalid if the product is re sold or has been damaged by inexpert repair...

Reviews: