background image


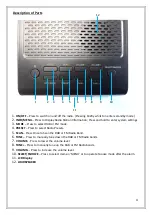
Description of Parts 

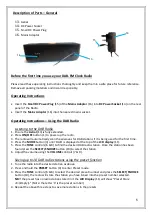
 General 


Before the first time you use your DAB-FM Clock Radio 

 
Please read these operating instructions thoroughly and keep them in a safe place for future reference. 
Remove all packing materials and discard responsibly. 


Operating Instructions 


Insert the 

Small DC Power Plug

 (15) of the 

Mains Adaptor

 (16) into 

DC Power Socket

 (14) on the rear 

panel of the Radio. 


Insert the 

Mains Adaptor

 (16) into the nearest mains socket. 


Operating Instructions 

 Using the DAB Radio 


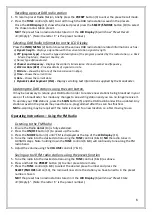
Listening to the DAB Radio 

1.


Ensure the 

Aerial

 (13) is fully extended. 

2.


Press 

ON/OFF

 button (1) to power up the radio. 

3.


The radio will automatically scan the airwaves for DAB stations if it is being used for the first time. 

4.


Press the 

MODE

 button (3

) until ‘DAB’ is displayed 

at the top of the 

LCD display 

(11). 

5.


Press the 

TUNE

 controls (6 & 8) to find the desired DAB radio station. Once the station has been 

found press the 

SELECT/SNOOZE

 button (10) to select the station. 

6.


Adjust the volume using the 

VOLUME

 controls (7 & 9). 


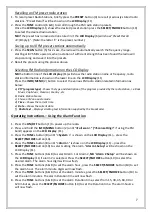
Saving up to 10 DAB radio stations using the preset function 

1.


Tune the radio into the desired station as above. 

2.


Press and hold the 

PRESET

 button (4) to enter Preset mode. 

3.


Press the 

TUNE

 controls (6 & 8) to select the desired preset number and press the 

SELECT/SNOOZE


button (10), the radio will store the station you have tuned into the preset number selected.  

NB

 If the preset has no radio station stored in it the 

LCD Display

 (11

) will show “

Preset Store 

<X:(Empty)>

 (Note: 

the letter ‘X’ is the preset number

). 

4.


Repeat the above three steps to save more stations in the presets.  


13.


Aerial 

14.


DC Power Socket 

15.


Small DC Power Plug 

16.


Mains Adaptor 


13 

15 

14 

16 

Summary of Contents for AVS1401

Page 1: ...1 DAB FM Clock Radio...

Page 2: ...ch as lighted candles should be placed on the Radio Do not position the Radio close to sources of heat such as radiators heaters other electronic equipment etc The Radio shall not be exposed to drippi...

Page 3: ...being dropped or damaged in any way Regular periodic checks should be carried out on the mains supply to ensure no damage is evident Should there be any signs of damage the product should not be used...

Page 4: ...ode 4 PRESET Press to select Radio Presets 5 SCAN Press Once to Scan the DAB or FM Radio Band 6 TUNE Press to manually tune down the DAB or FM Radio bands 7 VOLUME Press to lower the volume level 8 TU...

Page 5: ...button 3 until DAB is displayed at the top of the LCD display 11 5 Press the TUNE controls 6 8 to find the desired DAB radio station Once the station has been found press the SELECT SNOOZE button 10 t...

Page 6: ...n It may be necessary to retune your DAB radio in order to receive new stations being broadcast in your area or if a broadcaster has made any changes to an existing station and you can no longer recei...

Page 7: ...tation i e Rock Music Pop Music Classical Country etc b Radio Station Name c Stereo or Mono audio mode d Time Shows the current time e Date Shows the current date f Radio Text Displays scrolling text...

Page 8: ...Sleep Timer The sleep timer allows you to listen to music for a set time before the radio turns itself off automatically 1 Press the ON OFF button 1 to power up the radio 2 Press and hold the INFO MEN...

Page 9: ...ck Radio or its Power Supply in water or any other liquids Technical Specification Model Number AVS1401 Mains Adaptor Input AC 100 240V 50 60Hz 0 15A Output DC 5V 1A Audio Output Power 1W No of Speake...

Page 10: ...instructions contained in the User Manual The product must be used solely for domestic purposes The guarantee will berendered invalid if the product is re sold or has been damaged by inexpert repair...

Reviews: