207
Ү
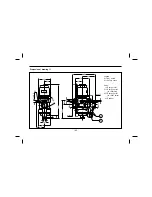
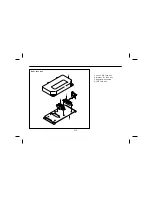
Adjustment by the use of an aim-
ing instrument
One aiming instrument consists of
two units :
one is for right side and the other
is for left side.
1) Place the right and left units of the
aiming instrument on the
headlamps (type 1–inside, type
2–outside) in such a manner that the
right and left units of the aiming
instrument lightly contact the aiming
bosses on the headlamp lenses.
Support the aiming instrument so that
the objective lens of the aiming
instrument is faced to the center of
the vehicle, and push the handle
strongly to tightly contact the vacumn
rubber cup of the instrument on the
lens.
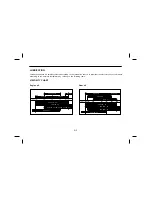
2) Look into the eyepiece of the aim-
ing instrument, and adjust the left
and right adjust screws so that the
standard line seen in the instru-
ment is correctly overlapped on the
white line of the other side aiming
unit. (This adjustment is the same
for both type 1 and type 2.)
3) Next, set the dial of the level vial
to the desired angle (0 deg for type
1 and 0.5 deg for type 2), and
adjust the updown adjust screws of
the headlamps so that air bubble
in the level vial is in center of the
level vial.
4) Thus, driving beam of the type 1
headlamp is tilted downward 0.5
deg, and passing beam of the type
2 is tilted downward 2 deg and
turned 0.5 deg to the left side.
White line
Type 2
Objective
lens
Eyepiece
Level
vial
Handle
Type 2
Center of vehicle
Vacuum
rubber
cup
Dial
Summary of Contents for BH090
Page 220: ...218 Drag link RR 2 points For leaf spring Spring and shackle pin 12 points...
Page 255: ...253 BODY DIMENSION BM090 ROOF ON COOLER NON COOLER APPROX APPROX...
Page 256: ...254 BS090...
Page 259: ...257 ROOF ON COOLER SUB ENG COOLER NON COOLER APPROX APPROX BH115E...
Page 260: ...258 ROOF ON COOLER SUB ENG COOLER APPROX APPROX BH120E...

