background image


Introduction

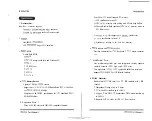
Graphic Descriptions of Jumper Settings

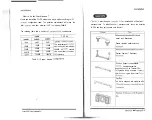
 Pin 1 &Pin 2 are set as short

means Pin 1 &Pin 2 are set as open

Warning :

 you install or 

 the CPU, 

 particularly clear CMOS, you

must pull out AC Power Cord.

i

 Introduction

 mainboard intergrates the latest advances in processor,

memory, and I/O technologies into mini ATX form factor that

combines performance, flexibility, and easy of use 

 integrated


of a variety of price/performance 

 mainboard supports Intel 

   processor based on the


 and 

 ITE 

 Super I/O

Chip. Three standard 

 DIMM with 

 size 

 to 

support Fast Page mode, 

 and Synchronous DRAM memory.

The Intel 


 4) provides and integrated

Bus Master IDE controller with high performance IDE interfaces for up

to four 


supports 

two 

 cost universal Serial 

 ports to fit

today and tomorrow’s requirement.

 User’s 

 I-l

Summary of Contents for CB61X-LX

Page 1: ... ...

Page 2: ...formation contained in this document is subject to change with out notice Contact your dealer for warranty details Trademarks All brands and product names used in this manual may be trademarks or registered trademarks of their respective companies ii 1 Introduction MainboardFeatures 1 1 Sp fic on 1 2 i o Layout 1 5 2 Installation CheckList 2 InstallMainMemory 2 1 Ho todothecombination 2 2 Install ...

Page 3: ...anual is designed to offer detailed information about the CB61X LX mainboard The content includes the main features of the mainbo ard the installation and the BIOS settings There are three chapters to offer clear and detailed information of CB61X LX Chapter 1 Introduction Describes the main features and major components Chapter 9 Installation Describes the installation of hardware including jumper...

Page 4: ...y and easy of use into high integrated capable of a variety of price performance Ievels CB6lX LX mainboard supports Intel Pentium II processor based on the Intel 440LX PCI set 82443LX and 82371AB ITE IT8679F Super I O Chip Three standard 168 pin DIMM with memoly size up to 384M8 support Fast Page mode ED0 and Synchronous DRAM memory The Intel 82371AB FYI IDE XceIerator PIIX 4 provides and integrat...

Page 5: ...cation version 2 1 CPU to PC1 memory write posting with 4 Word deep buffers Convert Back to Back sequential CPU to PC1 memory writes to PC1 Burst writes One 3Zbit A G P slot support up to 528MB s transfer rate A G P specification revision 1 0 Synchronous coupling to the host bus frequency 6 PS 2 Keyboard and PS 2 Mouse Set Provides Connectors for PS 2 Keyboard PS 2 mouse connector set 7 Serial Par...

Page 6: ......

Page 7: ... Data Output EDO memory 01 synchronous DRAM SDRAM The on board DRAM is installed with 168 pin DIMM Dual In line Memory Module CB61X LX also provides a DIMM plug and play support via Serial PD Presence Detect mechanism supported via the NIX4 SMB interface CB61X LX provides optional data integrity features including EC or ECC in the memory array The DIMM Socket is in compliance with JEDEC specificat...

Page 8: ...o maximum 32MB 384MB All DIMM sockets 64MB can use either SDRAM or 128MB ED0 memory Table 2 i System Memory ConfigUratiOnS CB61XLX User s Mmmal2 2 Installation CBhlX LX provides one slot slot 1 for installation of Pentium II processor card To install Pentium II processor card check the direction of CPU and then put the card onto the slot 1 mount with Baseboard Ensure retention module stays on Prev...

Page 9: ...l Heatsink support on Baseboard If you used Intel Boxed processor please skip third step and follow Intel Boxed processor install guide to install heatsinksupporter I r I s o I Second Step place RM Over RM attach studs on Motherboard Install Pentium Ii Processor with fan or heatsink on Baseboard Connect CPU Fan connector to power on ...

Page 10: ... To install the CPU at its correct frequency Please refer the following table to set up CPU frequency htium nProce swr Table 2 2 Pentium Series CPU Frequency and Bus Frequency CPUFan JP3 optional When you should install the boxed processor you can use this Header to connect processor s fan cableppin If you have the passive heatsink without fan this Header is not used lo 0 0 Fan WI FM CB61X LXUwkMa...

Page 11: ...ith type 36OKB 720 1 2 MB l 44M8 2 88MB IrDA JP14 JP13 CB61X LX provide two Headers which can support lrDAW 13 and Fast lR Jp14 module It gives users IR wireless data exchange directly from mobile computers printers and I DAs etc The RXH signal is supported Fast IR optiona1 Z pin Front Panel Switch ConnectorU17 ln order to help quick install front panel switch these headers are inte grated in 22 p...

Page 12: ...a new industry standard interface for eaSe use of PC peripheral ex msion Serial Port COMliand COMZu3 Jl Cl361X LX provides two sets of high speed serial port Each serial POti is 16550 UART compatible CB61X L X User s Mmal Z 10 Installation Parallel Port Printer ConnectorU2 CB61X L X provides one set of high speed parallel port The par l port can support bidiredion El P ECl mode PSI2 MOUSE USB I PA...

Page 13: ...ne optional item on the Power Management Setup manual of the BIOS setup This item is called Soft Off by PWR BTITV The function is as follows Delay 4 set 1 Pushing the button one time will change the system from normal operation to suspend state Pushing the button again will wake up the system 2 Pushing the power button more than 4 seconds will shut down the system Instant Off Pushing the power but...

Page 14: ...oppy and fixed disk drives video and so forth Taken together the presence or absence of these devices comprise the system configuration Use the SETUP program to verify or change the system configuration Ordinarily there should be no need to run SETUP the time you start your system since your computer comes from the factory ready to use You must however run the SETUP program each time you make any ...

Page 15: ...p Before the above message disappears press key to activate the SETUP program You can prevent the system displaying this message using the SETUP prompt setting described below Acessing SETUP When the System Prompts for the SETUP Program If the system BIOS detects a software or hardware error during the self testing process the system displays the following message Press Fl to continue DEL to Enter...

Page 16: ...lt h BIOS Setup Program n LOAD SETUP DEFAULTS This option supports the better perfor mance for the system It is recommended to choose OPTIMUM tting for the setup n INTEGRATED PERIPHERALS Ihis option allows users to decide how many kinds peripherals need to change their I O type mode and used or not This options also allows user to set the various system function and onboard PC1 IDE controller n SU...

Page 17: ...te _ Allows manual setting of the electronic calendar on the mainboard Time Sets the system s internal clock which includes hour minutes and seconds Primary Master Slave Secondary Master Slave Specifies the physical and electronic properties of the standard hard disk drives installed Relevant specifications include the type number of cylinders CYLS heads HEAD write pre compensation time PRECOMP re...

Page 18: ...FFFF Shadow Disabled ESC Quit T I Select 1ten Fl Help PU I DIt M o d i f y F5 Old Values Shift FZ Color F6 Load BIOS Defaults F7 Load Setup Defaults Figure 3 3 BIOS Features Setup Menu 1 CB61X LX Usxr sMmmal3 8 Built In BIOS Setup Program Virus Warning Allows the virus warning feature for the hard disk boot sector to display a warning message and produce a beep sound whenever an attempt is made to...

Page 19: ...ic Delay Mseo Select the delay in milliseconds before a key repeat The available Options are 250 default 500 750 1000 CB6lX LX User sManual3 IO Built h BIOS Setup Program Security Option Determines whether the password will be asked for in every boot System or when entering into the SETUP program Setup default Refer to the section entitled SUPERVISOR PASSWORD for the password setting PCWGA Palette...

Page 20: ...ed default Disabled i i CB61X L X User s Manual3 12 Built h BIOS Setup Program The following items are controlled by Auto Configuration T when users select Enabled For this reason their default values will be changed by the speed of CPU These items are DRAM Speed Selection MA Wait State ED0 RAS To CA Delay ED0 RAS Precharge Time ED0 DRAM Read Bunt and ED0 DRAM Write Burst DRAM Speed Selection Conf...

Page 21: ...tions are Enabled default Disabled CB61XU UsdxManual3 14 Built In BIOS Setup Program System BIOS Cacheable Allows caching of the different segments where there is system BIOS shadowing The available options are Enabled default Disabled Video BIOS Cacheable Allows caching of the different segments where there is video BIOS shadowing The available options are Enabled default Disabled 8 Bit I O Recov...

Page 22: ... _ This field only displays the current CPU temperature Current CPU Teyperature and CPU Waiining temperature Q will be shown only when the thermal detection circuits are installed Built In BIOS Setup Program ROM PCI lSA BIOS CB61X LX POWER MANAGEMENT SETUP AWARDSOFtWARE INC 0werManagement Max Saving M Control by Al M Yes Jideo Off Method Dl MS Jideo Off After Standby vtodem Use IRQ NA oze Mode lMi...

Page 23: ...Suspend Mode Sets the timer interval after system inactivity when the system enters SUSPEND mode The available options are 1 Min default 2 4 8 12 20 30 40Min l Hour Disable HDD Power Down Sets the interval time to power down HDD The available options are 1 Min default 1 15 Minidisable Throttle Duty Cycle Selects the percentage of time the STPCLK signal is asserted which the throttle mode The avail...

Page 24: ...he available options are Disabled default Enabled The item Reload Global Timer Events is for setting the wakeup events while system enters the standby mode IRQ 3 7 9 151 NM1 The available options are Disabled default Enabled Primary IDE O l Secbn ary IDE O l The available options are Disabled Enabled default CB61X lXUw sMmml3 20 Built In BIOS Setup Program Floppy Disk The available options are _ D...

Page 25: ...o Most of PC1 IDE cards are non PC1 compliant Defines the IRQ Routing to make them work properly The available options are PCI AUTO default ISA I CI SLOT 1 PCI SLOT 2 PCI SLOT 3 PCI SLOT 4 If user sets this option to ISA both the Primary IDE INT and Secondary IDE INT options below will not be shown on the screen Used MEM base addr This option will be shown only when Resources Controlled By option ...

Page 26: ... cB6lXLx User s Mlmual3 24 Built h BIOS Setup Program IDE Primary Secondary Master Slave PI0 Sets the advanced hard disk PI0 transfer mode which effects your hard disk transfer rate The program will auto detect the mode of this option you select Auto Otherwise you must set this option by yourself The available options are Auto default Mode 0 Mode 1 Mode 2 Mode 3 Mode 4 IDE Primary Secondary Master...

Page 27: ... ECP CB61X LXUkdsManual3 26 Built In BIOS Setup Program 1 If users set this options to SPP or El the ECP Mode UseDMA option below will not be shown on the screen ECP Mode Use DMA Selects the DMA channel of ECP Mode to Transfer your data The available options are 3 default 1 The SUPER VISOR PASSWORD utility allows you to set change and disable the password which is stored in the BIOS To change the ...

Page 28: ...Hard disk drives with less than 528MB total capacity must be set to Normal mode when combined with either old BIOS versions or the Award BIOS LBA and Large modes are new specifications which may not be fully supported by all operating systems An example of which is the current CB6IX LA Usv s Mmd3 28 Built h BIOS Setup Progranz version of UNIX System R3 2 4 which is still unable to support the LBA ...

Page 29: ...e automatically detected by the utility 8 Auto Scan Bad Track Automatically scan bad tracks and list the bad tracks in the window at the right side of the screen Built In BIOS Setup Program C Add bad Track Directly type in any information about known bad tracks in the window at the right side of the screen D Modify Bad Track Modify information about the bad tracks in the window at the right side o...

Page 30: ...further modifications are sill necessary before exitiong the SETUP program Once the Y key in pressed the system will automatically exit the program and reboot However if you want cancel all changes made under the SETUP program go to the options Exit Without Saving Press Y and the system will eait the SETUP program then reboot without saving any of the change made Q You may also use the FlO key to ...

Reviews: