14
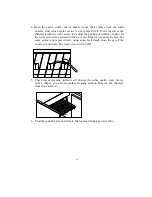
unit flat on the floor or on a platform depending on your installation
requirements.
2.
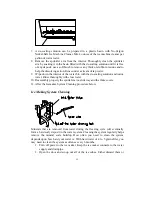
The water supply pipe and drainpipe must be plumbed before connecting to
the ice maker.
3.
Turn on main water supply and tap. Check for water supply connection leaks.
Tighten any connections (including connections at the valve) or nuts that leak.
4.
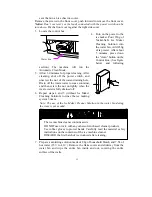
Pour 4 liter of water into the ice storage bin to check leaks at all drain
connections and the nut of the drain water hole. Tighten any connections or
nuts that leak.
5.
Push the ice maker into position.
6.
Seal all around the cabinet to the floor with an approved caulking compound.
OPERATION
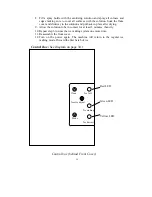
Final Check List before Operation
1.
Have all packing materials and tape been removed from the interior and
exterior of the ice maker?
2.
Did you clean the ice storage bin?
3.
Have the installation instructions been followed, including connecting the
machine to water, drain and electricity?
4.
Has the machine been leveled? Feet locked?
5.
Is the ice maker in a site where the ambient temperature is between 13
℃
and
32
℃
and the water temperature within 5
℃
and 25
℃
all year round?
6.
Has the water supply pressure been checked to ensure a minimum of 0.1Mpa
and a maximum of 0.5Mpa?
7.
Is there at least a clearance of 150mm at rear, and 40mm at sides and top for
proper air circulation?
8.
Has the power supply voltage been checked or tested against the data label
rating? And has proper grounding been installed in the ice maker?
9.
Is the ice maker plugged in?
10.
Did you turn on the main water supply and the tap?
11.
Did you check leaks to all water supplies and drainpipe connections?


