2. TECHNICAL SPECIFICATIONS
3. INTENDED USE
This Petrol lawn mower has been designed for cutting lawn areas in private house and hobby
gardens.
The machine is to be used only for its prescribed purpose . any other use is Deemed to be a case of
misuse. The user/operator and not the Manufacturer will be liable for any damage or injuries of any
kind caused as a result of this
Please note that our equipment has not been designed for use in commercial , trade or industrial
applications . our warranty will be voided if the machine is used in commercial , trade or industrial
businesses or for equivalent purposes.
4. SAFETY INFORMATION
IMPORTANT
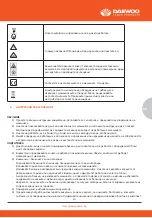
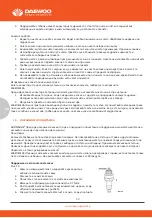
Please read these instructions fully before assembling and operating. Description Of Symbols
Symbols are used in this manual to attract your attention to possible risks. The safety symbols and
the explications which accompany them must be perfectly understood. The warning themselves do
not prevent the risks and cannot be a substitute for proper methods of avoiding accidents.
7. ASSEMBLY
2. TECHNICAL SPECIFICATIONS
3. INTENDED USE
This Petrol lawn mower has been designed for cutting lawn areas in private house and hobby
gardens.
The machine is to be used only for its prescribed purpose . any other use is Deemed to be a case of
misuse. The user/operator and not the Manufacturer will be liable for any damage or injuries of any
kind caused as a result of this
Please note that our equipment has not been designed for use in commercial , trade or industrial
applications . our warranty will be voided if the machine is used in commercial , trade or industrial
businesses or for equivalent purposes.
4. SAFETY INFORMATION
IMPORTANT
Please read these instructions fully before assembling and operating. Description Of Symbols
Symbols are used in this manual to attract your attention to possible risks. The safety symbols and
the explications which accompany them must be perfectly understood. The warning themselves do
not prevent the risks and cannot be a substitute for proper methods of avoiding accidents.
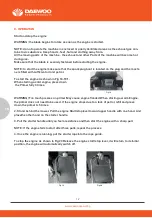
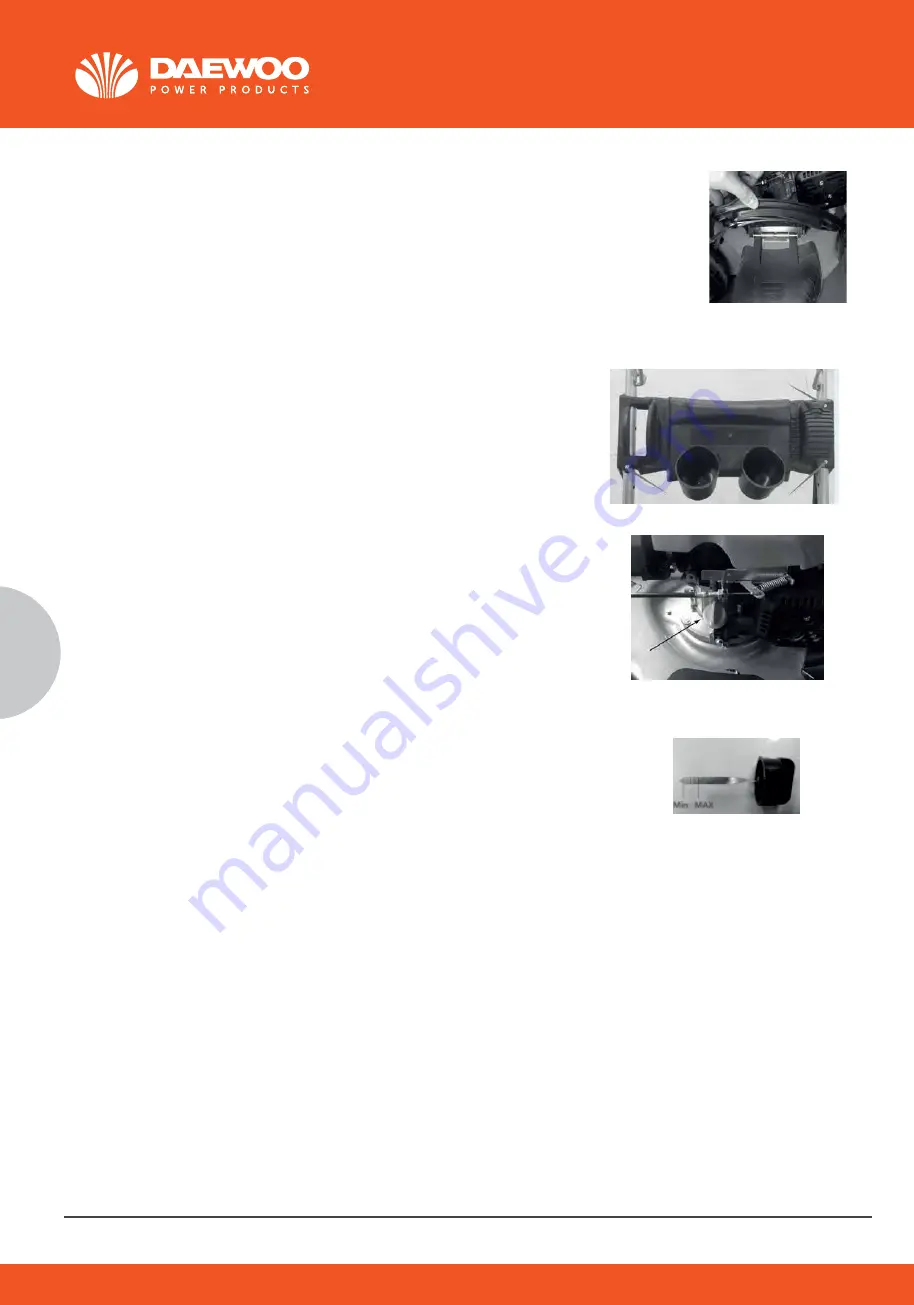
NOTE: When use side discharge function. First need remove the grass
Bag and plug the mulching plug.
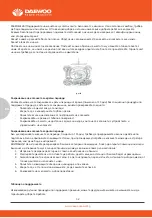
1. Lift the side discharge cover with
One hand and hook in the side dischargeDuct with the other hand.
2. Release the side discharge cover tosecure the duct in position.
Assembling the cup holder (optional)
As shown in Fig 13
1. Take out the plastic panel (1) from the box.
2. Align the mounting holes on the plastic panel
with the mounting holes on the upper-handle (2).
3. Fix the plastic panel with the bolts
and nuts (3) and (4) provided.
Checking the engine oil level And filling with engine
oil As shown in Fig 15-16
CAUTION! The following procedures and adjustments
must be performed before the engine is started.
Do not attempt to make any of these adjustments
while the engine is running.
CAUTION! To prevent engine damage the engine is
shipped without oil or petrol. The engine must be filled
with the correct grade of oil and petrol before
starting the engine.
NOTE! Running the engine with a low oil level will cause engine damage. It is recommend that high
detergent, premium quality 4-stroke engine oil used.
CAUTION! Always use high quality detergent oil classified SAE30 oil (or equivalent e. g SAE 10W/30,
often termed as 4 Stroke lawn mower oil. Never use additives with recommended oil. To prolong the
life of your engine it is important that the oil is changed after the first 20 hours of use.
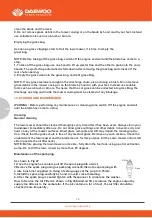
NOTE: To check the engine oil level, stop engine and place the mower on a level surface.
1.Remove the oil filler dipstick and wipe
oil from it with a clean cloth.
2. Insert the dipstick into the oil filler neck,3. Then remove the dipstick and check the oillevel. the oil
level must be between theMin and Max marks on the dipstick. If nearthe lower level, fill to upper
lever with the recommended oil((or equivalent t e. g SAE 10W/30). Do not overfill.
www.daewoopower.bg
26
BG
Сглобяване на страничния улей
Фиг
. 9
ЗАБЕЛЕЖКА
:
когато
използвате
странична
функция
за
изхвърляне,
първо
трябва
да
свалите
колекторния
кош
за
трева
и
да
поставите
приставката
за
мулчиране.
1.
Повдигнете
капака
на
страничния
борд
за
изхвърляне
с
една
ръка
и
закачете
улея
с
другата
.
2.
Върнете
капака
на
мястото
му,
за
да
подсигурите
стабилизирането
на
улея
.
Сглобяване на поставката за чаши
/
опция
/
Фиг
. 10
1.
Извадете
пластмасовия
панел
(1)
от
бокса
.
2.
Подравнете
отворите
на
пластмасовия
панел
с
тези
на
горната
дръжка
(2)
.
3.
Фиксирайте
пластмасовия
панел
с
болтовете
(3)
и
гайките
(4),
които
се
доставят,
ако
имате
тази
опция
.
Проверка
на
нивото
на
маслото
и
добавяне
на
двигателно
масло
Фиг
. 12-13
ВНИМАНИЕ
!
Процедурите,
описани
по-долу
трябва
да
бъдат
направени
преди
стартирането
на
двигателя.
Не
правете
настройки
и
проверки
от
опи
-
саните
по-долу
по
време
на
работа
на
двигателя!
ВНИМАНИЕ
!
За
да
се
предотврати
повреда
на
двигателя
по
време
на
транс
-
портирането,
машината
се
доставя
без
масло
и
гориво.
Двигателят
трябва
да
се
напълни
с
коректното
количество
масло
и
бензин
преди
да
стартира
-
те
машината.
ВНИМАНИЕ
!
Обърнете
внимание,
че
вашата
тревокосачка
е
четиритактова
и
масло
в
бензина
не
се
добавя!
ЗАБЕЛЕЖКА
!
Работата
на
двигателя
с
ниско
ниво
на
маслото
ще
предизвика
повреда.
Препоръчва
се
използването
на
висококачествено
четиритактово
масло.
ВНИМАНИЕ
!
Винаги
използвайте
висококачествено
масло
клас
SAE30
(или
еквивалент
.
Напр
., S
AE10W/30,
често
наричано
четиритактово
масло
за
моторни
косачки)
.
Никога
не
използвайте
добавки
с
препоръчаното
масло
.
За
да
удължите
живота
на
двигателя
си
е
важно
да
сменяте
маслото
след
първите
20
часа
употреба
.
ЗАБЕЛЕЖКА
:
За
да
проверите
нивото
на
маслото,
спрете
двигателя
и
поставете
косачката
на
равна
повърхност
.
1.
Извадете
масломерната
пръчка
и
подсушете
остатъците
от
масло
с
чиста
кърпа
.
2.
Поставете
пръчката
за
измерване
нивото
на
маслото
в
отвора
.
3.
Извадете
и
проверете
нивото
на
маслото,
то
трябва
да
бъде
между
мин
и
макс
маркерите,
обозначени
върху
пръчката
.
Ако
е
близо
до
мин
граница,
долейте
препоръчаното
масло
или
еквивалент,
например,
S
AE10W/30
,
до
горната
граница
на
мерителния
маркер.
Не
препълвайте
резервоара
за
масло.
Внимателно
изчистете
и
подсушете
всеки
евентуален
излив
.
4.
Поставете
капачката
за
маслото
върху
резбите
на
отвора
на
резервоара
и
завъртете
¼
оборот,
за
да
затегнете
.
25
NOTE: When use side discharge function. First need remove the grass
Bag and plug the mulching plug.
1. Lift the side discharge cover with
One hand and hook in the side dischargeDuct with the other hand.
2. Release the side discharge cover tosecure the duct in position.
Assembling the cup holder (optional)
As shown in Fig 13
1. Take out the plastic panel (1) from the box.
2. Align the mounting holes on the plastic panel
with the mounting holes on the upper-handle (2).
3. Fix the plastic panel with the bolts
and nuts (3) and (4) provided.
Checking the engine oil level And filling with engine
oil As shown in Fig 15-16
CAUTION! The following procedures and adjustments
must be performed before the engine is started.
Do not attempt to make any of these adjustments
while the engine is running.
CAUTION! To prevent engine damage the engine is
shipped without oil or petrol. The engine must be filled
with the correct grade of oil and petrol before
starting the engine.
NOTE! Running the engine with a low oil level will cause engine damage. It is recommend that high
detergent, premium quality 4-stroke engine oil used.
CAUTION! Always use high quality detergent oil classified SAE30 oil (or equivalent e. g SAE 10W/30,
often termed as 4 Stroke lawn mower oil. Never use additives with recommended oil. To prolong the
life of your engine it is important that the oil is changed after the first 20 hours of use.
NOTE: To check the engine oil level, stop engine and place the mower on a level surface.
1.Remove the oil filler dipstick and wipe
oil from it with a clean cloth.
2. Insert the dipstick into the oil filler neck,3. Then remove the dipstick and check the oillevel. the oil
level must be between theMin and Max marks on the dipstick. If nearthe lower level, fill to upper
lever with the recommended oil((or equivalent t e. g SAE 10W/30). Do not overfill.
Fig 11
Fig 13
Fig 14
Fig 15
фиг
.9
фиг
.10
фиг
.11
фиг
.12
NOTE: When use side discharge function. First need remove the grass
Bag and plug the mulching plug.
1. Lift the side discharge cover with
One hand and hook in the side dischargeDuct with the other hand.
2. Release the side discharge cover tosecure the duct in position.
Assembling the cup holder (optional)
As shown in Fig 13
1. Take out the plastic panel (1) from the box.
2. Align the mounting holes on the plastic panel
with the mounting holes on the upper-handle (2).
3. Fix the plastic panel with the bolts
and nuts (3) and (4) provided.
Checking the engine oil level And filling with engine
oil As shown in Fig 15-16
CAUTION! The following procedures and adjustments
must be performed before the engine is started.
Do not attempt to make any of these adjustments
while the engine is running.
CAUTION! To prevent engine damage the engine is
shipped without oil or petrol. The engine must be filled
with the correct grade of oil and petrol before
starting the engine.
NOTE! Running the engine with a low oil level will cause engine damage. It is recommend that high
detergent, premium quality 4-stroke engine oil used.
CAUTION! Always use high quality detergent oil classified SAE30 oil (or equivalent e. g SAE 10W/30,
often termed as 4 Stroke lawn mower oil. Never use additives with recommended oil. To prolong the
life of your engine it is important that the oil is changed after the first 20 hours of use.
NOTE: To check the engine oil level, stop engine and place the mower on a level surface.
1.Remove the oil filler dipstick and wipe
oil from it with a clean cloth.
2. Insert the dipstick into the oil filler neck,3. Then remove the dipstick and check the oillevel. the oil
level must be between theMin and Max marks on the dipstick. If nearthe lower level, fill to upper
lever with the recommended oil((or equivalent t e. g SAE 10W/30). Do not overfill.
To clean a flooded engine
NOTE: if the engine won't start after you have Operated the starter several times, the engine may be
flood with excess fuel. Use following procedure to clear and start a flooded engine.
Preparation
1. While mowing, always wear substantial footwear and long trousers. Do notoperate the equipment
when barefoot or wearing open sandals;
2. Thoroughly inspect the area where the equipment is to be used and removeall objects which can
be thrown by the machine;
3. Warning - petrol is highly flammable.
-Store fuel in containers specifically designed for this purpose;
-Refuel outdoors only and do not smoke while refueling;
-Add fuel before starting the engine. Never remove the cap of the fuel tank oradd petrol while the
engine is running or when the engine is hot;
-If petrol is spilled, do not attempt to start the engine but move the machineaway from the area of
spillage and avoid creating any source of ignition untilpetrol vapour have dissipated;
-Replace all fuel tank and container caps securely;4.Replace faulty silencers;
5. Before using, always visually inspect to see that the blades, blade bolts andcutter assembly are
not worn or damaged. Replace worn or damaged bladesand bolts in sets to preserve balance;
6. On multi-bladed machines, take care as rotating one blade can cause otherblades to rotate.
Operation
1.Do not operate the engine in a confined space where dangerous carbonmonoxide fumes can
collect;
2.Mow only in daylight or in good artificial light;
3.Avoid operating the equipment in wet grass, where feasible;
4.Always be sure of your footing on slopes;
5.Walk, never run;
Wipe away any spilt oil.)
4. Align the ribs of the cap with the groove of the filler neck. then rotate
1/4 turn to secure it.
Filling with engine fuel As shown in Fig 15
CAUTION! Always use clean, fresh unleaded petrol. Purchase fuel in quantities that can be used
within 30 days. Never mix oil with petrol.
CAUTION! Do not fill into the base of neck to allow for fuel expansion. Do not overfill the fuel tank.
CAUTION! WARNING! Petrol is highly flammable and extreme precaution must be taken when
handling or working with it. Keep out of reach of children.
CAUTION! To prevent engine damage the engine is shipped without oil or petrol. The engine must be
filled with the correct grade of oil and petrol before starting the engine.
WARNING! Refuel in a well-ventilated area with the engine stopped. Do not smoke or allow flame or
sparks in the area where the engine is refueled or where petrol is stored. Avoid repeated or prolon-
ged contact with skin or inhalation of vapour.
Summary of Contents for DLM4600SPL
Page 19: ...www daewoopower bg 19 BG 1 20 2 21 3 22 4 22 5 22 6 23 7 25 8 27 9 28 10 30 11 33 12 34 13 41...
Page 40: ...www daewoopower bg 40 BG 10 6 M5x30 10 6 M5x30...
Page 43: ...www daewoopower bg 43 BG 24 6 6 12 6...
Page 44: ...www daewoopower bg 44 BG 1 1 2022 6 6...
Page 45: ...www daewoopower bg 45 BG...
Page 46: ...www daewoopower bg 1784 1 51 359 2 81 77 600 359 2 81 77 601...

