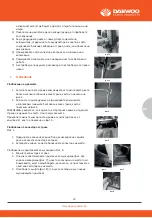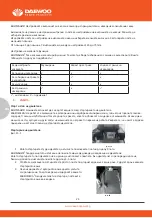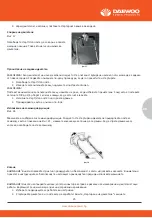
NOTE: When use side discharge function. First need remove the grass
Bag and plug the mulching plug.
1. Lift the side discharge cover with
One hand and hook in the side dischargeDuct with the other hand.
2. Release the side discharge cover tosecure the duct in position.
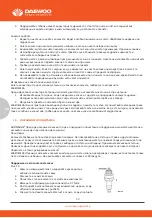
Assembling the cup holder (optional)
As shown in Fig 13
1. Take out the plastic panel (1) from the box.
2. Align the mounting holes on the plastic panel
with the mounting holes on the upper-handle (2).
3. Fix the plastic panel with the bolts
and nuts (3) and (4) provided.
Checking the engine oil level And filling with engine
oil As shown in Fig 15-16
CAUTION! The following procedures and adjustments
must be performed before the engine is started.
Do not attempt to make any of these adjustments
while the engine is running.
CAUTION! To prevent engine damage the engine is
shipped without oil or petrol. The engine must be filled
with the correct grade of oil and petrol before
starting the engine.
NOTE! Running the engine with a low oil level will cause engine damage. It is recommend that high
detergent, premium quality 4-stroke engine oil used.
CAUTION! Always use high quality detergent oil classified SAE30 oil (or equivalent e. g SAE 10W/30,
often termed as 4 Stroke lawn mower oil. Never use additives with recommended oil. To prolong the
life of your engine it is important that the oil is changed after the first 20 hours of use.
NOTE: To check the engine oil level, stop engine and place the mower on a level surface.
1.Remove the oil filler dipstick and wipe
oil from it with a clean cloth.
2. Insert the dipstick into the oil filler neck,3. Then remove the dipstick and check the oillevel. the oil
level must be between theMin and Max marks on the dipstick. If nearthe lower level, fill to upper
lever with the recommended oil((or equivalent t e. g SAE 10W/30). Do not overfill.
WARNING
!
Never run the engine without the air filter element installed.
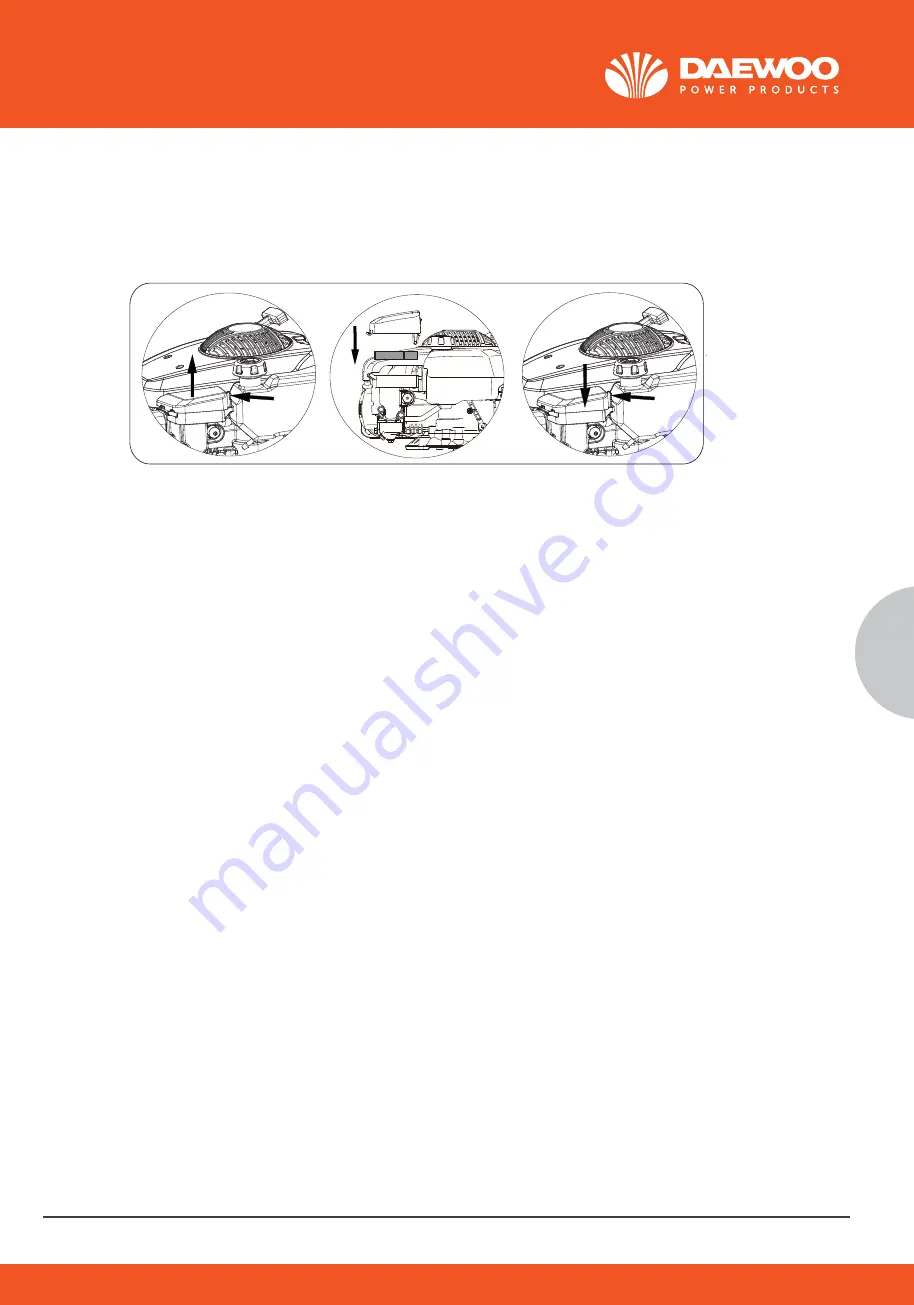
1. Remove the air cleaner outside cover (A). Be carefulto prevent dirt and debris from falling into the
aircleaner assembly.
2. Separate the Air Filter (A) from the Air Filter Housing (B).
3.Inspect the air filter. Clean dirty air filter with warmwater and mild soap. Allow air filter to dry
thoroughly before re-installation4.Install the air filter assembly onto the carburetor and secure with
screw.
Note: Do not use pressurized air or solvents to clean the filter. Pressurized air can damage the filter
and solvents will dissolve the filter.
Changing the engine oil Tilt the lawnmower towards the oil filler, have a container ready to catch the
oil and remove the dipstick. Once the oil has been emptied, replace the dipstick and wipe clean any
spillages. Refill with 500ml SAE30 oil or equivalent, i. e. SAE 5W/30, SAE10W/30.
Refill with 500ml SAE30 oil or equivalent i. e SAE5W/30, SAE10W/30. When the dipstick is rested on
the filler pipe (i. e . not turn in pace ), the oil level must be between the min and max marks on the
dipstick.
See “Checking the engine oil level and filling with engine oil” Start the engine and allow it to run
briefly.
Stop the engine, wait one minute and check the oil level. Top up if necessary. Note! see more in
engine manual.
Replacing the blade
For safety reasons you should only ever have your blade sharpened, balanced and mounted by an
authorised service workshop. For optimum results it is recommended that the blade should be
inspected once a year.
WARNING! Before you remove the grass collection bag, stop the engine and wait until the blade
stops completely.
WARNING! You will need garden gloves (not provided) and a spanner wrench(not provided) to
remove the blade.
NOTE! Don't invert the mower. Tip it slightly towards the oil filler pipe and reach under the deck.
WARNING! Always handle the blade with care, sharp edges could cause injury USE GLOVES. Renew
your metal blade after 50Hrs mowing or 2yrs whichever is sooner regardless of condition.
General cleaning
The lawn mower should be cleaned thoroughly every time after it has been used. Always clean your
lawnmower immediately after use. Do not allow grass cuttings and other debris to become dry and
hard on any of the mower surfaces. Dried grass remnants and dirt may impair the mowing opera-
tion. Check that the grass chute is free of any residual grass. Remove any such residue. Check the
underside of the lawn mower and the blade mount. for this purpose ,tilt the Lawn mower onto its left
side (opposite the oil filler neck)
NOTE: Before placing the lawn mower on its side , fully drain the fuel tank using a petrol extraction
pump. Do not tilt the lawn mower by more than 90 degrees.
Maintenance of the spark plug.
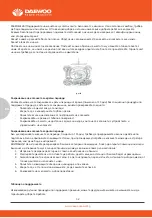
As shown in Fig 22
1. Once the engine has cooled, pull off the spark plugwith a twist.
2. Remove the spark plug using a spark plug wrench3.Clean the spark plug with a wire brush (not
supplied ).4.Using a feeler gauge set the gap to 0.75mm
5. Install the spark plug carefully by hand to avoid cross-threading.
6. After the spark plug is seated tighten with thespanner to compress the washer.
How to Service the Air Filter As shown in Fig 23Soiled air filters reduce the engine output by supply
too little air to the carburetor. if the air contains a lot of dust , the air filter should be checked more
frequently.
dipstick.
See “Checking the engine oil level and filling with engine oil” Start the engine and allow it to run
briefly.
Stop the engine, wait one minute and check the oil level. Top up if necessary. Note! see more in
engine manual.
Replacing the blade
For safety reasons you should only ever have your blade sharpened, balanced and mounted by an
authorised service workshop. For optimum results it is recommended that the blade should be
inspected once a year.
WARNING! Before you remove the grass collection bag, stop the engine and wait until the blade
stops completely.
WARNING! You will need garden gloves (not provided) and a spanner wrench(not provided) to
remove the blade.
NOTE! Don't invert the mower. Tip it slightly towards the oil filler pipe and reach under the deck.
WARNING! Always handle the blade with care, sharp edges could cause injury USE GLOVES. Renew
your metal blade after 50Hrs mowing or 2yrs whichever is sooner regardless of condition.
Never run the engine without the air filter element installed.
1. Remove the air cleaner outside cover (A). Be carefulto prevent dirt and debris from falling into the
aircleaner assembly.
2. Separate the Air Filter (A) from the Air Filter Housing (B).
3.Inspect the air filter. Clean dirty air filter with warmwater and mild soap. Allow air filter to dry
thoroughly before re-installation4.Install the air filter assembly onto the carburetor and secure with
Note: Do not use pressurized air or solvents to clean the filter. Pressurized air can damage the filter
and solvents will dissolve the filter.
Changing the engine oil Tilt the lawnmower towards the oil filler, have a container ready to catch the
oil and remove the dipstick. Once the oil has been emptied, replace the dipstick and wipe clean any
spillages. Refill with 500ml SAE30 oil or equivalent, i. e. SAE 5W/30, SAE10W/30.
Refill with 500ml SAE30 oil or equivalent i. e SAE5W/30, SAE10W/30. When the dipstick is rested on
the filler pipe (i. e . not turn in pace ), the oil level must be between the min and max marks on the
See “Checking the engine oil level and filling with engine oil” Start the engine and allow it to run
Stop the engine, wait one minute and check the oil level. Top up if necessary. Note! see more in
engine manual.
Replacing the blade
For safety reasons you should only ever have your blade sharpened, balanced and mounted by an
authorised service workshop. For optimum results it is recommended that the blade should be
inspected once a year.
WARNING! Before you remove the grass collection bag, stop the engine and wait until the blade
stops completely.
WARNING
!
Never run the engine without the air filter element installed.
1. Remove the air cleaner outside cover (A). Be carefulto prevent dirt and debris from falling into the
aircleaner assembly.
2. Separate the Air Filter (A) from the Air Filter Housing (B).
3.Inspect the air filter. Clean dirty air filter with warmwater and mild soap. Allow air filter to dry
thoroughly before re-installation4.Install the air filter assembly onto the carburetor and secure with
screw.
Note: Do not use pressurized air or solvents to clean the filter. Pressurized air can damage the filter
and solvents will dissolve the filter.
Changing the engine oil Tilt the lawnmower towards the oil filler, have a container ready to catch the
oil and remove the dipstick. Once the oil has been emptied, replace the dipstick and wipe clean any
spillages. Refill with 500ml SAE30 oil or equivalent, i. e. SAE 5W/30, SAE10W/30.
Refill with 500ml SAE30 oil or equivalent i. e SAE5W/30, SAE10W/30. When the dipstick is rested on
the filler pipe (i. e . not turn in pace ), the oil level must be between the min and max marks on the
dipstick.
See “Checking the engine oil level and filling with engine oil” Start the engine and allow it to run
briefly.
Stop the engine, wait one minute and check the oil level. Top up if necessary. Note! see more in
engine manual.
Replacing the blade
For safety reasons you should only ever have your blade sharpened, balanced and mounted by an
authorised service workshop. For optimum results it is recommended that the blade should be
inspected once a year.
WARNING! Before you remove the grass collection bag, stop the engine and wait until the blade
stops completely.
WARNING! You will need garden gloves (not provided) and a spanner wrench(not provided) to
remove the blade.
NOTE! Don't invert the mower. Tip it slightly towards the oil filler pipe and reach under the deck.
WARNING! Always handle the blade with care, sharp edges could cause injury USE GLOVES. Renew
your metal blade after 50Hrs mowing or 2yrs whichever is sooner regardless of condition.
www.daewoopower.bg
31
BG
Смяна на въздушен филтър
фиг
. 20
1.
Отключете
лостчето
(1)
и
издърпайте
нагоре,
за
да
отворите
отделението
за
въздушния
филтър
(2).
2.
Подменете
въздушния
филтър.
3.
Натиснете
надолу
и
заключете
лостчето
на
отделението
за
въздушния
филтър,
за
да
затворите.
1.
Забележка
:
не
използвайте
сгъстен
въздух
или
разтворители,
за
да
почистите
въздушния
филтър
.
Това
може
да
повреди
филтъра
.
Смяна на масло
Наклонете
косачката
към
отвора
за
масло,
като
предварително
сте
поставили
контейнер,
в
който
да
изсипете
останалото
масло
в
резервоара
и
извадете
пръчката
.
След
като
изпразните
резервоара
за
масло,
поставете
обратно
пръчката
за
масло
и
почистете
всички
възможни
изливи
.
Долейте
с
500ml SAE30
или
еквивалент,
като
напр
., S
AE5W/30,
S
AE10W/30.
Когато
щеката
за
измерване
на
масло
е
поставена
на
тръбата
за
пълнене,
но
не
е
завинтена
на
място,
нивото
на
маслото
трябва
да
е
между
мин
и
макс
маркировката
върху
нея
.
Вижте
„Проверка
на
нивото
на
маслото”
в
настоящата
инструкция
.
Включете
двигателя
и
го
оставете
да
работи
за
малко
.
Спрете
двигателя,
изчакайте
една
минута
и
проверете
нивото
на
маслото
.
Долейте,
ако
е
необходимо
.
Смяна на ножа
За
вашата
безопасност
препоръчваме
ножа
да
се
наточва,
балансира
и
монтира
само
при
оторизиран
сервиз
.
За
оптимални
резултати
се
препоръчва
да
проверявате
ножа
веднъж
годишно
.
ВНИМАНИЕ
!
Преди
да
свалите
колектора
за
трева,
спрете
двигателя
и
изчакайте
ножът
да
спре
напълно
.
ВНИМАНИЕ
!
Ще
имате
нужда
от
градински
ръкавици
(не
се
доставят
в
комплекта)
и
гаечен
ключ
(не
се
доставя
в
комплекта),
за
да
отвъртите
ножа
.
ЗАБЕЛЕЖКА
!
Не
обръщайте
косачката
.
Наклонете
я
леко
към
отвора
за
пълнене
на
масло
и
се
протегнете
под
платформата
.
ВНИМАНИЕ
!
Винаги
дръжте
ножа
с
внимание
.
Острите
ръбове
могат
да
предизвикат
нараняване
.
Носете
ръкавици
.
Подновете
металния
ног
след
50
часа
косене
или
на
2
години,
според
зависи
кое
е
достигнато
първо
.
ВНИМАНИЕ
!
Ако
ножът
е
издраскан
или
повреден,
подменете
го
.
ВНИМАНИЕ
!
Не
дръжте
ножа
с
голи
ръце
.
фиг
.20
www.daewoopower.bg
31
BG
Забележка:
не
използвайте
сгъстен
въздух
или
разтворители,
за
да
почистите
въздушния
филтър.
Това
може
да
повреди
филтъра.
Смяна на масло
Наклонете
косачката
към
отвора
за
масло,
като
предварително
сте
поставили
контейнер,
в
който
да
изсипете
останалото
масло
в
резервоара
и
извадете
пръчката.
След
като
изпразните
резервоара
за
масло,
поставете
обратно пръчката за
масло и
почистете
всички възможни
изливи. Д
олейте с
4
00ml
SAE30 или
еквивалент,
като
напр.,
S
AE5W/30,
S
AE10W/30.
Когато
щеката
за
измерване
на
масло
е
поставена
на
тръбата
за
пълнене,
но
не
е
завинтена
на
място,
нивото
на
маслото
трябва
да
е
между
мин
и
макс
маркировката
върху
нея.
Вижте
„Проверка
на
нивото
на
маслото”
в
настоящата
инструкция.
Включете
двигателя
и
го
оставете
да
работи
за
малко.
Спрете
двигателя,
изчакайте
една
минута
и
проверете
нивото
на
маслото.
Долейте,
ако
е
необходимо.
Смяна на ножа
За
вашата
безопасност
препоръчваме
ножа
да
се
наточва,
балансира
и
монтира
само
при
оторизиран
сервиз.
За
оптимални
резултати
се
препоръчва
да
проверявате
ножа
веднъж
годишно.
ВНИМАНИЕ!
Преди
да
свалите
колектора
за
трева,
спрете
двигателя
и
изчакайте
ножът
да
спре
напълно.
ВНИМАНИЕ!
Ще
имате
нужда
от
градински
ръкавици
(не
се
доставят
в
комплекта)
и
гаечен
ключ
(не
се
доставя
в
комплекта),
за
да
отвъртите
ножа.
ЗАБЕЛЕЖКА!
Не
обръщайте
косачката.
Наклонете
я
леко
към
отвора
за
пълнене
на
масло
и
се
протегнете
под
платформата.
ВНИМАНИЕ!
Винаги
дръжте
ножа
с
внимание.
Острите
ръбове
могат
да
предизвикат
нараняване.
Носете
ръкавици.
Подновете
металния
ног
след
50
часа
косене
или
на
2
години,
според
зависи
кое
е
достигнато
първо.
ВНИМАНИЕ!
Ако
ножът
е
издраскан
или
повреден,
подменете
го.
ВНИМАНИЕ!
Не
дръжте
ножа
с
голи
ръце.
31
WARNING
!
Never run the engine without the air filter element installed.
1. Remove the air cleaner outside cover (A). Be carefulto prevent dirt and debris from falling into the
aircleaner assembly.
2. Separate the Air Filter (A) from the Air Filter Housing (B).
3.Inspect the air filter. Clean dirty air filter with warmwater and mild soap. Allow air filter to dry
thoroughly before re-installation4.Install the air filter assembly onto the carburetor and secure with
screw.
Note: Do not use pressurized air or solvents to clean the filter. Pressurized air can damage the filter
and solvents will dissolve the filter.
Changing the engine oil Tilt the lawnmower towards the oil filler, have a container ready to catch the
oil and remove the dipstick. Once the oil has been emptied, replace the dipstick and wipe clean any
spillages. Refill with 500ml SAE30 oil or equivalent, i. e. SAE 5W/30, SAE10W/30.
Refill with 500ml SAE30 oil or equivalent i. e SAE5W/30, SAE10W/30. When the dipstick is rested on
the filler pipe (i. e . not turn in pace ), the oil level must be between the min and max marks on the
dipstick.
See “Checking the engine oil level and filling with engine oil” Start the engine and allow it to run
briefly.
Stop the engine, wait one minute and check the oil level. Top up if necessary. Note! see more in
engine manual.
Replacing the blade
For safety reasons you should only ever have your blade sharpened, balanced and mounted by an
authorised service workshop. For optimum results it is recommended that the blade should be
inspected once a year.
WARNING! Before you remove the grass collection bag, stop the engine and wait until the blade
stops completely.
WARNING! You will need garden gloves (not provided) and a spanner wrench(not provided) to
remove the blade.
NOTE! Don't invert the mower. Tip it slightly towards the oil filler pipe and reach under the deck.
WARNING! Always handle the blade with care, sharp edges could cause injury USE GLOVES. Renew
your metal blade after 50Hrs mowing or 2yrs whichever is sooner regardless of condition.
Fig 22
Fig 23
фиг
.20
2
1
0
Summary of Contents for DLM4600SPL
Page 19: ...www daewoopower bg 19 BG 1 20 2 21 3 22 4 22 5 22 6 23 7 25 8 27 9 28 10 30 11 33 12 34 13 41...
Page 40: ...www daewoopower bg 40 BG 10 6 M5x30 10 6 M5x30...
Page 43: ...www daewoopower bg 43 BG 24 6 6 12 6...
Page 44: ...www daewoopower bg 44 BG 1 1 2022 6 6...
Page 45: ...www daewoopower bg 45 BG...
Page 46: ...www daewoopower bg 1784 1 51 359 2 81 77 600 359 2 81 77 601...


