21
THE REPAIR
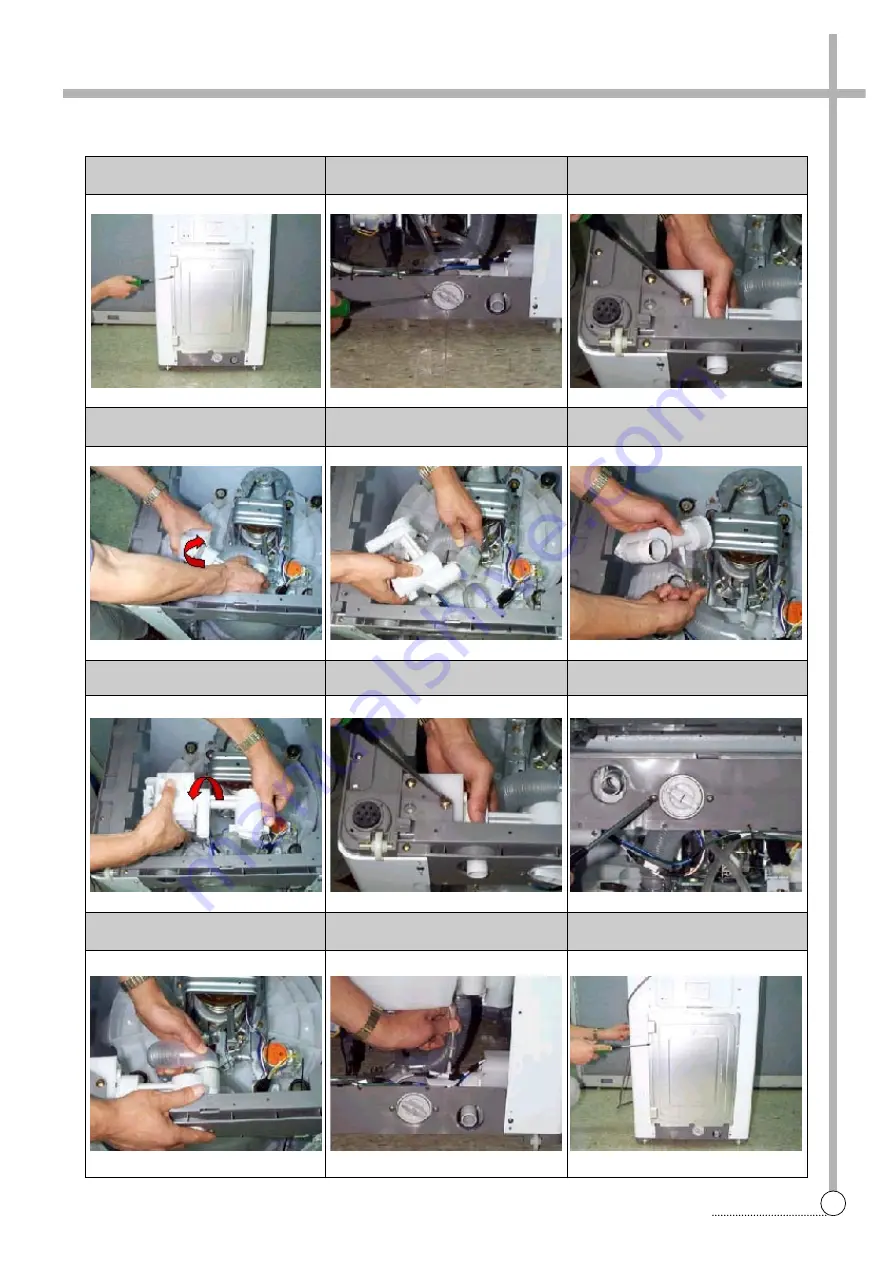
1
separate the back cover from
washing machine
4
turn the case filter ass’y and sepa-
rate it from the drain motor
7
assemble the case filter ass’y that
purchased
0
assemble the hose drain I to the
case filter with bond & clamp
2
remove two screws
5
separate the drain hose i from the
case filter ass’y
8
tie up three screws
q
assemble the cavitation hose to
the case filter with bond & clamp
3
remove three screws
6
separate the cavitation hose from
the case filter ass’y
9
tie up two screws
w
assemble the back cover to the
washing machine
REPLACE THE CASE FILTER ASS’Y
Summary of Contents for DWF-200M
Page 31: ...30 WIRING DIAGRAM APPENDIX Wiring Diagram non Pump Single Valve ...
Page 32: ...31 WIRING DIAGRAM Non Pump Multi Valve ...
Page 33: ...32 WIRING DIAGRAM Pump Single Valve ...
Page 34: ...33 WIRING DIAGRAM Multi Valve ...
Page 35: ...34 PARTS DIAGRAM Inverter Single Valve ...
Page 36: ...35 PARTS DIAGRAM Parts Diagram ...
Page 37: ...36 PARTS DIAGRAM ...
Page 38: ...37 PARTS DIAGRAM ...
Page 39: ...38 PARTS DIAGRAM ...
Page 44: ...43 CIRCUIT DIAGRAM Circuit Diagram 201M ...
Page 45: ...44 CIRCUIT DIAGRAM Circuit Diagram 200M 240M ...
Page 46: ...45 CIRCUIT DIAGRAM Circuit Diagram 200MV 240MV ...