7
6
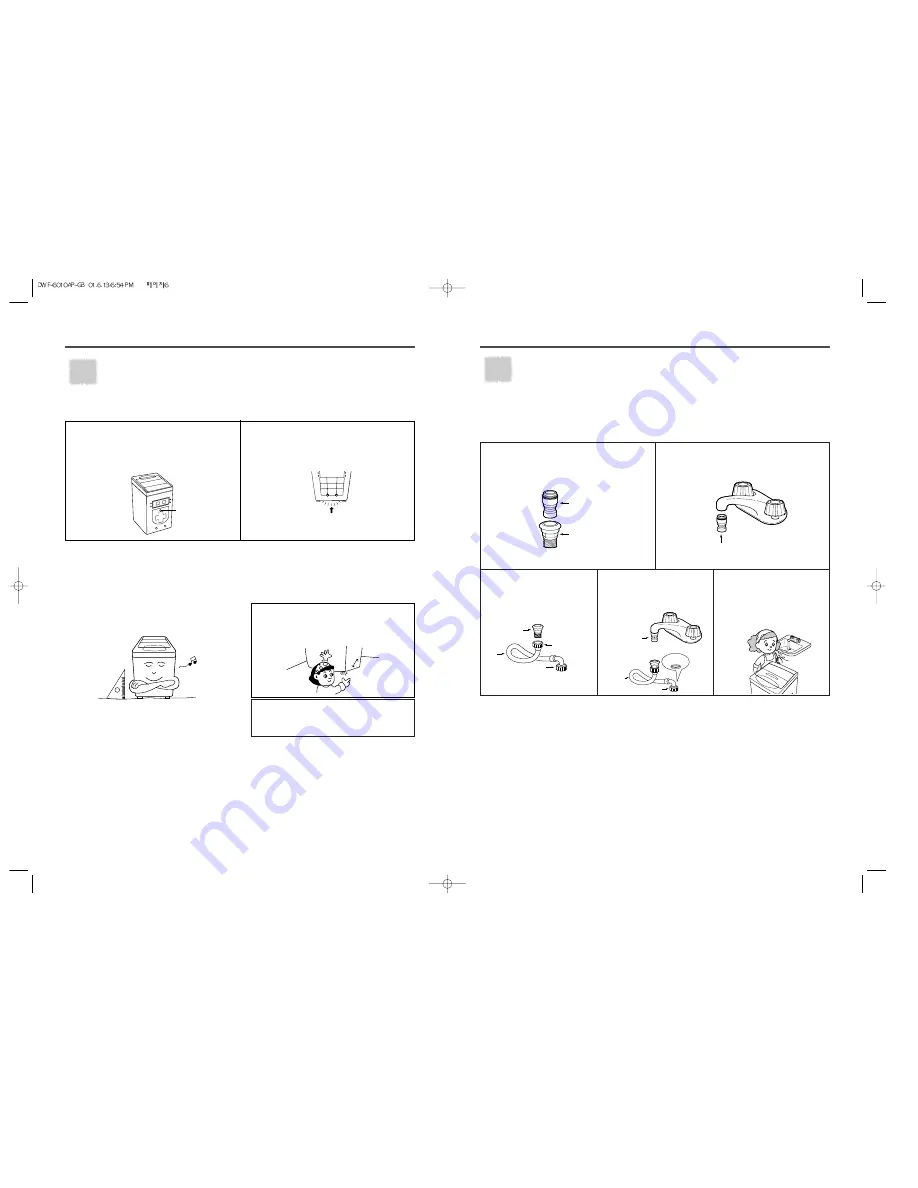
Before installing your washer, remove the
pad from the bottom of the cabinet.
Then, separate under base cover from
rear side of cabinet by removing the
screw.
Slide the under-base cover into the end,
this will decrease the noise made by this
washer.
Installation of the Under Base Cover
Location
Place your washer on a level and solid floor,
considering the length of inlet hose, drain
hose and power supply cord.
Do not place or store your washer below 0°C(32°F) to avoid
any damage from freezing.
Do not place your washer where it may be splashed during
bathing.
If washer is not level, it should be corrected
by the adjustable leg (provided optionally) in
the front-right side under the base and/or, a
thin block or brick.
DIRECTIONS FOR SAFE USE
,
,
,
HOW TO INSTALL
å
∫
SCREW
Before installing the washing machine,
assemble the under-base cover.
NOTES:
The opening must not be obstructed by carpeting when
the washing machine is installed on a carpeted floor.
Be careful not to confuse hot water inlet (pink color) and cold water inlet (blue color),
if your washer is provided with dual water inlets.
If you have only one water tap, connect the inlet hose with cold water inlet (blue color).
NOTES:
1. Be sure to connect the hot inlet hose to hot water tap and hot water valve. The hot inlet hose
has a marking “90°C max”.
2. For best operating conditions your hot water should be approximately 60°C(140°F). Your hot
water should not exceed 65°C(149°F), as water above this temperature will cause damage to
the machine.
For normal tap
!
The inlet adapter consist of two
connectors.
@
Screw the connector G to the screw tap
#
Screw the connector E,
into connector D
$
Hook the inlet hose to the
connector G (Direct
connection to Sink Faucet
in the restroom)
%
Connect the connector C of the
inlet hose to the water inlet of the
washer by turning it clockwise to be
fixed tightly.
• Please check the rubber packing
inside the connector C of the inlet
hose.
,
,
,
WATER CONNECTION
Turn on the water completely and check for any leakage. If any leakage, turn off the water, try
again as the above procedures.
For special taps, call a qualified plumber for the installation.
Leak Test
Connector G
Connector E
Connector G
Connector C
Connector D
Connector E
Hose
Rubber
Packing
Connector C
Connector G
Hose


