4
- Should the mains lead ever require a replacement, it is
essential that this operation be carried out by a qualified
electrician and should only be replaced with a flexible
cord obtained from the manufacturer.
- After replacement of a fuse in the plug, the fuse cover
must be refitted. If the fuse cover is lost a replacement
cover must be obtained. The colour of the correct
replacement fuse cover is that of the coloured insert in the
base of the plug or the colour that is embossed in words
in the base of the plug recess or elsewhere on the plug.
Always state this colour when ordering a replacement fuse
cover.
- Only 13 amp. replacement fuses which are ASTA
approved to BS 1362 should be fitted.
4. Check the rating plate (8) for voltage information.
5. The socket should be easily accessible and not directly
behind the appliance.
6. Electrical connections must be made in accordance with
local regulations. The appliance must be earthed as described
by law (connected through a properly earthed plug and
socket). The manufacturer rejects all liability for injury to
persons and animals or damage to property resulting from
failure to comply with this requirement.
7. A 10A fuse or one of a higher value must be used in the
socket circuit.
8. If the appliance plug and the wall socket are incompatible,
the socket must be replaced by a qualified electrician.
9. If the supply cord is damaged, it must be replaced by the
manufacturer or his service agent or a similarly qualified
person in order to avoid hazard.
10. Do not use extension leads or multiple adapters, etc.
11. In some countries a plug has to be fitted. Make sure that the
installation and electrical connections are performed by a
qualified technician in compliance with the manufacturer’s
instructions and current local safety regulations. The wires in
the mains lead are coloured in accordance with the following
code:
- green/yellow = earth
- blue = neutral
- brown = live.
DISCONNECTION
Note: does not apply in the UK.
Electrical disconnection: remove the plug from the mains, or (if
applicable) disconnect the two-pole circuit breaker upstream
from the socket.
PROTECTING THE ENVIRONMENT
- The packaging may be completely recycled, as confirmed by
the recycling symbol; follow local disposal regulations.
- The appliance is manufactured from reusable materials.
- When you decide to scrap this product, please check the
cable to be disconnected from the mains. Then cut off the
cable and dispose of the product according to local waste
disposal laws.
- This product is free of CFC’s (cooling circuit contains R134a
or R-600a). Check the compressor label on the rear of the
appliance or the rating label inside the fridge to see which
refrigerant is used for your re frigerator.
English
Check for damages and correct
closing of the doors.
Not in the vicinity of a heat source.
Keep room dry and well ventilated.
Do not obstruct the top of refrigerator
in order to keep enough ventilation.
Clean interior with a damp cloth.
Best room temperature range -
+16°C to +32°C.
IMPORTANT
1. Although this product was carefully checked before
packing, please check the product:
- for damage;
- for correct closing of the doors.
Complaints must be reported to your retailer within 24
hours of delivery.
2. Installation instructions (7 drawings below).
3. Keep potentially hazardous packing materials (plastic
bags, etc.) out of reach of children to prevent the risk
of trapping and suffocation.
Wait 2 hours before connecting to the
mains.
Summary of Contents for ERF-33.M
Page 2: ......
Page 10: ......
Page 12: ......
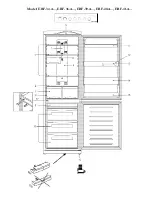
Page 16: ...ERF 33 M 17...
Page 17: ...17 17 16 ERF 34 M...
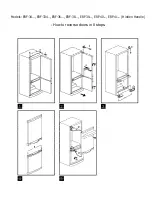
Page 18: ...Model ERF 34 A ERF 36 A ERF 39 A ERF 40 A ERF 41 A...
Page 19: ...17 Model ERF 38 A 17...
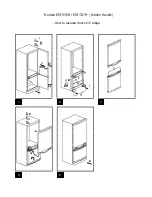
Page 20: ...Models ERF 336M ERF 337M Hidden Handle How to reverse doors in 5 steps 1 2 3 4 5...
Page 24: ...C d DMS3906900v 03...


